
3 Easy Solutions to Hard Reset Nokia G310 | Dr.fone
3 Solutions to Hard Reset Nokia G310 Phone Using PC
Find here 3 easy ways to hard reset Android using ADK or Android Device Manager from your PC. Also, do not forget to back up Android to PC before starting.
There are several cases when someone wants to know about how to hard reset an Android phone using PC. Such cases usually arise when your device is not accessible or stolen. It also involves situations when you forget the password or the unlock pattern of your device, or maybe your phone has frozen and is non-responsive. In such situations, it is very important to know how to reset Android phones to factory settings from the computer.
Factory reset will delete all your user data from internal storage. Thus it is also very important to back up all your internal data of the Nokia G310 device before you hard reset Android via PC. Moreover, a hard reset should be your last option at hand to revive your Android device. Hence, in this article for all the users out there, we have picked up the solution on how to factory reset Android Phone using PC.
You must ensure that all the steps are followed in sync so that the hard reset Android via PC is successful.
Part 1: Back up Android before hard reset
Since factory reset involves removing all data, adjusted settings and logged accounts from the Nokia G310 device; therefore, it is very important to back up all the data before moving on with the factory reset process. So, in this section, we will show you how to first back up your Android device using the Phone Backup . This is an easy-to-use and very convenient Android backup software that can be used to back up an Android device.

![]()
Wondershare Dr.Fone
Flexiblely Back up and Restore Android Data
- Back up Android data to the computer with one click.
- Preview and restore the backup to any Android device or iOS device.
- Supports 8000+ Android devices.
- There is no data lost during backup, export, or restoration.
3,981,454 people have downloaded it
Let’s have a look at the easy process to back up Android before the factory reset it.
Step 1: After installation completes, connect your Android device via data cable and go to “My Backup”. Then, this tool will automatically detect your device.
Step 2: You can now see the file types that will be backed up, such as Contacts, Messages, Calendars, Videos, etc.

Step 3: Click on “Backup pow” to proceed with the process. The backup process will start, keeping connected the Nokia G310 device during the phone backup process.

Step 4: Within a few minutes, your whole device will be backed up. You can click “View Backups” to view all data that is backed up.

Phone Backup is one of the handiest and easy-to-use features within Wondershare Dr.Fone. Users can select their opted files manually to restore. This tool supports 8000+ Android devices worldwide. Users will feel safe and secure using this revolutionary software.
 safe & secure
Dr.Fone - Screen Unlock (Android) is a user-friendly software tool that helps you unlock your Android device if you forget the passcode, pattern lock, PIN, or face/fingerprint lock. It supports various Android devices, allows you to bypass lock screens without data loss, and provides step-by-step instructions for easy unlocking. It also helps with FRP unlock and works on both Windows and Mac systems.
Step 1: Launch Dr.Fone - Screen Unlock on your computer and select “Screen Unlock” from the main interface. After that , you need to connect your Android phone to the computer using a USB cable.

Step 2: Choose “Android” > click “Unlock Android Screen” if you want to remove the lock screen. Choose your device brand. The hard reset methods vary for different device brands, so make sure that you choose the correct device brand.

Step 3: Put the Android phone into Specific mode with the help of Dr.Fone. And then, Dr.Fone will factory reset your Android phone within a few minutes. Now you can access your Android phone without a password!

safe & secure
In this process, we will learn how to hard reset Android phone to factory settings from a computer using SDK. This involves removing all data from the Nokia G310 device using a PC.
Follow the given steps to know how to hard reset an Android phone using PC.
Pre-Requirements
• PC that runs on Windows (Linux/Mac installer is also available)
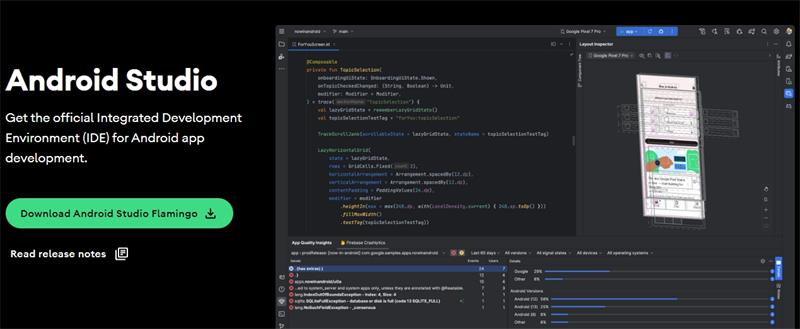
• You have to download Android ADB tools on your computer. Android ADB Download: https://developer.android.com/studio
• A USB Cable to connect your Nokia G310 with your computer.
Steps to hard reset Android using SDK
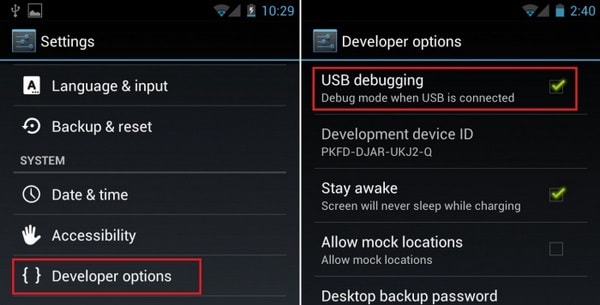
Step 1: Enable USB Debugging in the Android settings. Open Settings>Developer options>USB Debugging. If developer options can’t be found on the Nokia G310 device, then please go to Settings > General > About phone > Common > Software info (tap on it 5-8 times).
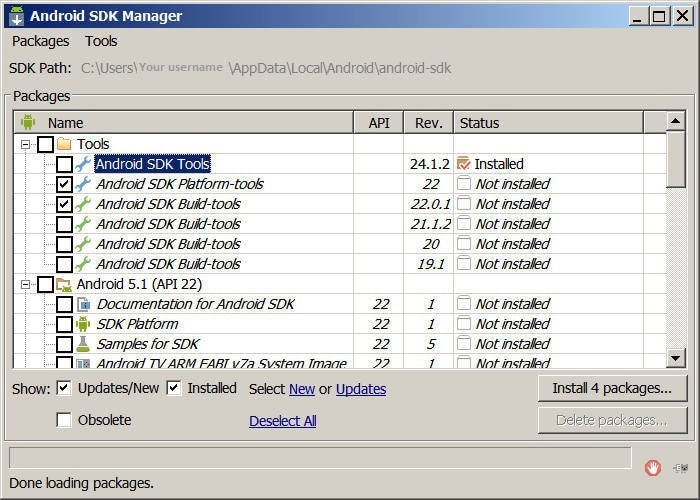
Step 2: Install Android SDK Tools. Ensure that Platform-tools and USB drivers are selected in the SDK manager window.
Step 3: Ensure that the drivers for your Android are installed on your PC or at least the Generic drivers are present
Step 4: Connect the Nokia G310 device to the PC using a USB cable. Ensure that the Nokia G310 device is recognized in the Windows Device Manager.
Step 5: Open the command prompt in Windows and go to C:\Users\Your username\AppData\Local\Android\android-sdk\platform-tools
Step 6: Type ADB reboot recovery and the Nokia G310 device will restart. The recovery menu must appear after this
Step 7: The device can be disconnected now. Now, you can remove the password or simply Factory Reset the Nokia G310 device.
Now, you have successfully reset your device using a PC.
Although the first process is the easiest, in certain cases, you might have to look for other options too. Kindly follow the steps thoroughly and format your device with ease.
Part 4: Hard reset Android using Android Device Manager (Find My Device)
When someone loses their phone, or it is stolen, the two questions that commonly arise are: how to locate the phone? And if it is not possible, how to remotely wipe the phone’s data? People can use the Android Device Manager (also referred to as “Find My Device”) and do the exact two things. The best thing about this is that it doesn’t need to be installed as it is inbuilt on all Android Devices.
Let us look at the following steps to know how to reset Android phones to factory settings from the computer.
Requirements for Android Device Manager to Work:
• It must be activated in the Nokia G310 device administrator settings. Go to settings > Security > Device administrators and check whether ADM is enabled as a device administrator or not.
• The location of the Nokia G310 device must be ON
• The device must be signed in to a Google account
• The device must have an active internet connection
• The device should not be switched off
• Even if the Nokia G310 device is without SIM, the Google account must be active
Steps to use ADM to wipe or locate any Android Device:
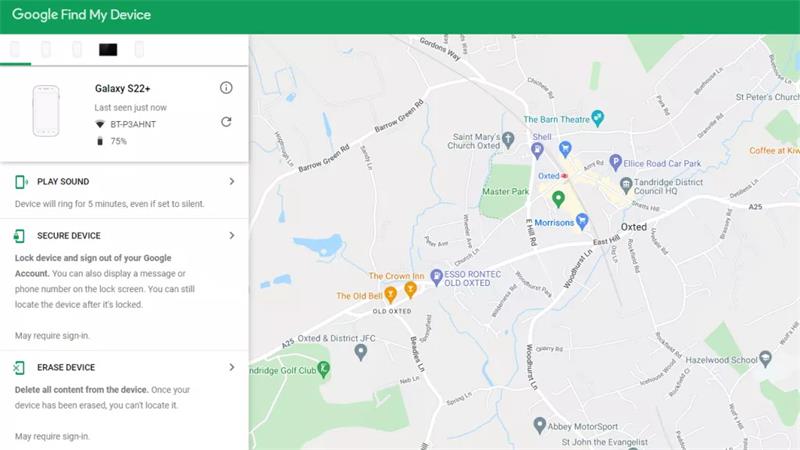
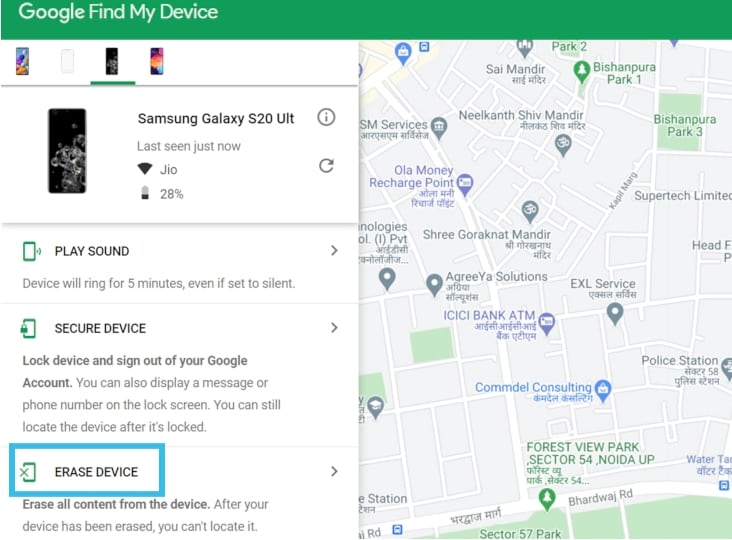
Step 1: Directly go to the Android Device Manager website , and log in to your account. You will get three options: “Play Sound”, “Secure Device” and “Erase Device”.
Step 2: Click on the “Play Sound” option will make it raise the alarm, notifying of the location, you can easily locate your Android phone if it is nearby.
Step 3: Click “Secure Device”, you can remotely lock your device with a new passcode, display a custom message on the lock screen, and even track the Nokia G310 device’s location in real-time. It also gives you the option to add a contact number, so anyone who finds your device can reach out to you.
Step 4: Select “Erase Device” to reset your device. Once you select this option, the interface will take over and complete the job. Congratulations! You have successfully used the Android Device Manager (ADM) to reset your Android smartphone.
The Bottom Line
So these were the third different methods through which you can hard reset your Android device. Resetting the Nokia G310 device involves removing every data from the Nokia G310 device. The phone gets back to the same state as it was out of the box. Hence, most importantly, do not forget to back up data using Phone Backup and restore beforehand so that you do not end up losing anything important.
All Things You Need to Know about Wipe Data/Factoy Reset For Nokia G310
Wiping data or carrying out a factory reset on an Android device is an effective solution for various issues on your Android phone. Even if you are contemplating selling your phone and you need all your device data to be wiped out, you carry out a factory reset. But, before you proceed, what’s important is to understand about wipe data/ factory reset, because, if you don’t, you might end up losing all your important data before it is backed up, serving no purpose. So, before you wipe data/ factory reset Android, here’s what you should know about it.
Part 1: What data will be wiped by Wipe Data/Factory Reset?
Doing a factory reset on the Android device will remove all the applications installed on the Nokia G310 device along with the data associated with them. This brings back all the default settings of the Nokia G310 device as it was when the phone was new, giving you a clean slate to start all over again.

Since Wipe data/factory reset deletes all applications, app data, and information (documents, videos, images, music, etc) stored in the internal space, it is required for you to perform a data backup operation before you reset the Android device to factory settings. However, wipe data/factory reset does not affect the SD card in any way. So, even if you have the SD card inserted with videos, images, documents, and any other personal information in the Android device while carrying out a factory reset, everything will remain safe and intact.
Part 2: How to perform Wipe Data/ Factory Reset?
Performing wipe data/factory reset on your Android device e is very simple. It is a matter of time before you wipe out everything lying on the internal storage of your Android device. Here’s how you can perform Wipe data/ Factory Rest on your device:
Step 1: First of all, turn off the Nokia G310 device. Then, use the volume up button, volume down button, and Power button on your Android device simultaneously and hold on to the buttons until the phone turns on.
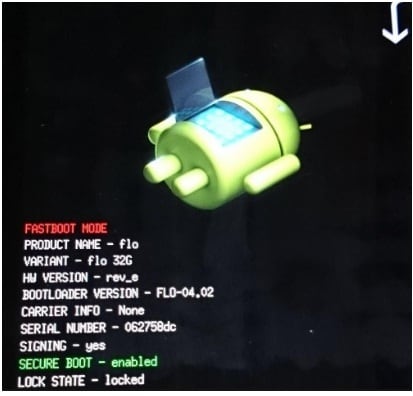
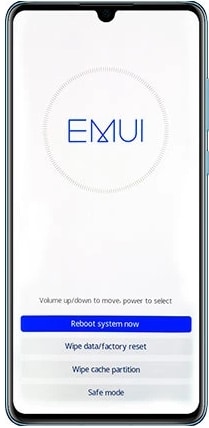
Step 2: Release the buttons when the Nokia G310 device is powered on. Now, use the volume up and down button to sift through the options given on the screen. Use the power button to select “Recovery Mode” on the screen. Your phone will restart into “Recovery Mode’ and you will find the below screen:
Step 3: Holding the power button down, use the volume up button, and the Android system recovery menu will pop up.
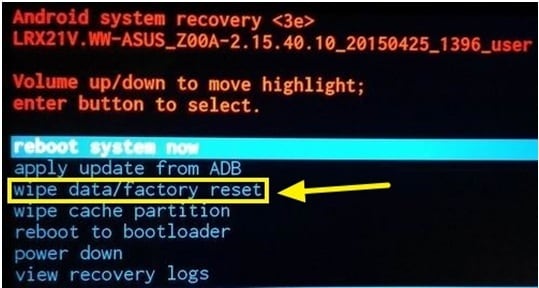Now, scroll down to “wipe data/factory reset” option from the list of commands and use the Power button to select it.
Now, scroll down to “Yes – delete all user data” using the volume button and then push the power button to select.
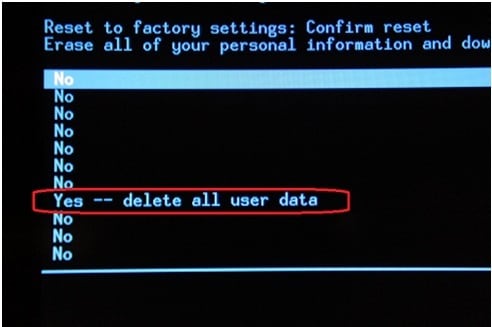
In some time your device will be reset into factory settings with all your data erased. The entire process will take a few minutes. Ensure that you have the phone at least 70% charged so that it does not run out of charge midway.
Part 3: Does Wipe Data/ Factory Reset wipe all your data?
There are various instances where you would require performing a wipe/factory reset on your device. It might be because of some glitch that you would like to troubleshoot on your Android device. Wiping data from the phone is a universal solution in such cases. Even in cases where you want to sell your device, performing a factory reset seems the best option. What’s important is to make sure you don’t leave a trace of your personal information on the Nokia G310 device. Therefore, wipe data/factory reset is never the ultimate solution to rely on. It is neither the best option anyway.
Contrary to conventional thought of relying on wipe data/factory reset Android believing it to be the best solution for wiping out complete data from the phone, all research outcomes have proved something different. It is easier to recover account tokens used to authenticate you when you enter a password for the first time, from service providers like Facebook, WhatsApp, and Google. Hence it is easier to restore the user’s credentials as well.
So, to protect your privacy and completely wipe data off the Nokia G310 device, you can use Dr.Fone - Data Eraser. This is an amazing tool that erases everything on the Nokia G310 device without leaving an ounce of data in it. Here’s how you can use Dr.Fone - Data Eraser to completely wipe the data and protect privacy:
![]()
Dr.Fone - Data Eraser
Fully Erase Everything on Android and Protect Your Privacy
- Simple, click-through process.
- Wipe your Android completely and permanently.
- Erase photos, contacts, messages, call logs, and all private data.
- Supports all Android devices available in the market.
4,683,556 people have downloaded it
Step 1: Install and launch Dr.Fone - Data Eraser
First of all, install Dr.Fone on your computer and launch it by double-clicking on the icon. You will find the below window. You will find various toolkits on the interface. Select Erase from various toolkits.
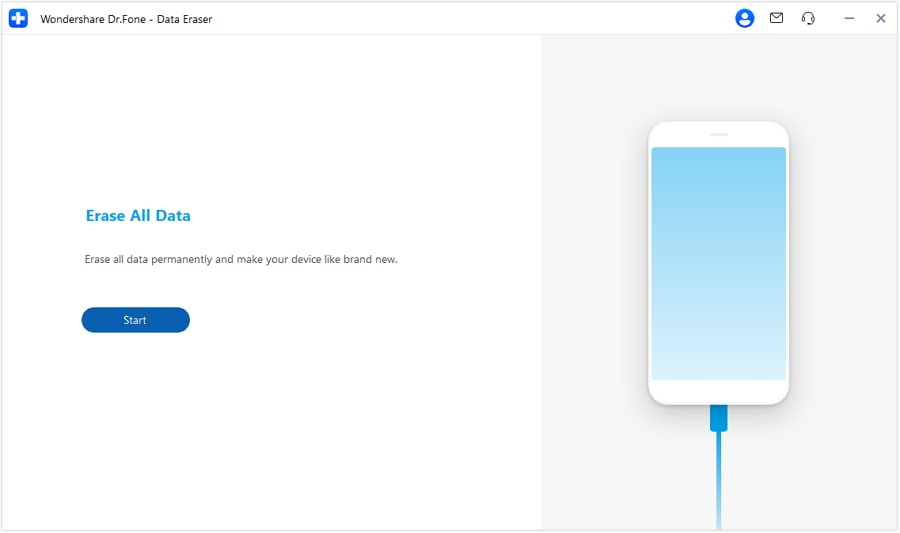
Step 2: Initiate the Process
When the tool’s window opens, click Start to trigger the operation.
Step 3: Confirm and Execute Data Eraser
To remove all data, confirm with the given code. After inputting the code, select Erase Now. A message will appear upon erasure completion. Click Erasure Report to review the types of data erased.
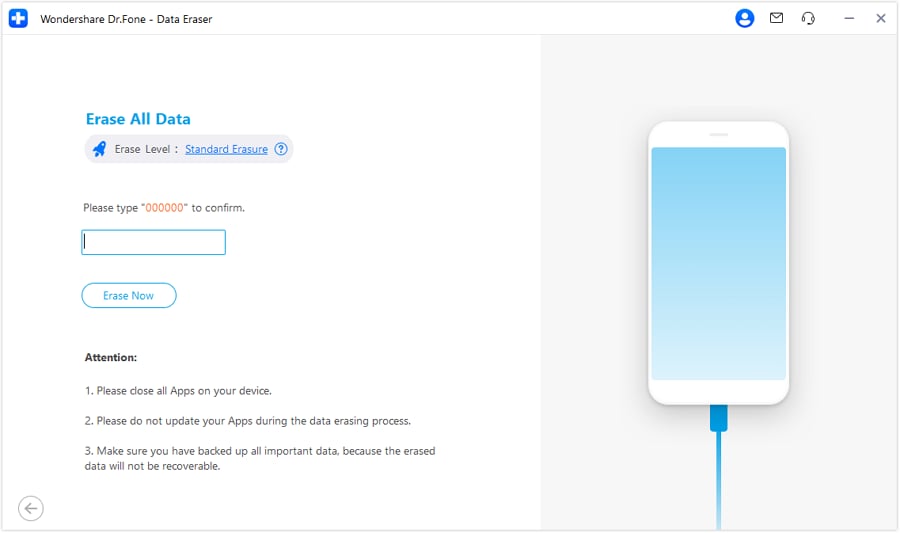
This will protect your privacy as your Android device will reboot into default settings with all the data erased.
Since the erased data cannot be recovered, it is highly recommended to have all the personal data backed up before operating here using Dr.Fone.
And you could watch this YouTube video for an in-depth tutorial.

safe & secure
Conclusion
Hence, today we learned about wiping data and also factory reset. Well as per us, using Dr.Fone - Data Eraser is the best option as it is a simple and click-through process and helps you completely erase data from your Android. This toolkit also is the best as it supports all Android devices available in the market today.
safe & secure
How to Reset a Nokia G310 Phone That Is Locked
“Looking for the best solutions on how to factory reset Nokia G310 phone when locked?”
The need to reset a Nokia G310 phone arises in several situations like forgetting the password, PIN, or pattern, purchasing a second-hand device that is locked, accidentally changing the password or setting a wrong one, and others. In all these and other similar situations, you would need to reset your Nokia G310 phone and this can be done using different methods and tools.
In this article, we will discuss all these methods that can help you reset your device so that it can be accessed without any hassles.
Part 1: Things You Should Be Aware of Before Resetting Nokia G310 Phones
Before you start resetting your Nokia G310 device through any of the methods, there are certain important things that should be considered and taken care of. Check them out as below.
- First of all, ensure that your Nokia G310 phone is charged so that the battery does not go off in between and stop the ongoing process.
- Ensure to clear the cache on your Nokia G310 phone.
- If your Nokia G310 phone is not locked, make sure to take the backup of the Nokia G310 device to prevent accidental loss of data. If the Nokia G310 device is locked, ensure that from next time you keep taking the backup on regular basis.
Part 2: How to Reset Nokia G310 Phone When Locked?
Once you have fulfilled the above mention pre-requisites, next comes the process of device resetting. If your Nokia G310 phone is locked, there are different methods that can help you reset your device and the popular ones can be checked as below.
Method 1: Reset Nokia G310 using Google’s Android Device Manager
The Android Device Manager which is also known as Find My Phone is an excellent feature that is majorly used for locating the lost or the stolen phone. This feature also allows the users to unlock and reset their devices. The Android Device Manager can only function if you know the Google ID and password that was used for device initialization. The feature can be used to erase the Nokia G310 device data and reset it.
Steps to reset Nokia G310 phone using Google Android Device Manager
- Step 1. On your PC browser, using your Google account, sign in to the Google Find My Device.
- Step 2. The list of devices will appear on the screen, from which you need to choose the Nokia G310 phone that you want to unlock and reset.
- Step 3. Now, from the available options, click on ERASE DEVICE.
- Step 4. Again, tap on ERASE DEVICE, and to continue you need to log in to your Google account.
With the completion of the above steps, your Nokia G310 phone will reset.
Method 2: Perform a Hard Reset on Nokia G310 with Hardware Keys
Hard reset which is also termed factory reset is a feature that will reset all the Nokia G310 device settings and bring them to the factory setting status. While you perform the hard reset, all the data of your phone as well as the installed apps will also be deleted.
Steps to hard reset Nokia G310 Phone
- Step 1. Using the Power button, turn off your Nokia G310 phone.
- Step 2. Press and hold the Volume Up and Power button together for a few seconds.
- Step 3. In some time, the Recovery mode will load on the screen. From the menu, choose to Wipe data/factory reset using the Volume Up/Down buttons and the selected option can be confirmed using the Power button.
- Step 4. At the space provided, enter the word Yes and then click on the Wipe data/factory reset button.
- Step 5. Again, to confirm the hard reset, click on the Wipe data/factory reset button.
- Step 6. The process of hard resetting will start and when completed, click on Reboot system now for restarting the unlocked phone.
Note: After the hard reset, Google Account Verification, FRP screen will appear where you need to enter the correct Google account or PIN that was previously synced with the Nokia G310 device. If you know the Google credentials, it’s great, but in case you have forgotten then no need to worry as there are Nokia G310 FRP bypass tools available as well as Nokia G310 codes that can be used to bypass the FRP lock.
Method 3: An Efficient Alternative to Reset Locked Nokia G310 Phone
If the above-listed methods do not work for any reason, we recommend using Dr.Fone-Screen Unlock (Android) as the best alternative. This is a Windows and Mac-based tool that can help bypass and remove all types of screen locks including PIN, passcode, pattern, Face ID as well as a fingerprint. The software not only works with Nokia G310 but all other popular Android devices including Nokia G310, LG, Oppo, and more.
 safe & secure
The screen locks can be removed without rooting, and the software is completely safe to use.
![]()
Dr.Fone - Screen Unlock (Android)
The Best Tool for factory reset Nokia G310 Phone When Locked
- Work perfectly to reset your Nokia G310 without a password.
- It’s the only solution available that works with both Windows and Mac to help you regain access to your device easily.
- Everybody can handle it without any technical background.
- Except for resetting, it also unlocks the locked Nokia G310 if you are using a PIN, fingerprint, or other screen locks.
4,464,992 people have downloaded it
Steps on how to factory reset Nokia G310 phone without password using Dr. Fone - Screen Unlock
- Step 1. Download, install and launch the Dr.Fone software on your PC and from the main menu choose the Screen Unlock feature.
- Step 2. Next, your Nokia G310 phone needs to be connected to the system using a USB cable, and then from the interface select Unlock Android Screen option.

- Step 3. In the next step, select your Nokia G310 phone’s brand from the supported list in Dr.Fone to ensure it enters the correct specific mode.
- Step 4. Dr.Fone will begin unlocking the Android screen once it enters the specific mode. Please wait for the unlock process to finish.
Part 3. How to Reset Nokia G310 Phone at Normal Cases?
In normal situations, the Nokia G310 phones can be reset using the settings menu or the Android Factory Reset code. Both these methods and their guide to getting the process done are listed below.
Method 1: Reset Nokia G310 phones through the Phone Settings menu
To unlock the screen and reset your Nokia G310 phone, the settings menu of the Nokia G310 device can be used. For this method, you do not need to make your device enter the recovery mode. The steps for the process are as follows.
- Step 1. On your Nokia G310 phone, open the Settings app and look for the Backup and Reset option from the Personalization section.
- Step 2. Next, select Factory Data Reset Option.
- Step 3. Go through the on-screen details and then click on the Reset device button.
The steps above will reset your phone to the default factory settings.
Method 2: Reset Nokia G310 phones with factory reset code
There are Android Reset Codes for different brands of phones that can be used for resetting the Nokia G310 device. These secret codes can be different phones as well as OS versions. In general, the code used for resetting Nokia G310 phones is *#*#2846579#*#*.
Steps to reset Nokia G310 phone using secret reset code
- Step 1. On your Nokia G310 phone, go to the dialer and type the code- *#*#2846579#*#*.
- Step 2. From the menu, click on the Restore Factory option.
- Step 3. Finally, to confirm the resetting of the Nokia G310 device, click on the OK button.
The above methods can also be tried if you get stuck in a situation on how to factory reset Nokia G310 tablets without password. Also, we recently covered a method of how to bypass the Google account on Nokia G310 after a factory reset, we have now had the opportunity to test this with many people with different models of Android and have found mixed results.
Conclusion
The above given are multiple options that can be used for resetting your Nokia G310 phone when you forget your device unlock password. Some of these solutions can be used for free and if they work, nothing like that. Dr.Fone – Screen Unlock (Android) is one of the best methods to reset your Nokia G310 device as it supports removing all types of screen locks in a hassle-free manner.
safe & secure
- Title: 3 Easy Solutions to Hard Reset Nokia G310 | Dr.fone
- Author: Nova
- Created at : 2024-07-17 15:14:11
- Updated at : 2024-07-18 15:14:11
- Link: https://phone-solutions.techidaily.com/3-easy-solutions-to-hard-reset-nokia-g310-drfone-by-drfone-reset-android-reset-android/
- License: This work is licensed under CC BY-NC-SA 4.0.