
Excel File Recovery – Recover Corrupt Excel 2007 Files Easily | Stellar
How Can I Recover Corrupted Excel File 2016?

Error Messages Indicating Corruption in Excel File
- When an Excel 2016 file turns corrupt, you’ll receive an error message that reads: “The file is corrupt and cannot be opened .”

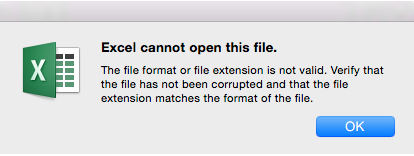
- But sometimes, you encounter the “Excel cannot open this file” error message due to corruption in the file.
Why does Excel File turn Corrupt?
Following are some common reasons that can turn an Excel file corrupt:
- Large size of the Excel file
- The file is virus infected
- Hard drive on which Excel file is stored has developed bad sectors
- Abrupt system shutdown while working on a worksheet
Workarounds to Recover Data from Corrupt Excel
The workarounds to recover corrupted Excel file 2016 data will vary depending on whether you can open the file or not.
How to Recover Corrupted Excel File 2016 Data When You Can Open the File?
If the corrupt Excel file is open, try any of the following workarounds to retrieve the data:
Workaround 1 – Use the Recover Unsaved Workbooks Option
If your Excel file gets corrupt while you are working on it and you haven’t saved the changes, you can try retrieving the file’s data by following these steps:
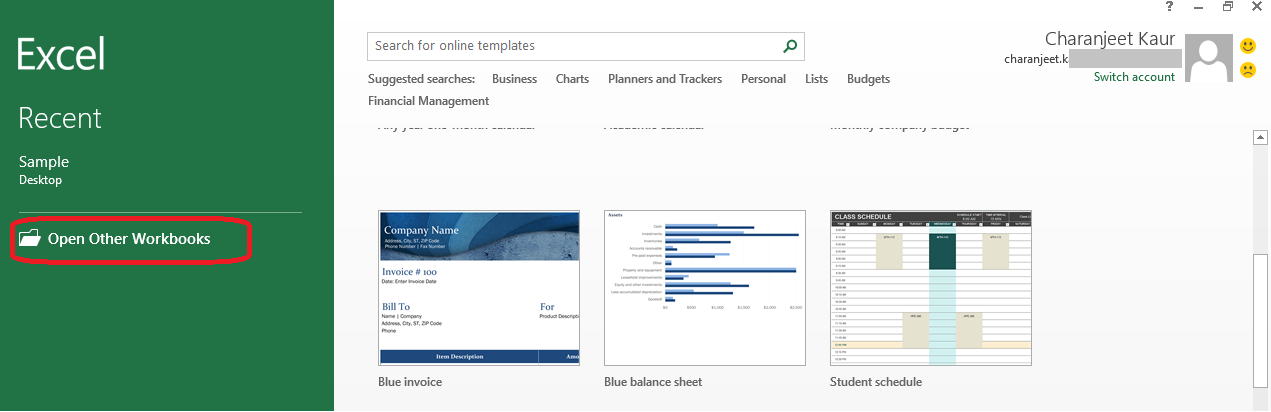
- Open your Excel 2016 application and click on the Open Other Workbooks option.
- Click the Recover Unsaved Workbooks button at the bottom of the ‘Recent Workbooks’ section.
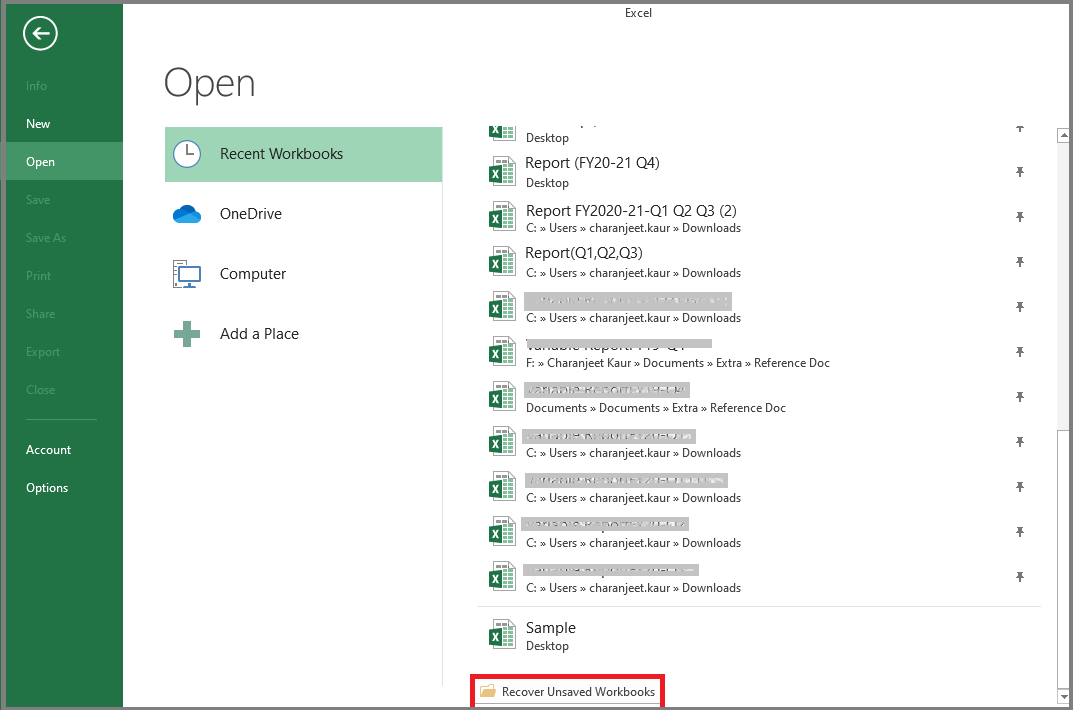
- A window with list of unsaved Excel files will open. Click the corrupt file you want to open.
This will reopen your last saved version of the Excel workbook. If this method doesn’t work, proceed with the next workaround.
Workaround 2 – Revert to Last Saved Version of your Excel File
If your Excel file gets corrupt in the middle of making any changes, you can recover the file’s data if the changes haven’t been saved. For this, you need to revert to the last saved version of your Excel file. Doing so will discard any changes that may have caused the file to turn corrupt. Here’s how to do it:
- In your Excel 2016 file, click File from the main menu.
- Click Open. From the list of workbooks under Recent workbooks, double-click the corrupt workbook that is already open in Excel.
- Click Yes when prompted to reopen the workbook.
Excel will revert the corrupt file to its last saved version. If it fails, skip to the next workaround.
Workaround 3 – Save the Corrupted Excel File in Symbolic Link (SYLK) Format
Saving an Excel file in SYLK format might help you filter out corrupted elements from the file. Here are the steps to do so:
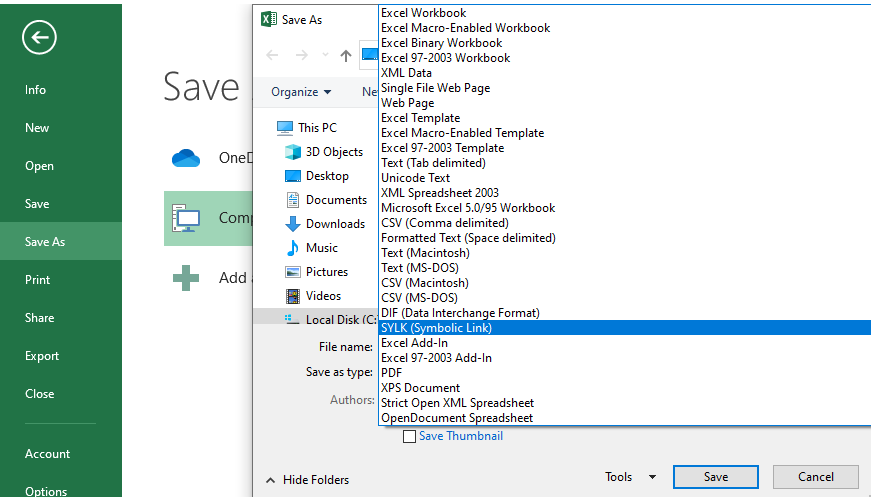
- From your Excel File menu, choose Save As.
- In ‘Save As’ window that pops-up, from the Save as type dropdown list, choose the SYLK (Symbolic Link) option, and then click Save.
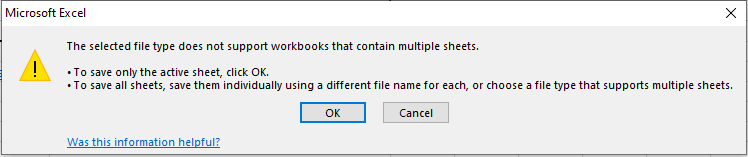
Note: Only the active sheet will be saved in workbook on choosing the SYLK format.
- Click OK when prompted that “The selected file type does not support workbooks that contain multiple sheets”. This will only save the active sheet.

- Click Yes when the warning message appears - “Some features in your workbook might be lost if you save it as SYLK (Symbolic Link)”.

- Click File > Open.
- Browse the corrupt workbook saved with SYLK format (.slk) and open it.
- After opening the file, select File > Save As.
- In ‘Save as type’ dialog box, select Excel workbook.
- Rename the workbook and hit the Save button.
After performing these steps, a copy of your original workbook will be saved at the specified location.
How to Recover Corrupted Excel File 2016 Data When You Cannot Open the File?
If you can’t access the Excel file, apply one of these workarounds to salvage the file’s data.
Workaround 1 – Open and Repair the Excel File
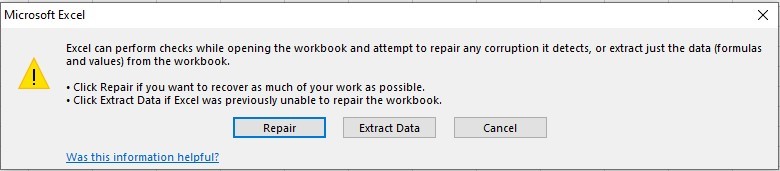
Excel automatically initiates ‘File Recovery’ mode on opening a corrupt file. After starting the auto-recovery mode, it attempts to reopen and repair the corrupt Excel file at the same time. If the auto-recovery mode does not start automatically, you can try to fix corrupted Excel file 2016 manually by using ‘Open and Repair’. Follow these steps:
- Open a blank file, click the File tab and select Open.
- Browse the location where the corrupt 2016 Excel file is stored.
- When an ‘Open’ dialog box appears, select the file you want to repair.
- Once the file is selected, click the arrow next to the Open button, and then click the Open and Repair button.
- Do any of these actions:
- Click Repair to fix corrupted file and recover data from it.
- Click Extract Data if you cannot repair the file or only need to extract values and formulas.
If performing these actions doesn’t help you retrieve the data, proceed with the next workaround.

Workaround 2 – Disable the Protected View Settings
Follow these steps to disable the protected view settings in an Excel file:
- Open a blank 2016 workbook.


- Click the File tab and then select Options.

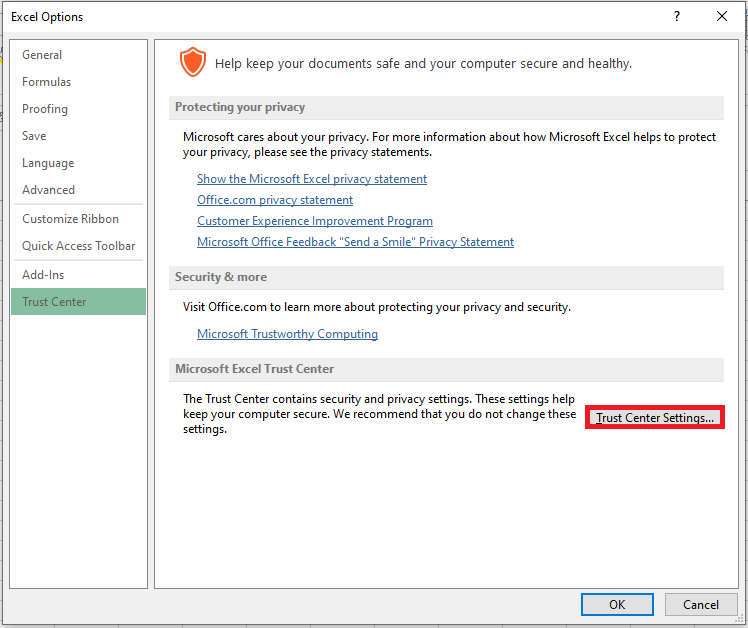
- When an Excel Options window opens, click Trust Center > Trust Center Settings.
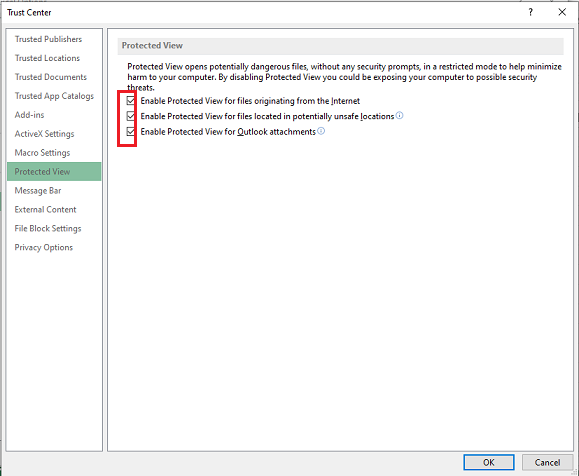
- In the window that pops-up, choose Protected View from the left side navigation. Under ‘Protected View’, uncheck all the checkboxes, and then hit OK.
Now, try opening your corrupt Excel 2016 file. If it won’t open, try the next workaround.
Workaround 3 – Link to the Corrupt Excel File using External References
If you only need to extract Excel file data without formulas or calculated values, use external references to link to your corrupt Excel 2016 file. Here’s how you can do it:
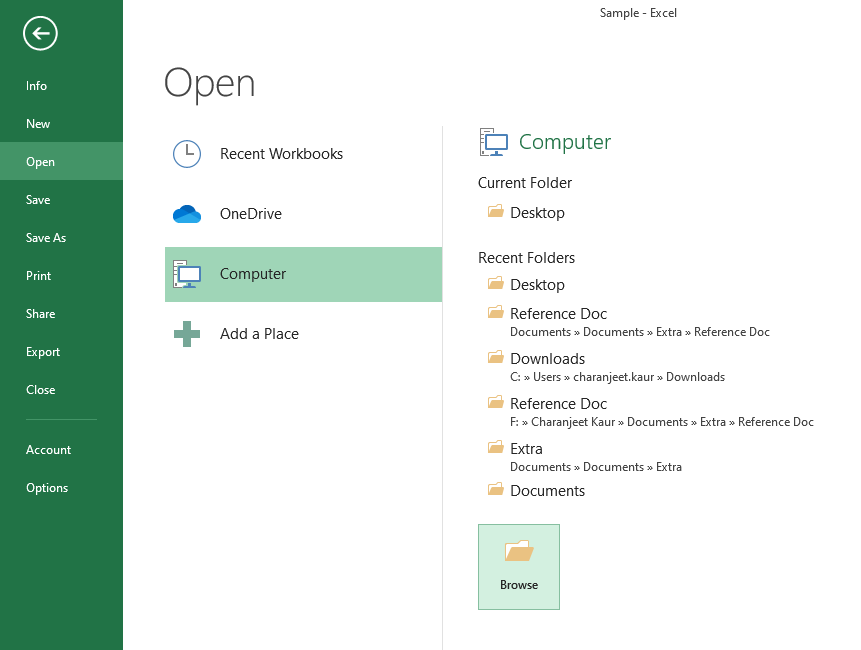
- From your Excel file, click File > Open.
- From the window that opens, click Computer and then click Browse and copy the name of your corrupt Excel 2016 file. Click the Cancel button.
- Go back to your Excel file, click File > New > Blank workbook.

- In the new Excel workbook, type “=CorruptExcelFile Name!A1” in cell A1 to reference cell A1 of the corrupted file. Replace the ‘CorruptExcelFile Name’ with the name of the corrupt file that you have copied above. Hit ENTER.
- If ‘Update Values’ dialog box appears, select the corrupt 2016 Excel file, and then click OK.
- If ‘Select Sheet’ dialog box pops-up, select a corrupt sheet, and press the OK button.
- Select and drag cell A1 till the columns required to store the data of your corrupted Excel file.
- Next, copy row A and drag it down to the rows needed to save the file’s data.
- Select and copy the file’s data.
- From the Edit menu, choose the Paste Special option and then select Values. Click OK to paste values and remove the reference links to the corrupt file.
Check the new Excel file for recoverable data. If this didn’t work, consider using an Excel file repair tool to retrieve data.
Alternative Solution to Recover Excel File Data
Applying the above workarounds may take considerable time to recover corrupted Excel file 2016. Also, they may fail to extract data from a severely corrupted file. Using Stellar Repair for Excel software can help you overcome these limitations. The software helps repair severely corrupted XLS/XLSX file and retrieve all the file data in a few simple steps.

Key benefits of using Stellar Repair for Excel are as follows:
- Recovers tables, pivot tables, images, charts, chartsheets, hidden sheets, etc.
- Maintains original spreadsheet properties and cell formatting
- Batch repair multiple Excel XLS/XLSX files in a single go
- Supports MS Excel 2019, 2016, 2013, and previous versions
Check out this video to know how the Excel file repair tool from Stellar® works:
Conclusion
Errors such as ‘the file is corrupt and cannot be opened’, ‘Excel cannot open this file’, etc. indicate corruption in an Excel file. Large-sized workbook, virus infection, bad sectors on hard disk drive, etc. are some reasons that may result in Excel file corruption. The workarounds discussed in this article can help you recover corrupted Excel file 2016 data. However, manual methods can be time-consuming and might fail to extract data from severely corrupted workbook. A better alternative is to use Stellar Repair for Excel software that is purpose-built to repair and recover data from damaged or corrupted Excel file.
Easy Steps to Make Excel Hyperlinks Working
Summary: This blog discusses why hyperlinks won’t work in Excel and solutions to fix it. If nothing works, try using Stellar Repair for Excel software to recover your workbook with hyperlinks and all the data intact.

Hyperlinks in your Excel file could be references to a file’s location on the computer or a location within the same worksheet. Or, hyperlinks might be pointing to a URL. Sometimes, the hyperlinks won’t work and any of the following errors may pop up on your screen on clicking a hyperlink:
‘Cannot open the specified file.’

‘This operation has been canceled due to restrictions in effect on this computer. Please contact your system administrator.’
Parental Control Software

Causes of ‘hyperlinks not working in Excel’ problem, and solutions thereof
Here are some of the possible causes behind the ‘hyperlinks not working’ issue and solutions to fix it:
Cause 1 – Change in the name of the hyperlinked file
If the file name that appears in the hyperlink text is different than the actual file name, it will prevent the hyperlink from working.
Solution – Link to the renamed file
Ensure that the links in the Excel file are updated and points to the renamed file. For this, right-click the hyperlink and select ‘Edit the hyperlink’. Next, in the hyperlink address, replace the current filename with the renamed one in the hyperlink address.
Cause 2 – File name has a pound (#) sign
When you create a hyperlink for a file in Excel, you cannot use a pound character (#) in the file name that appears in the hyperlink. That is because the pound sign is not accepted in hyperlinks and may lead to the ‘Cannot open the specified file’ error.
Note: While you can use a pound character in a file name, it cannot be used in hyperlinks in an MS Office document.
Solution – Rename the file name and remove the pound sign
Open the file that contains the ‘#’ sign and rename it by following these steps.
- Right-click the cell containing the hyperlink that is not working, and click Edit Hyperlink.
- From the Address box, copy the address of the file you are linking to.
- Go to the location where the file is stored, right-click on the file, and click Rename.
- Remove the ‘#’ character from the name of the file.
- Go back to the Excel file, right-click on the problematic hyperlink, and choose Edit Hyperlink. Next, browse and select the renamed file.
- The renamed file without the pound sign will be added in the Address box.
- Click OK.
Now try opening the hyperlink.
Cause 3 – Sudden system shutdown causes abrupt closing of Excel
There may be a discrepancy in the data in hyperlinks when a system shut down suddenly, without properly closing the Excel file. And so, when trying to open a link, it won’t open.
Solution – Enable the option to save hyperlinks
There is an inbuilt option in Excel to update hyperlinks every time the workbook is saved. Follow these steps to enable that option:
Note: The steps may vary based on the Excel version you are using.
For Excel 2013, 2016, or 2019:
- Open Excel Workbook -> Go to File->Options->Advanced
- Scroll down to find the General tab and click on Web Options
- Web Options Window pops-up
- In the Web Options Window, go to Files Tab and select the ‘Update Links on save‘ checkbox
- Click on OK button and your option is saved
The steps are also explained in the image below:

For Excel 2007:
- Click the Office button
- Select Excel Options, then follow Step 1) to Step 5), as mentioned above and get the Excel Hyperlinks to work again.
Still unable to open hyperlinks in Excel?
If you fail to make Excel hyperlinks work using the above-discussed solutions, use an Excel repair tool to fix the hyperlinks issue. Download the Stellar Repair for Excel to repair an XLS/XLSX file and restore the hyperlinks.

See the working of the tool here:
The tool recovers all components of the Excel file including tables, charts, chart sheets, cell comments, images, formulas, and more. You can repair multiple worksheets and fix all dysfunctional Excel hyperlinks across multiple worksheets in a single workbook. Click on the workbook, select all worksheets and start repairing
Conclusion
Carefully read the possible causes behind the ‘Excel Hyperlinks not working’ issue to understand what resulted in the issue in the first place. If nothing helps, use Stellar Repair for Excel to restore the hyperlinks and save the result in a new Excel file, without interfering with worksheet properties and cell formatting.
Excel File Corruption Warnings and Solutions
Summary: Many users reported error messages they receive when they try to save or open an Excel file. In this blog, you will learn about the warning messages that indicate your Excel file is corrupt and possible solutions to repair it. It also outlines the Stellar Repair for Excel to repair corrupt Excel files.
Excel users often report about receiving warning messages suggesting corruption in the workbook. This usually happens while opening an Excel file, ‘.xls’ or ‘.xlsx’ file created by earlier versions, or attempting to create a copy of the workbook.
Excel file corruption may occur due to several reasons including (but not limited to) virus infection, sudden system shutdown during write operation, and leaving excel file open on the shared network.
Occurrences of Excel File Corruption Warnings
Occurrence 1 – “Excel found unreadable content in

On clicking ‘Yes’, you will receive the following error:
“The file is corrupt and cannot be opened”.

Occurrence 2 – “Excel cannot open the file

Besides the warning messages outlined above, there are a few other tell-tale signs of Excel file corruption such as:
- Excel crashes or freezes, preventing you from accessing the workbook and information stored in it.
- Unexpected errors occur during the save operation listed as below:
- “An unexpected error has occurred. AutoRecover has been disabled for this session of Excel”.
- “Errors were detected while saving
”.
Solutions to Fix Excel File Corruption Issue
Follow the below-listed solutions to deal with corruption issues in Excel:
NOTE: If you encountered problem opening Excel files after upgrading to latest Windows Operating System (OS) and Office program, try updating your Office as well as Windows OS to latest patches provided on the Microsoft site. Microsoft frequently releases Office and Windows OS patches to help users’ correct known errors. Check if you can open the corrupt workbook after installing the update.
Solution 1 – Use Open and Repair Utility
Excel comes with a built-in recovery mechanism. It automatically starts ‘File Recovery Mode’ when a user opens a corrupt workbook, and attempts to open and repair the workbook. Sometimes, the recovery mode might not start automatically. In that case, you will need to repair the Excel file manually by using ‘Open and Repair ’ utility.
Steps to use Microsoft’s built-in repair utility are as follows:
Step 1: Select File > Open.
Step 2: Click the folder containing the corrupt workbook, and then click Browse.
Step 3: In the Open window, select the corrupt workbook.
Step 4: Next, click the arrow in the Open button, and then click Open and Repair.

Step 5: In the window that appears, click Repair.

If ‘Open and Repair’ doesn’t work in excel , select Extract Data to extract formulas and values from the corrupt workbook.
NOTE: If you need a quick solution to salvage your data, use an Excel file repair tool.
Or else, attempt the following solutions to deal with corruption in Excel file .
Solution 2 – Uninstall and Re-install Office Installation
NOTE: Make sure to create a backup of your Excel file before uninstalling and re-installing your Office application.
Download the Office uninstall support tool to remove the application.
You can read: Simple Ways to Open Corrupt Excel file Without any Backup
To reinstall Microsoft Office, follow these steps:
NOTE: Before proceeding with Office re-installation process, make sure that you have license keys ready.
Step 1: Open the Microsoft Office site.
Step 2: Select Sign in.
NOTE: You may skip this step if you’re already signed in.
Step 3: After signing in, from the Office sign-in page, click Install/Install Office
Your Office application will get re-installed. Now open the backed-up Excel file and see if the problem is fixed.
Solution 3 – Move Excel File to a Different Location
Often moving a corrupt Excel file to a different location can help solve the corruption problem. Here’s how:
Step 1: Open the corrupt Excel file by navigating to the following path:
C:\Users\User_Name\AppData\Roaming\Microsoft\Excel
NOTE: Make sure to replace User_Name with your user name. If you are unable to find the Excel file, you will have to search for the file manually in Program Files (x86).

Step 2: Open the Excel folder, and move the corrupt file to some other location.
Step 3: Delete the files from the Excel folder.
Now try opening the Excel file you have moved and see if the issue is resolved.
Solution 4 – Use Excel File Repair Software
If none of the above solutions works for you, use Stellar Repair for Excel. It is a specialized Excel file repair software that helps repair corrupt Excel file and recover workbook data in its original state.
Essentially, the software helps rebuild the corrupt file to restore every single object in the file. It can recover objects including user-defined charts, conditional formatting rules, formatting of the charts, properties of worksheet, engineering formulas, etc.

Steps to use Stellar Repair for Excel are as follows:
Step 1: Download, install and launch Stellar Repair for Excel software.
Step 2: In Select File window, click Browse to select the file you want to repair.

NOTE: If you are unaware of the Excel file location, click ‘Search’ in the Select File window to find the file.
Step 3: Once the files are selected, click Repair to initiate the repair process.

Step 4: Preview the repaired file and select all or specific files you want to save.

Step 5: Click Save File on Home menu.

Step 6: In Save File window, choose ‘Default Location’ or ‘Select New Folder’ to select the location where you wish to save the file. Click OK.

The selected files will be saved at the specified location.
Conclusion
You may experience Excel file corruption warning messages while opening or saving an Excel file. The file may become corrupt due to malware infection, sudden system shutdown, and forgetting to close workbook on a shared network. This post outlined occurrences of Excel file corruption warnings, and also described solutions to fix the issue.
You may try using Microsoft’s built-in ‘Open and Repair’ tool to repair corrupt workbook and recover data from it. If this solution doesn’t work, proceed with uninstalling and re-installing the Office application. Another solution is to move corrupt files to another location. But if the problem still persists, use Stellar Repair for Excel software to repair single or multiple Excel (.xls or .xlsx) files and restore data.
Summary: Recovering your unsaved Excel file on Windows 10 with some of our tested methods can truly save you a lot of time, money, and effort. Here’s how to do it!
Microsoft provides a wide range of applications to its users that cater to different purposes. Out of all the MS Office applications, Excel is considered the most used native application by several companies and individuals to store and process crucial data. Excel can also be called a go-to data analysis tool that offers great reliability, ease of use, and multiple features. But unfortunately, it’s not immune to human errors and system errors.
What if you accidentally close the Excel file without saving your work or Excel crashes suddenly? Or worse! Your system crashes without any warning and when you reboot your system, you can’t find the unsaved Excel file.
There could be different situations where you may lose access to your unsaved Excel workbook. There is no need to be anxious, though! We’ve covered some easy-to-follow DIY methods in this post to help you recover unsaved Excel files quickly.
4 Ways to Recover Unsaved Excel File
Irrespective of the circumstances, you can recover unsaved Excel files on Windows 10 using the following methods.

Method 1: Use the Search Option
If you remember the name of the Excel file, try to find it using the Search option. Following these steps:
- Go to Windows Search Box and type the name of the file.
- If you find the file there, click Open or Open file location.

- If you click Open file location, it will take you to the exact location of the file, and you’ll be able to regain access to lost/unsaved Excel file easily.
Method 2: Use AutoRecover Feature
Microsoft Excel comes with a built-in AutoRecover feature that saves copies of all open Excel files at a user-definable fixed interval. You can recover the file if you forget to save it and accidentally close it or it closes automatically due to an unexpected system breakdown or power failure. You can follow the given steps to recover unsaved Excel files with the AutoRecover feature:
- Open a new Excel file and go to File > Options.
- Then go to Save > Save workbooks.
- Next, ensure that the ‘Save AutoRecover information every’ and ‘Keep the last autosaved version if I close without saving’ option is already selected.

- Now, copy the file path given against the AutoRecover file location.
- Open the File Explorer, paste the Menu Bar file path there, and hit Enter.
- The unsaved file will appear with the .xlb extension.
- Double-click the file and choose Excel from apps to open the .xlb file.

- Finally, save the file to the desired location.
Method 3: Use the ‘Recover Unsaved Workbooks’ Option
Another way that you can choose is the ‘Recover Unsaved Workbooks’ option. To regain access to your Excel file, follow the given steps:
- Open an Excel sheet and then go to File > Open.
- Now, scroll down and click Recover Unsaved Workbooks.

- The list of unsaved files will show in the Document Recovery pane.
- Locate the file you lost and double-click on it to open.
- Finally, right-click on the version of the file you want to restore and click Save As.

And, save the file to the desired location
Method 4: Restore File with Previous Versions Utility
This feature will help you recover unsaved Excel files when you’ve saved the workbook earlier, but you end up losing access to the file due to an Excel or system crash. It’d help you save the previously saved version of your Excel file. To do so, follow the given steps:
- Open an Excel file and navigate to File > Info > Manage Versions.

- It will show the previously saved versions. You can choose the one you want to restore and click Save/Save As to store the file with a different name.
Hopefully, this blog has helped you learn how to recover unsaved Excel files. You can try any of the above methods.
FAQ
1. How can I repair a corrupted workbook?
Whenever Excel detects a corrupted workbook while opening, it automatically starts running the File Recovery mode and repairing the file. If the File Recovery mode doesn’t start automatically, you can manually repair the corrupted workbook .
How to Fix Excel File Couldn’t Open in Protected View
Summary: This blog discusses about the Excel error ‘The file couldn’t open in Protected View’ and workarounds to fix the error. If you cannot access the Excel file data, using an Excel file repair tool can help you quickly restore the data to its original state.
Protected View is a feature in Microsoft Excel that opens a file in read-only mode while disabling the editing functions. An Excel file opens in Protected View if the file is from an unsafe location. For example, the file may be opened from an insecure Internet location or downloaded as an Outlook attachment from suspicious senders. In that case, your Excel application won’t let you open the file to protect it against malware or virus attacks.
However, the Protected View feature sometimes prevents an Excel file from opening even if it is from a safe location. Also, opening an Excel file may return an error message ‘file couldn’t open in protected view’.

You may be able to resolve the issue by closing all the open Excel files, closing the Excel application, and then re-opening the problematic file. But this process can take a significant amount of time as you need to close and re-open the Excel application and the file continuously.
## **How to Fix the Excel File Couldn’t Open in Protected View Error?**Here are some workarounds to fix the error:
Workaround 1 – Disable the Protected View Settings
Note: Before disabling the protected view settings, ensure you have a reliable antivirus software installed on your computer to safeguard files against malware or virus attacks.
- Open the Excel file throwing the error, go to File and click the Options tab.
- From the Options dialog box, go to Trust Center and click on Trust Center Settings.
- From the Trust Center Settings dialog box, select the Protected View tab.
- Uncheck the appropriate option under the Protected View section, and then click OK to apply the changes. For instance, uncheck the “Enable Protected View for Outlook attachments” option if the file is a downloaded Outlook attachment.

- Click OK again.
Now try opening the problematic Excel file. If it still doesn’t open, try the following workaround.
Workaround 2 – Repair the Office Installation
Sometimes, corruption in the Office installation may cause Excel to return the ‘file could not open in protected view’ error. So, try repairing your Office installation and check if it solves the problem.
- Open the Control Panel and click the Uninstall a program option under Programs.
- Click Uninstall a program under the Programs tab.
- Right-click the Microsoft Office program you have installed and click the Change button.
- Select the Repair option and click Continue.

Once the repair operation is complete, check if you can open the Excel file without any issue.
Workaround 3 – Install Latest MS Office Updates
Several Excel users have reported about experiencing issues (such as the Protected View issue) on opening an Office document like Excel, Word, or others – after upgrading Windows to a newer version. This problem may occur due to incompatibility between the Office app and the updated Windows version. You can try to fix the problem by upgrading the Office app, and here’s how:
- Click on the File tab in the Excel file that throws an error.
- Click the Account tab at the left-hand bottom of the screen.
- From Office Updates, expand Update Options, and then click Update Now.

After installing the updates, restart your PC and open the Excel file. If this doesn’t work, use the following workaround.
Workaround 4 – Convert the File and Rename It
Some Excel users resolved the ‘Protected view’ issue by renaming their Excel files. But before that, ensure that the file you are trying to open is saved with .xlsx format. If the file type is .xls, you need to convert it to .xlsx format and then rename it. Before converting the file, save a copy of the original file in the desired location.
If the file type is .xlsx, copy the problematic file. Next, open a blank Excel document and paste the copied file. The file will appear as an icon, double-click on it. If it opens without any error, save it with a different name. Hopefully, reaming the Excel file may help resolve the problem.
Conclusion
There is no fixed solution to resolve the Excel error ‘The file could not open in Protected View’. However, the workarounds discussed in the blog have helped users resolve the ‘Protected View’ issue. Make sure to use the workarounds in the same order as explained in the blog.
If you’re having an issue loading the Excel file data due to the ‘Protected View’ error, consider restoring the data using an Excel file repair tool .

Top 5 Ways to Fix Excel File Not Opening Error
Summary: MS Excel users sometimes face issues while using the MS Excel application. One such issue is the Excel file not opening error. In this post, we’ve mentioned the reasons that may result in this error and the ways to resolve it. Also, you’ll find about an Excel repair software that can help you repair corrupt Excel files.
Several Microsoft Excel users have reported encountering the ‘Excel file not opening’ error when opening their Excel file. There are several reasons that may cause this error. In this post, we’ll be discussing the reasons that may lead to the ‘Excel file not opening’ error and the top 5 ways to fix this error.
Why Does the ‘Excel File Not Opening’ Error Appear?
Following are some possible causes that may result in the ‘Excel file not opening’ error:
- There may be a problem with an add-in that is preventing you from opening the Excel files.
- There’s a chance that your Excel application is faulty.
- Your Excel program is unable to communicate with other programs or the operating system.
- The file association might have been broken. This is a common problem faced by users who have upgraded their Excel application or operating system.
- The file you’re trying to open is corrupted.
5 Ways to Fix Excel File Not Opening Error
Let’s explore the ways to resolve the Excel file not opening error:

1. Uncheck the Ignore DDE Checkbox
Dynamic Data Exchange (DDE)allows Excel to communicate with other programs. The Excel error may occur due to incorrect DDE settings. You need to ensure that the correct DDE configuration is enabled. Follow the steps provided below:
- Launch your MS Excel file.
- Go to File > Options.

- Now click on Advanced.


- Further, find the General option on the screen.

- Uncheck the option **‘Ignore other applications that use Dynamic Data Exchange (DDE)**’.
- Click OK to save the changes.
2. Reset Excel File Associations
When you launch your Excel file, the file association ensures that the Excel application is used to open the file. You can try to reset these associations and see if Excel opens after this. Proceed with the following steps to do so:
- Navigate to Start Menu and launch Control Panel.
- Now, navigate to Programs > Default Programs > Set Your Default Programs.

- A new window will open. Herein, find the Excel program in the list and select it. Now, select the option ‘Choose defaults for this program’. Click OK.

- A new window for ‘Set Program Associations’ will open.
- Check the box against the ‘Select All’ option.
- Further, click Save to reset the Excel File Associations settings.

3. Disable Add-Ins
Many people install third-party add-ins to enhance the application’s functionality. Sometimes, these add-ins can create an issue. Follow the below-mentioned steps to disable the problem creating add-ins:
- Launch MS Excel application.
- Navigate to File > Options > Add-ins.

- In the window that opens, go to the Manage option at the bottom.
- Herein, select the COM Add-ins option from the dropdown list. Click Go.

- In the COM Add-ins window, uncheck all the boxes to disable the add-ins. Click OK.

4. Repair MS Office Program
Sometimes the issue is not with your Excel file. Instead, the reason for the error can be a corrupt MS Office application. You can repair the program to fix the Excel file not opening error. Here are the steps:
- Press the Windows + R keys to launch the ‘Run’ dialog box.

- Enter the text ‘appwiz.cpl’ to launch the program and features window.

- Find the MS Office program in the list of applications.
- Right-click on it and select Change.

- In the new window, select the Quick Repair radio button. Click Repair.

- Follow the on-screen instructions to repair the Office application. Once the repair process is completed, you can try opening the Excel file to see if the problem is resolved.
5. Disable Hardware Graphics Acceleration
The hardware graphics acceleration assists in the system’s better performance, especially when you use MS Office applications, like MS Excel or Word. Sometimes, this causes the Excel file not opening issue. You can disable this option to try to resolve the issue. Here are the steps:
- Launch your MS Excel application.
- Navigate to File > Options > Advanced.
- Herein, go to the Display option.
- Uncheck the Disable hardware graphics acceleration checkbox. Click OK.

What If These Solutions Do Not Work?
If you have applied all the methods mentioned above and still cannot open your Excel file, there are chances that your file is corrupted. You can use a specialized Excel repair tool , such as Stellar Repair for Excel to repair the corrupted Excel file. This software has powerful algorithms that can scan and repair even severely corrupt Excel files, without any file size limitation. After repairing the file, it restores all the data, including tables, charts, rules, etc. to a new Excel, with 100% integrity.
To know how the software works, see the video below:
Conclusion
Before you proceed with resolving the Excel file not opening error, try to find out the root cause of this error. If you know the real reason, you can try the method right away. If the reason for the error is corruption in the Excel file, the best option is to repair the file using a professional Excel repair tool, such as Stellar Repair for Excel .

Fix the Too many different cell formats Error in Excel?
Excel has set a limit on the number of unique cell formats within a workbook. Excel 2003 allows up to 4000 different cell format combinations, whereas Excel 2007 and later versions allow a maximum of 64000 combinations. When this limit exceeds, you may encounter errors, such as “Too many different cell formats”. It can prevent you from inserting or modifying workbook rows or columns. Sometimes, it prevents you to copy and paste the content within the same or different workbooks. This error may also occur due to various other reasons.
You can encounter the “Too many different cell formats” error due to the below reasons:
- Formatting is missing in the workbook.
- Size of your Excel file has increased due to excessive use of complex formatting (conditional formatting).
- Workbook contains a large number of merged cells.
- There are multiple built-in or custom cell styles.
- Excel workbook is corrupted.
- The unused styles are unexpectedly copied to new workbooks (when moving or copying a worksheet from one to another).
- Workbooks contain multiple worksheets with different cell formatting.
Methods to Fix the “Too many different cell formats” Error in Excel
First, check that your Excel application is up-to-date. It helps in preventing duplicate styles in workbooks. If the error persists, then follow the below methods:

Method 1: Simplify the Workbook Formatting
You can face the error in Excel - Too many different cell formats, if the size of your Excel file has increased due to excessive or unnecessary formatting. You can try to simplify the formatting of the affected workbook. While reducing the number of formatting combinations, you can follow the simplifying guidelines, such as using a standard font and applying borders consistently. Follow the below steps to remove unnecessary formatting in your worksheet:
- First, open the affected worksheet.
- Now, use the shortcut key (Ctrl+A) to select all the cells.
- In the Excel ribbon, navigate to the Home tab and click Clear.

- Then, select the Clear Formats option.

The above steps will remove all unnecessary formatting from the selected cells, thus reducing the number of cell formats. Besides this, you can try removing the cell patterns (if any) or use cell styles to remove unnecessary formatting in the workbook.
Method 2: Remove Conditional Formatting
Conditional formatting is also one of the reasons behind the “Too many different cell formats” error. It usually occurs if you have applied multiple rules to various cells or cell ranges within a workbook. Each rule has its own formatting settings. If you’ve applied a large number of conditional formatting to cells, it can increase the number of unique cell formats. You can check and remove the unnecessary conditional formatting. Here are the steps to do this:
- Open the Excel file in which you are getting the error.
- Go to the Home tab and locate Conditional Formatting.

- Select Manage Rules.
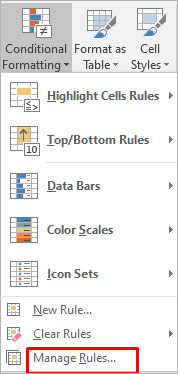
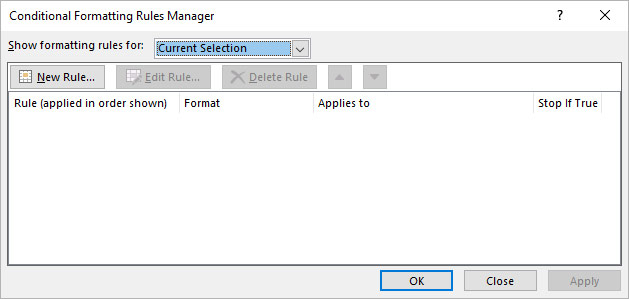
- The Conditional Formatting Rules Manager wizard is displayed. You can check the formatting rules and delete the unnecessary rule by clicking on the Delete Rule option.

Method 3: Repair your Excel Workbook
Corruption in the Excel workbook can also cause the “Too many different cell formats” error. You can try the Microsoft inbuilt utility to repair the file. Follow these steps to use this utility:
- Open your Excel application. Go to File > Open.
- Click Browse to choose the affected workbook.
- The Open dialog box will appear. Click on the corrupted file.
- Click the arrow next to the Open button and then select Open and Repair.
- You will see a dialog box with three buttons - Repair, Extract Data, and Cancel.

- Click on the Repair button to recover as much of the data as possible.
- After repair, a message is displayed. Click Close.
If the Open and Repair utility does not work or fails to repair the corrupted Excel file due to any reason, then you can use Stellar Repair for Excel to repair the Excel file. It is a simple-to-use third-party Excel repair tool with an intuitive UI that enables anyone to use it without much effort. The tool can help in fixing the “Too many different cell formats” error. It does so by repairing the Excel (XLS/XLSX) file and recovering all the components, including damaged cell style, without impacting the original formatting. You can download the software’s demo version and install it to check how it works.
Method 4: Save the Excel File to a Binary Workbook (.xlsb) Format
You can also get the “excel too many cell formats” error if the size of the spreadsheet is too large. You can try saving the Excel file in binary (.xlsb) format to reduce the Excel file size. Here’s how to do so:
- In Excel, navigate to File > Save As.
- Select Excel Binary Workbook (*.xlsb) in the Save as type dialog box.
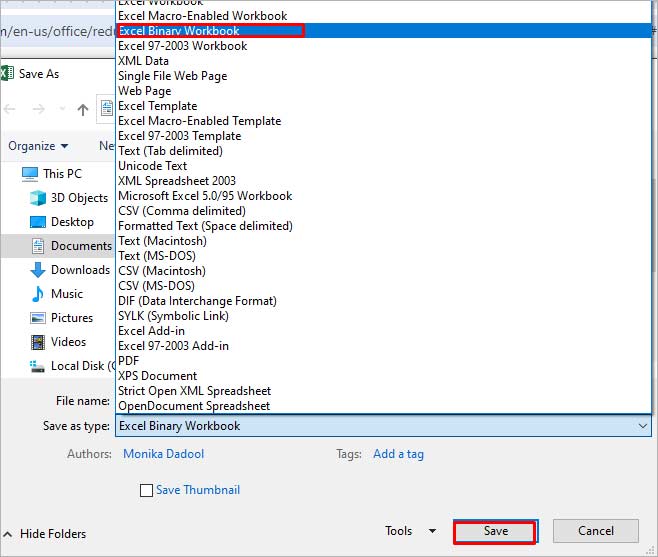
- Click Save.
Some Additional Solutions
Here are some additional methods you can try to fix the issue:
1. Check and Fix the Un-used Style Copy Issue
Many users have reported encountering the “Too many different cell formats” error when moving or copying the content of a workbook from one Excel to another and the unused styles being copied from one workbook to another. Microsoft has released a hotfix package which contains a fix for this issue. You can install this hotfix package (2598143 ) to resolve the issue.
2. Use Clean Excel Cell Formatting Option
You can check and enable the Excel cell formatting option to fix the “Too many cell formats” issue. This option will help you remove the excess formatting in your workbook. To locate this option, click on the Inquiabove steps willre tab. If you fail to see the Inquire tab, then check if the Inquire option is enabled in the Excel Com Add-ins settings.
3. Clean up Workbooks using Third-Party Tools
The “Too many different cell formats” issue can occur if your workbook contains a large number of unnecessary styles, as mentioned above. You can use third-party tools, such as XLStyles Tool or Remove Styles Add-in to clean up workbooks recommended in Microsoft Guide. However, Microsoft takes no guarantee of these tools.
Closure
If you’re getting the “Too many different cell formats” error in Excel, try the methods discussed in this post to resolve it. You can simplify the formatting by following standardized guidelines and clearing all the unnecessary conditional formatting. If the error has occurred due to corruption in Excel file, then you can use Stellar Repair for Excel to repair the Excel file. It is an advanced tool that can repair Excel worksheet and recover all its objects without losing the original formatting.
- Title: Excel File Recovery – Recover Corrupt Excel 2007 Files Easily | Stellar
- Author: Nova
- Created at : 2024-07-17 17:11:00
- Updated at : 2024-07-18 17:11:00
- Link: https://phone-solutions.techidaily.com/excel-file-recovery-recover-corrupt-excel-2007-files-easily-stellar-by-stellar-guide/
- License: This work is licensed under CC BY-NC-SA 4.0.