

Filter Not Working Error in Excel 2010 Fix 2024 | Stellar
Filter Not Working Error in Excel [Fix 2024]
Summary: The filter is not working issue in Excel can occur due to several reasons, like blank rows, hidden rows, merged cells, corrupted data, etc. In this post, we will mention the reasons why the filter is not working correctly in Excel and several fixes to resolve the issue. We will also mention an advanced Excel repair tool to repair the Excel file if corruption in file is the cause of the issue.

You can use the Filter function in Excel to filter data in large-sized Excel files quickly. While using Excel filters, sometimes, you face a situation where the filter is disabled or may fail to function properly.

The Excel filter usually fails to work if you have not selected the complete and correct range of data. Let’s learn more about the “Sort and Filter not working in Excel” issue and look at the possible methods to fix it.
Why the Filter is not Working in Excel?
You can face the “filter is not working” issue if you are applying the filter on a protected worksheet or trying to find the data from a hidden row. Besides this, there could be many other reasons contributing to this issue, such as:
- The data you are trying to filter is in merged cells.
- The Excel file automatically selected the data up to the first empty cell, excluding the remaining rows.
- Grouped sheets in Excel file.
- Blank row in the Excel sheet.
- You are trying to apply a filter on an invalid data range.
- The workbooks in which you’re facing the filter issues are corrupted.
- You are specifying incorrect criteria in the filter columns.
Solutions to Resolve the Filter is not Working Issue in Excel
There might be two scenarios: the Excel filter option is disabled/grayed out or the filters fail to function properly. You can follow the given troubleshooting solutions to resolve the issue based on the scenario you’re facing.
Scenario 1 – Filter Option is Disabled or Grayed Out
Method 1: Check and Un-group the Worksheet
When you apply filters to a single sheet in a grouped set, Excel disables the filter option in other sheets within the group. You can check the grouped sheets and try ungrouping them to enable the filter option. Here’s how to do so:
- In the Excel file, go to the Group section.

- Right-click on the Ungroup Sheets.
Alternatively, you can press the Shift + Alt + Left keys to ungroup the sheets.
Method 2: Unprotect Worksheet
The “disabled Excel filter” issue can also occur if your worksheet is protected. You can unprotect the worksheet to enable the filter option. To do so, go to the Review tab and then select Unprotect Sheet.

Method 3: Check and Uninstall Excel Add-ins
Sometimes, the Excel filter gets disabled due to faulty or corrupted Excel add-ins. You can run the Excel in Safe mode to check whether the issue has occurred due to add-ins. To do this, type excel /safe in the Run window and click OK.

In safe mode, if you see the filter option, it indicates some problematic Excel add-ins were causing the issue. In such a case, you can check and uninstall the faulty Excel add-ins to fix the issue.
Scenario 2 – Filter is not Working
Method 1: Try Clearing Filters
Sometimes, the Excel filter fails to work correctly if some filters from the previous sessions are still active. In such a case, you can clear the applied filters. Follow the below steps:
- In Excel file, click Sort & Filter option.
- Select clear.

Method 2: Select Entire Data
The filter not working issue in Excel can occur when the range selected for filtering is incomplete or incorrect. You need to make sure that you’ve selected the entire data range in Excel. You can use the Ctrl+A keys to select the entire content in the worksheet.
Method 3: Check and Delete Blank Cells from the Table’s Columns
When you apply a filter to the data, Excel expects data to be in a continuous range. Excel filters do not consider the blank cells, thereby resulting in incorrect functioning of the filter. To resolve this issue, check and delete all blank cells. In case your Excel file is too large to delete the blank cells, then you can add a “Serial number” row as an alternative. Adding serial number row creates a data continuity, thus helping in fixing the filter-related issue.
Method 4: Unhide Hidden Rows and Columns
Hidden rows or columns in worksheets can also affect the filter functionality. You can check and unhide rows/columns to troubleshoot the issue. Here is how to do so:
- In the affected Excel file, go to Home.
- Click on Format > Hide & Unhide.

- Click Unhide Rows or Unhide Columns (as required).

Method 5: Unmerge Cells
You can experience the filter in Excel is not working issue if you are using the filter to extract data from merged cells. Ensure to unmerge the “merged cells” before applying a filter in Excel. Follow the below steps to unmerge the merged cells in Excel:
- Navigate to the Home option.
- In the toolbar, select the Merge & Center option.
- Click Unmerge Cells.
Method 6: Repair the Workbook
Sometimes, the Filter Not Working in Excel issue can occur due to inconsistencies in file structure. If these issues occurred due to corruption in the worksheet, you can repair it using the Open and Repair tool. It is an in-built tool in Excel that is used to repair corrupted Excel files. Here are the steps to use this tool:
- In the Excel application, navigate to the File option.
- Click Open and then click Browse to choose the Excel file.
- In the Open dialog box, click the problematic Excel file.
- Click the arrow next to the Open option and select Open and Repair.
- Click Repair to recover as much data as possible.
- The application prompts a message after the repair process is complete. Click Close.
In most cases, the Open and Repair tool can easily fix corruption issues in the Excel file. However, for any reason, if the open and repair tool doesn’t work you can consider repairing the file using a professional Excel Repair tool. Stellar Repair for Excel is one such advanced and secure tool to repair Excel files. With this tool’s powerful scanning capabilities, you can repair highly corrupted Excel files and recover all their objects with complete integrity. The tool is compatible with all Windows editions, including the latest Windows 11.
Closure
Several reasons are associated with the filter not working issue in Excel. The filter option may not work as expected if you have not selected the complete and correct range of data or for many other reasons. You can follow the troubleshooting methods discussed above to fix the issue. If the filter fails to work due to corruption in the workbook, then try Stellar Repair for Excel . It is an advanced tool that can even repair severely damaged files. It also helps to recover all the data from corrupted files without changing the original formatting. You can check the tool’s functionality by downloading its demo version. It allows you to preview all the repairable objects in the corrupted Excel file.
Best Excel Repair Software till Date - Try Now
Summary: In this blog, we overview and conclude Stellar Repair for Excel as Best Excel Repair software till date – based on its distinctive features and capabilities. Also, you’ll get to know what makes it the top Excel repair software from the perspective of recognized review websites, tech community forums, and users. In addition, you’ll find the simple and step-wise process of repairing Excel by using the software.
Corruption in Excel files can hamper workflow, bringing productivity to a halt. And what can be more concerning is that you may lose sensitive data if the corrupt or damaged file is not repaired on time. An Excel file may get corrupted due to various reasons.
Common Reasons Behind Excel File Corruption
- Abrupt system shutdown
- Human errors such as accidental deletion, formatting, or overwriting an Excel workbook
- Damaged Excel installation
- Hardware failure
- Virus infection or malware attack
- Bad sectors on the hard drive on which Excel files reside
- Large-sized Excel file
Regardless of the reason, manually troubleshooting corruption errors in an Excel file can drain time, resources and may even cause data loss. However, using a third-party professional tool such as Stellar Repair for Excel can save you the manual efforts and time in repairing Excel files, keeping the original data intact.
What Makes Stellar Repair for Excel the Best Software?
While there is no dearth of Excel file repair tools, Stellar Repair for Excel software has garnered considerable interest and positive reviews by MVPs . The software has remarkable features that make it the Excel file repair specialist.
Key Features of Stellar Repair for Excel Software
Though the software encompasses several great features and a simple-to-use and intuitive user interface, some of the key features that make it the best Excel repair software are:
- Restores Excel (XLS / XLSX) File in Original, Intact State
The software repairs corrupt Excel files and restores all the data in the original format. Also, it helps restore the original properties of cell formatting of the workbook.
- Capability to Resolve all Excel Related Errors
Most errors that crop up unexpectedly while working with Excel files are the result of damages caused due to human errors, virus infection, power surges, etc. The software can help you easily fix corrupted Excel files to get rid of errors such as “Excel is not responding ”, “Excel found unreadable content in name.xls ”, “Excel cannot open the file filename.xlsx”, etc.
- Real-Time Pre-Recovery Preview
It provides users with the opportunity to preview recoverable Excel file items before saving them. This helps users estimate how much data they will be able to salvage by using the tool, thus helping them make an informed decision about investing in the software.
Besides these features, some other aspects that make the software a recommended choice for Excel repair are as follows:
- 100% Secure****: Downloading and installing this software is 100% safe and secure, since Norton antivirus security comes installed with it.
- Tested by MVPs****: Stellar Repair for Excel software is tried and tested by credible MVPs.
- Allows Testing before Purchase: The software’s demo version lets you understand the tool and its advantages before buying it.
- Stellar is Microsoft Gold Partner****: The software’s vendor, Stellar Data Recovery, is a certified Gold partner for Microsoft.
Stellar Repair for Excel – The Most Recommended Software
Check out the user ratings and reviews to understand why Stellar Repair for Excel ranks as the top Excel file repair software, and why you should choose it over its competitors:
- Capterra – 4/5
A user has shared how effectively the Stellar Repair for Excel software repaired and restored the corrupted Excel file.

- g2.com – 4.5/5
The Excel Repair software got a rating of 4.5/5 on g2.com based on the positive reviews of the users.

- Softpedia – 3.5/5
Softpedia gave the product a rating of 3.5/5 and reported it as 100% clean (meaning without malware).

Support and Compatibility
Stellar Repair for Excel software supports the latest MS Excel versions 2019, 2016, 2013, and lower versions. It can operate smoothly on Windows 11, 10, 8.1, 8, 7, and earlier operating systems.
System Requirements
Stellar Repair for Excel requires a minimum Pentium Class Processor with 2 GB minimum memory and 250 MB of free storage drive space.

How to Use Stellar Repair for Excel Software to Repair Excel Files?
Follow these steps for repairing damaged or corrupt Excel files:
- Run the software and from the main software screen, select the corrupt Excel files you want to repair by clicking Browse or Search.

- Once the file is selected, click Repair to begin repairing the corrupt file.

- When the scanning finishes, all recoverable data is displayed in the left-pane of the preview window. Click on any item to preview its content in the right-pane.

- For saving the file, click the Save File button on the Home menu.
- When prompted, select a target location to save the repaired file and click OK.

The repaired Excel file will now get saved in the selected target location.
Concluding Lines
Stellar Repair for Excel software empowers users to repair Excel (.XLS/.XLSX) files and restore worksheet data in the event of file corruption and data loss. More importantly, the software performs granular-level recovery to restore the complete file items while preserving worksheet properties and visual representation.
How to Fix ‘Sharing Violation Error’ when Saving Excel?
Summary: You may encounter the sharing violation error in Excel when you repeatedly save changes in a workbook. The error can occur due to different reasons. In this blog, we will discuss the possible reasons behind this sharing violation error and some effective solutions to fix it. If the issue has occurred due to corruption in Excel file, you can try the advanced Excel repair tool mentioned in the post to repair the corrupted file.
It is not uncommon to encounter errors while working with Excel application. One common error that Excel users face is the sharing violation error that occurs while saving an Excel spreadsheet. The complete error message says, “Your changes could not be saved to file because of a sharing violation.” When this error occurs, users won’t be able to save the changes in the file. So, it is important to fix this issue as soon as possible. But before fixing the error, let’s find out the causes behind this error.
Causes of Excel Sharing Violation Error
This error may pop up due to the below reasons:
- The file you are trying to save is corrupted.
- The Excel file is not in the trusted location.
- Sharing Wizard is disabled.
- You do not have permission to modify the Excel file.
- The Excel file is not permitted to get indexed.
Methods to Fix the Sharing Violation Error in Excel
You can move the affected Excel file to a new folder and save it with a different name. Then, see if it fixes the error. If it doesn’t help, you can try the below methods.
Method 1: Check and Change the Excel File Properties
You can get the sharing violation error in Excel if the file attribute options, such as “File is ready for archiving” and “Allow this file to have contents indexed in addition to file properties” are disabled. You can check the File Properties and enable these options to fix the issue. Here are the steps:
- Right-click on any Excel file and select Properties.

- In the Properties window, click on the Advanced option.

- In the Advanced Attributes window, select the below options under File attributes:
- File is ready for archiving.
- Allow this file to have contents indexed in addition to file properties.

- Click OK.
Note: If these options are already selected, then unselect and re-select them.
Method 2: Enable Sharing Wizard Option
The error “Your changes could not be saved to file because of a sharing violation” can also occur if the sharing wizard option is disabled on your system. You can check and enable the sharing wizard option using these steps:
- Go to your system’s Documents folder.
- Click View > Options > Change folders and search options.

- In the Folder Options window, click View.

- Under the View section, search for the “Use Sharing Wizard” option in the Advanced Settings.

- If the Use Sharing Wizard option is unselected, select it and then click OK.
Method 3: Move the Excel File to a Trusted Location
You can encounter the sharing violation error if the file you are trying to save is not in the trusted location. You can try moving the file to a trusted location by following these steps:
- In Excel, go to File and then click Options.
- Click Trust Center and then click Trust Center Settings.

- In the Trust Center window, click Trusted Locations and then click Add new location.

- In the Add new location window, select Browse to locate and choose the folder, and then click OK.
Method 4: Open Excel in Safe Mode
Incompatible add-ins can create issues in the Excel file. To check if the sharing violation issue has occurred due to add-ins, open Excel in safe mode. To do so, follow these steps:
- Open the Run window using Windows + R.

- Type excel /safe and click on OK.
- Open the affected file and then try to save the changes.
- If you are able to save the changes without any error, then it indicates add-ins are causing the issue. To fix this, you can remove the recently downloaded add-ins (if any).
Method 5: Repair the Excel File
Corruption in Excel file can also create issue while saving the changes. In such a case, you can repair the corrupted Excel file using the inbuilt utility in Excel, named Open and Repair. Follow these steps to use this utility:
- In Excel, navigate to File > Open > Browse.
- In the Open dialog box, click on the affected Excel file.
- Click the arrow next to the Open button and select Open and Repair from the dropdown.
- Click on the Repair option to recover as much data from the file as possible.
If the above utility fails to fix the corrupt Excel file, then you can use a more powerful Excel repair tool , such as Stellar Repair for Excel. This Excel repair tool can repair even severely corrupted or damaged Excel files (xls, .xlsx, .xltm, .xltx, and .xlsm). This tool can recover all the data from the corrupted Excel file, including images, chart sheets, formulas, etc., without changing the original format. It can help in fixing common corruption-related errors in Excel. You can download the software’s demo version to scan the corrupt file.
To Conclude
Above, we have discussed some effective methods to fix the sharing violation error in Excel. This error may also occur if you try to save the Excel file in an incompatible format. So, check the format and try saving the file in a compatible format. If the error occurs due to Excel file corruption, you can repair corrupt Excel file using the Open and Repair tool. If nothing works, then download a third-party Excel repair tool, such as Stellar Repair for Excel. It is an advanced tool that can fix severely corrupted Excel files. You can install this repair tool on any Windows system.
Repair Office 2016 Files (Word, Excel and PowerPoint)on Windows
If you frequently work with Microsoft Word (.docx), Excel (.xlsx), and PowerPoint (.pptx) files, then issues like file inaccessibility or corruption won’t be new to you.
Let’s discuss some common scenarios which may lead to corrupt MS Office 2016 files:
Scenarios behind Microsoft Office Files Corruption
Scenario 1 – Disruption during Data Migration
You decide to move Office files from your hard drive to other removable media. However, when you try to access the data within the files post-migration, you may find Word, Excel, and PowerPoint files showing gibberish characters. Due to a power surge, sudden system shutdown, and internal mechanical failure, the files may have turned corrupt.
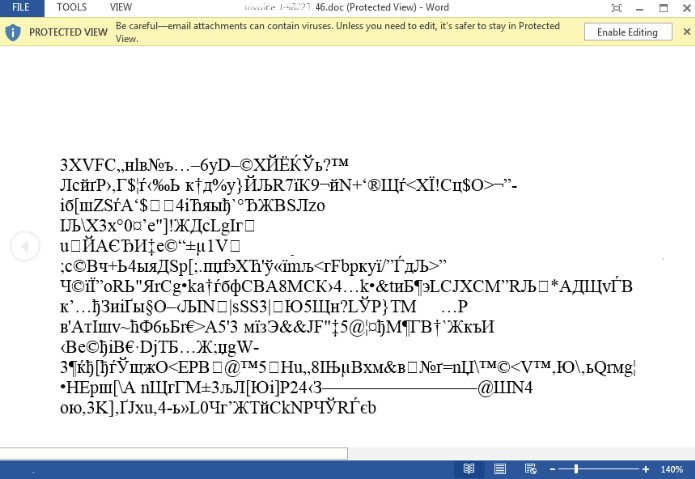
Figure 1- Microsoft Word file showing garbage characters
Scenario 2 – Office Files and Registry Entries Become Infected
When you open or use the Microsoft Office application, it crashes as soon as it opens. You assume that an add-in was causing the problem and restart the Office application without add-ins loaded, but the application still crashes. This may happen because of a virus infecting the Office files and registry values, thus leading to corrupt or damaged Office files.
Scenario 3 – Inaccessible or Lost Data
Suppose all your Office files are stored on a USB device, and you unplugged the device while it was still open in Windows. Now, when you attempt to open a Word or an Excel file, all the data is gone. Unsafe removal of USB or any other external storage device may corrupt the data inside your Office files or turn the file inaccessible.
How Can You Deal with Microsoft Office Files Corruption?
Here are a few solutions that can help you fix or repair Office 2016 Files Corruption:
Solution 1 – Use Microsoft in-built Repair Utility
Microsoft recommends using its in-built repair utility, ‘Open and Repair’, to fix corrupt Office files. Follow these steps to understand how you can use the utility to repair the corrupt Word, Excel, and PowerPoint files:
- Launch the MS Office application whose file you want to repair:
- To repair corrupt Word (.doc, .docx) files, launch MS Word
- To repair corrupt Excel files (.xls, .xlsx) files, launch MS Excel
- To repair corrupt PowerPoint (.ppt, .pptx) files, launch MS PowerPoint
- Click File, and then click the Open tab.
- Click Navigate to the location or folder where the Word, Excel, or PowerPoint file is stored.
- Select the corrupt file you want to repair by single-clicking on it, and then find the Open button and click on the drop-down menu next to it.
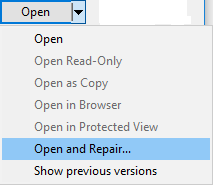
- From the drop-down menu, click the Open and Repair option and follow the subsequent instructions to repair Office 2016 files.
Solution 2 – Repair Office 2016 Installation
Try repairing the Office installation to fix the MS Office files. The steps to repair your Office installation may vary depending on the operating system you are using.
For Windows 7
- Open your PC’s control panel
- Click Programs
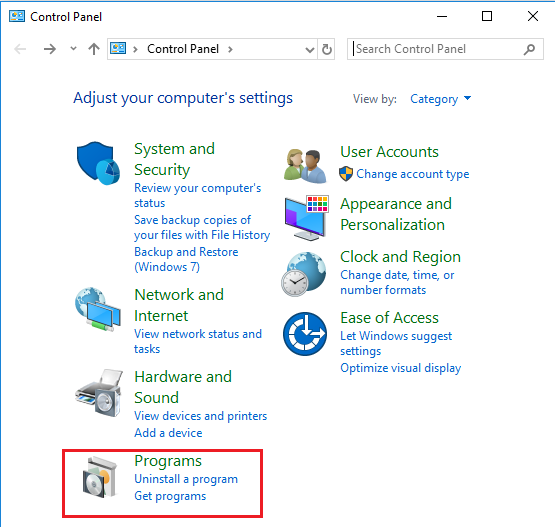
- Click Programs and Features, and then click Uninstall a program option
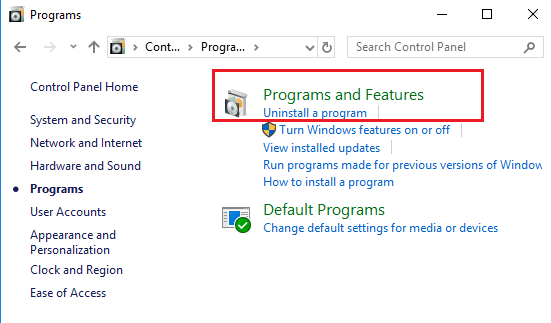
- Right-click on the Office application you want to repair, and then click Change
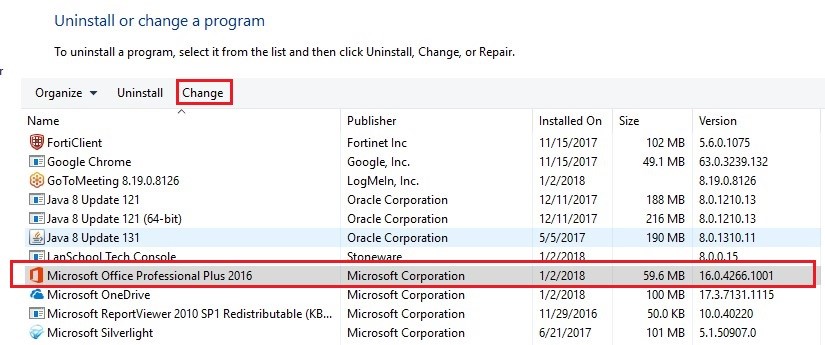
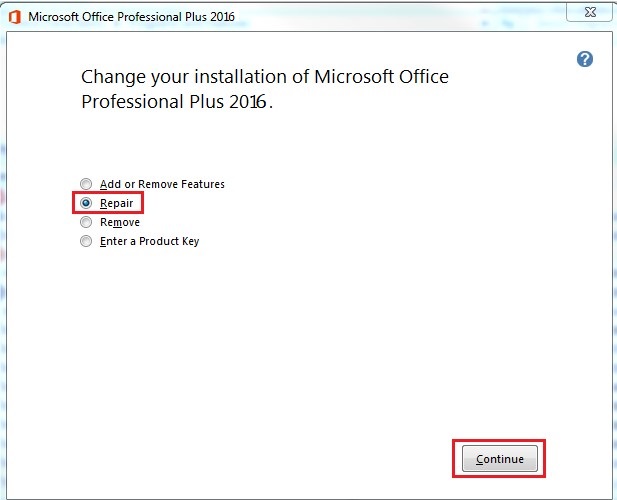
- Under Change your installation of Microsoft Office Professional Plus 2016, choose Repair and then click Continue.
For Windows 10
- Right-click the Start button, and type in Apps & Features (For Windows 10)
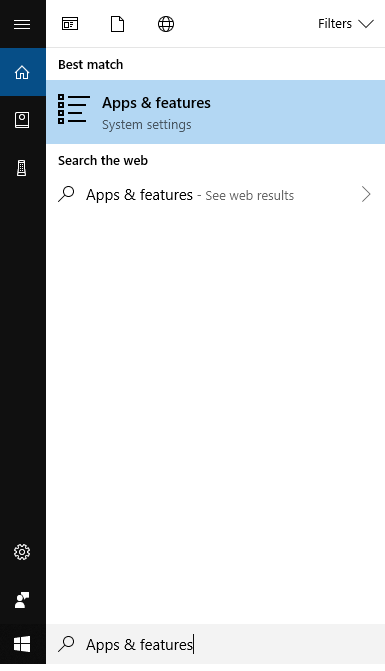
NOTE: This step will work for Windows 10/8/8.1/7 and Vista
- Click Programs from the window that opens, click on the MS Office product you want to repair, and then click on Modify
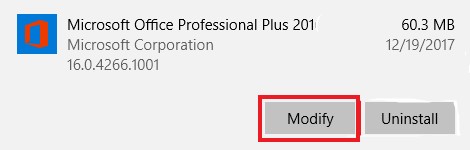
Note: Following the step will repair the entire Microsoft Office suite even if it contains only one application you want to repair such as an Excel or PowerPoint file. But, in case you have a standalone app installed, try to locate that application by name.
- Under Change your installation of Microsoft Office Professional Plus 2016, choose Repair, and then click Continue to initiate the repair process.
- Once the repair process completes, you’ll be prompted to restart your PC. Click Yes
Solution 3 – Use Stellar Toolkit for File Repair
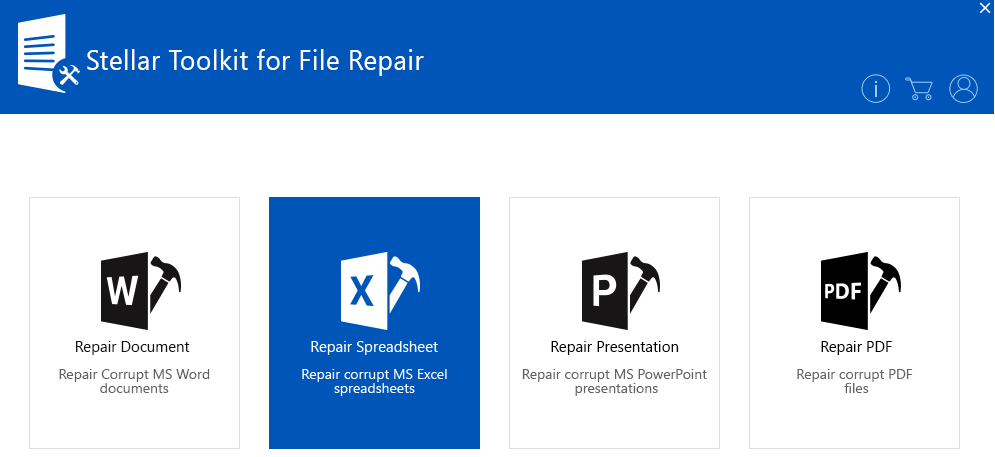
Repair MS Office 2016 files by using Stellar Toolkit for File Repair . This software comprises four essential utilities that can help you repair corrupt MS Word, MS Excel, MS PowerPoint, and PDF files.
The toolkit helps repair corrupt Office 2016 and other version documents and files while maintaining the original file format, which is less likely achievable with inbuilt methods. Follow these steps to repair MS Office 2016 documents by using the Office file repair tool:
- Download and install Stellar Toolkit for File Repair.

- Launch the software.
- From the software’s main interface, select the MS Office file you want to repair.
- From the window that pops up, select the corrupted file to be repaired.
Note: If you don’t know the exact location of corrupt office files or if they are large in number, you can locate the files by using the Find/Search option included in the software.
- After selecting the file, click the Scan button to initiate the repairing process.
- Once the scanning process is complete, all the recoverable information is displayed in the software’s left-hand panel. Click on any item to preview it before recovery.
- To save the repaired data, click the Save button, and enter a destination of your choice.
- Click OK.
Conclusion
This post outlined possible scenarios and their causes that may lead to corruption in MS Office 2016 files. It also emphasized how the inbuilt methods such as Open and Repair, and Repair Office Installation help to resolve the corruption issues. But these are not competent enough to resolve all the errors. With Stellar Toolkit for File Repair, you can resolve all sorts of corruption issues and recover data of Office 2016 files – Excel, Word, PPT, and PDF – in their original state.
‘Unable to Save Excel Workbook’ Issue [Fix 2024]
Summary: You may unable to save your Excel Workbooks due to several reasons. Many users have reported this issue on the Tech Forums. This blog will discuss a few instances when users cannot save their Excel files. It lists the causes behind the issue and their possible solutions. It also mentions the Stellar Repair for Excel to fix the saving error if it is due to corruption in the Excel file.
It is easy to work with Microsoft Excel but sometimes, the application may create issues thereby hampering the smooth functioning of the workbook. One such issue is “unable to Save Excel Workbook”.
Let’s take a look at the issue of Unable to Save Excel Workbook
Instance 1:
In an organization, users connected to one of the servers (Windows 2008 R2) using Citrix – a Terminal Server configured with Windows 2008 R2 –and accessed their data through a File Server, also configured with Windows 2008R2. Since the connectivity to Shared Drive was established through a Terminal server, any conflict amongst the server configuration may create conflict in shared file.
This issue was discussed at length at one of the Tech Forums , where the users were unable to access their workbooks stored on the shared drive. The File menu did not work. As a result, the users were forced to save the workbook by creating quick access shortcuts or locally on the desktop. In many cases, the saving option was ruled out completely.
Instance 2:
A similar problem was reported, wherein the users received an error when saving an Excel workbook after inserting a chart in an existing workbook (previously saved) or copying values from an existing workbook. A system is configured with Windows 7 and Microsoft Office 10 configuration. The issue arises when the user is unable to save the changes after editing in a saved spreadsheet. The following message displays on the screen:

Figure: Unable to Save Excel WorkBook Issue
Further, if the user clicks ‘Continue’, the following error message is received:
“Excel encountered errors during save. However, Excel was able to minimally save your file to <**filename.xlsx**>”.
Note: This issue impacts build Version 1707 (Build 8326.2086) and later, and also only occurs with files that are stored locally, such as on the desktop. This problem does not occur if you manually enter values or insert a chart in a newly created workbook.
Plausible reasons for the ‘Unable to save Excel workbook’ Issue
- The issue was detected in Microsoft Office Professional Plus 2010 32-bit, Service Pack 14.0.6029.1000.
- Excel version on the user system may or may not match with Excel version on File server.
- The issue of ‘Unable to Save Excel Workbook’ impacts only the Build Version 1707 (Build 8326.2086) and later.
- In case of Issue 2, the problem surfaces when the user adds files, tables or charts in the locally saved excel files, such as on the desktop.
Methods to fix the ‘Unable to Save Excel Workbook’ Issue
There may be an issue with the Build version or the Registry Values settings may not be appropriate, which does not allow the Excel workbooks to save.
But, before starting to resolve the issue, verify the following:
- The location where the file is to be saved may not have enough space to save the Excel file: Check the available space and save again. You may also use the option of ‘Save As’ to save the file at a new location.
- Excel file may be a shared one where edits are not allowed by a specific user: There are restrictions attached to documents and other files shared over the network. Check for these restrictions.
- Antivirus may interrupt in during file saving: Antivirus in the system may not allow saving of the files. Request the system administrator to uninstall the antivirus and reinstall after saving.
- The file is not saved within 218 characters: If the file is not saved due to the naming issue, then check the character length and try again.
- Differences in Windows versions of the local system and those on network drive may cause excel not saved issues. Check that all the systems have the same configuration and are updated to the recently available versions.
- Excel spreadsheet is corrupt: If none of the above factors have not caused hindrance in saving the file, then there may be a probability of corruption in the Excel spreadsheet .
Once verified, look for a healthy and restorable backup. If backup is missing, resolve the issue of “Unable to open Excel File” with manual settings on local system or through a reliable Excel repair software.
Method 1: Modify Registry Entries
If multiple users are unable to access their workbooks stored on the shared drive and facing unable to save Excel file problem (see Instance 1 above), then follow the below steps:
- Go to ‘Registry Entry’. To do this, type ‘regedit’ in the Start Search box, and press ENTER

Figure: Edit Registry
- You are prompted for the administrator password or for a confirmation, type the password, or click Continue
- Locate the following registry subkey, and right-click it: HKEY_LOCAL_MACHINE\System\CurrentControlSet\Services\CSC

Figure: CSC Location
- Point the cursor to New, and click Key

Figure: Create new key
- Type ‘File Parameters’ in the available box

Figure: File parameters
- Right-click Parameters, point the cursor to New, and click DWORD (32-bit) Value

Figure: File parameter (DWORD – 32 bit) value
- Type ‘FormatDatabase’, and press ‘ENTER’. Right-click ‘FormatDatabase’, and click ‘Modify’

Figure: Modify format database
- In the Value data box, type ‘1’, and click ‘OK’

Figure: Value data
- Exit ‘Registry Editor’
- Restart the system and verify if the files can be saved now
Method 2: Try Google Uploads
If the user is unable to save the changes after editing in a locally saved spreadsheet (see Instance 2 above), then follow these steps:
- Upload the unsaved Excel file to Google Docs. Ensure that the file gets converted to Google Sheets format.
- Check if all the formulae are active and working.
- Make changes to the Google Sheet and verify that all the changes are working fine.
- Use the Google Sheets export feature to download the file in Excel format.
Method 3: Resolve manually with Open and Repair
If the Excel file is found to have corruption, try out the Excel Open and Repair utility:
- Open a blank Excel File. Go to File and Click Open.
- Go to Computers and click Browse.
- Access the Location and Folder and click the arrow icon beside Open followed by Open and Repair.

Figure: Illustrates Steps to use ‘Open and Repair’ method
The Open and Repair utility is not competitive enough and may not fix corruption in severely corrupted files. Hence, if you are unable to save Excel workbook after applying the manual methods, then you can search for a useful software-based repair utility.
Method 4: Excel File Repair Software
Specifically meant to resolve Excel file corruption. Stellar Repair for Excel helps you to repair every single object including charts, tables, their formatting, shared formulae and rules and more.
- Install and Open the software and select the corrupt Excel File. You can also click the Find option if the file location is not known.
- Click Scan and allow the software to scan and repair the corrupt Excel file.
- Once repaired, the software displays the fixed file components to verify its content.
- Click Save to save the file data in a blank new file as ‘Recovered_abc.xls’, where abc.xls is the name of the original file.
See the working of the software which has been declared as a tool that provides 100% integrity and precision.
The Excel repair software takes care to save the repaired data in a new file to minimize the chances of further corruption.
Conclusion
‘Unable to save Excel file’ is a generic problem that may appear due to various reasons. In this blog post, we presented some of the actual instances reported by users on community forums.
Windows updates, the Build versions, the Service Packs of the local systems and those on the network drive must be either similar or in sync with each other. Any deviation may cause issues in accessing or saving the Microsoft files, as reported in Instance 1 is caused where user is unable to save Microsoft Excel file on the Network Drive. In case, the user is unable to save the file on network drive then the problem lies with the Registry value.
Another case is when the users receive an error while saving an Excel workbook after they insert a chart in an existing workbook or copying values from an existing workbook. This issue is known to affect build Version 1707 (Build 8326.2086) and later, and only occurs with locally stored files.
When a user is unable to save a specific Excel file, then the problem can be resolved using the manual methods or the software based utility. The mode of repair depends upon the level of corruption in Excel file.
Hence, it is suggested to analyze the nature of the problem and decide an appropriate resolution method.
How to Fix “File Not Loaded Completely” Error in Excel?
Summary: You may get the “File not loaded completely” error when opening a large-sized Excel file. Read this post to understand the causes behind this issue and the troubleshooting solutions to fix this Excel error. Also, you’ll get to know about an Excel repair tool that can help fix the issue if the cause is corruption in the Excel file.
Several users have reported experiencing the “File not loaded completely” error while opening Excel spreadsheets or when importing CSV file into Excel. This error can occur if the worksheet has crossed the maximum rows and columns limit , i.e., 1048576 rows by 16,386 columns. However, this issue can also occur due to various other reasons. Let’s take a look at the possible causes behind this error.
Why this Error Occurs?
The “File not loaded completely” issue can occur due to one of the following reasons:
- The Excel file you are trying to open is corrupted.
- The Excel file is too large.
- The Excel file has crossed the rows limit.
- Memory issue in your system.
Methods to Resolve the “File not Loaded Completely” Error
Following are some methods you can try to fix the Excel file not loaded completely issue.
Method 1: Try to Import the Spreadsheet into MS Access
A large-sized Excel file takes time and memory to load. When you try opening a large file, you may get the “file not loaded completely” error. It indicates your file contains unwanted rows and columns. In such a case, you can try importing your spreadsheet into Access. By doing this, you can easily access the rows and columns in the database table, and then remove the extra rows. Follow the steps below to import your spreadsheet into Access:
- Open a blank database in Access application.
- Navigate to the External Data tab and then click on the Excel button.

- In the Get Data-Excel Spreadsheet window, click Browse.

- In the File Open dialog box, select the Excel file (in which you are getting the error) and click Open.

- Select Import the source data into a new table in the current database and click OK.

- In the Import Spreadsheet Wizard window, you’ll see all the rows and columns of your Excel file. Click Next.

- In the dialog box that appears, you can modify the field information (extra columns or rows).

Once you performed the changes, click on the Next button.
Provide a name to the table.

- Next, select the option “I would like a wizard to analyze my table after importing the data” (if you want to analyze the data) and click Finish.
- You will get a dialog box with a message. Click Yes.

- The Table Analyzer wizard will appear on the screen.


- Click on the Next button.

- Follow the instructions of the Table Analyzer wizard.
- Once you complete all the steps, select “Save import step” and click Close.

Method 2: Split Your Large Excel File
You may face the Excel file not loaded completely issue when importing a large Excel file. In such a case, you can try splitting your large file into smaller ones. To split the file, you can use VBA codes or the move or copy feature.
Method 3: Stop Unwanted Processes Running in the Background
Sometimes, you get the “File not loaded completely” error if you are running multiple files or programs simultaneously. You can check and stop unnecessary background processes in Windows using your system’s Task Manager. Here are the steps:
- Press the Ctrl+Shift+Esc keys to open the Task Manager window.

- Navigate to the Processes tab and check the Memory section.
- You can see the memory consumption of all the applications in your system.
- Select the unwanted applications and click on End Task.

Now, try to open the Excel file.
Method 4: Repair your Excel File
Sometimes, Excel throws the “File not loaded completely” error if it fails to read the data in your file. This might happen if your Excel file is corrupt. You can use the Open and Repair utility in Excel to repair your Excel file. Follow the below steps:
- In Excel, click the File tab and then click Open.
- Click Browse to select the desired file.
- In the Open dialog box, click on the corrupted file.
- Click on the arrow next to the Open button and then select Open and Repair.

- Click on the Repair button.

- After repair, you will see a message as shown in the below figure.

- Click Close.
An Alternative Solution
If your file gets corrupted, then repairing it using the “Open and Repair” utility is a good option. However, the Open and Repair utility may not work if the file is severely damaged or corrupted. In such a case, you can use a professional Excel repair tool, such as Stellar Repair for Excel. This tool is primarily designed to repair inaccessible or corrupted Excel files. It can effectively work even if your file is too large or severely damaged. It can recover all the data from the corrupted Excel file without impacting its actual format. The software supports Excel files of almost all Excel versions.
Conclusion
The File not loaded completely issue in Excel may occur due to numerous reasons. Try the troubleshooting methods listed above to resolve the issue. If the Excel file is corrupt, then you can try repairing your file using the Open and Repair tool. However, it can fix only minor corruption issues. If your file is severely corrupted, then use Stellar Repair for Excel . The software offers you the safest way to repair your Excel file without making any changes in the formatting. You can download the free trial version of the software today to scan and preview the Excel file.
Ways to Fix Personal Macro Workbook not Opening Issue
Many users have reported encountering issues while accessing personal macro workbook, such as personal macro workbook not opening, personal macro workbook not loading automatically, Excel personal macro workbook keeps getting disabled, etc.
Such issues may arise due to a problem with the directory where the personal workbook is stored. However, there are various other reasons that may lead to such issues. Below, we’ll discuss the reasons behind the personal macro workbook not opening issue and the solutions to troubleshoot and fix the issue. But before proceeding, let’s understand why personal macro workbook is used.
Why Personal Macro Workbook is used?
You can access macros in a specific Excel workbook. However, when you need to use the same macro in other Excel worksheets, then you can create a personal macro workbook. A personal macro workbook (Personal.xlsb) is a hidden workbook that is used to store all macros. It makes your macros available every time you open Excel.
Causes of Personal Macro Workbook not Opening Issue
You may encounter personal macro workbook is not opening issue when attempting to record macros. Some possible causes behind such an issue are:
- Personal macro workbook is stored at an untrusted location
- Location of xlsb is changed
- Personal macro workbook is hidden
- Personal macro workbook becomes corrupted
- Disabled items in add-ins
- Workbook is Read-only
Methods to Fix the “Personal Macro Workbook not Opening” Issue
Follow the given methods to fix the personal macro workbook is not opening issue:
Method 1: Check the Path of Personal.xlsb
The personal macro workbook (Personal.xlsb) file is stored in XLStart folder. It opens automatically when you open your Excel application. However, sometimes it fails to load automatically. It usually occurs when you try to open the file from an incorrect path. You can check the path of Personal.xlsb by following these steps:
- Open the workbook.
- Click on the Developer tab.

- Press Alt + F11 to open Visual Basic Editor.
- Go to View > Immediate Window.
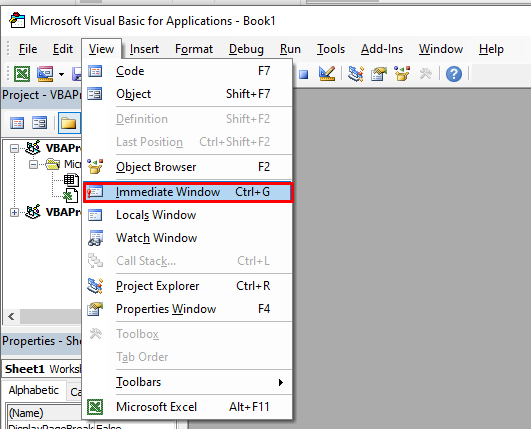
- In Immediate Window, type the following code to know the location of the workbook:
?thisworkbook.path.
- Then, hit Enter.
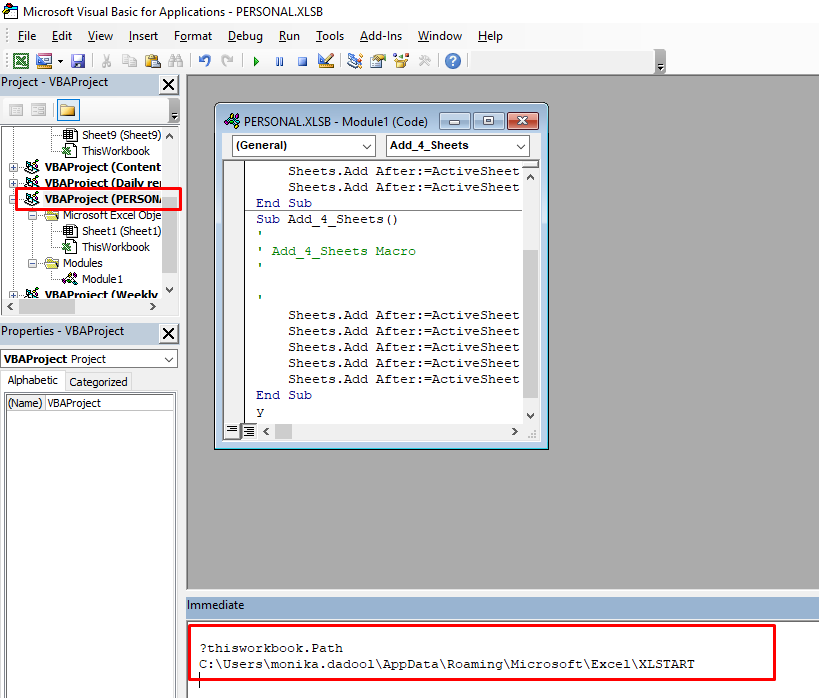
- You will see the path of the personal macro workbook.
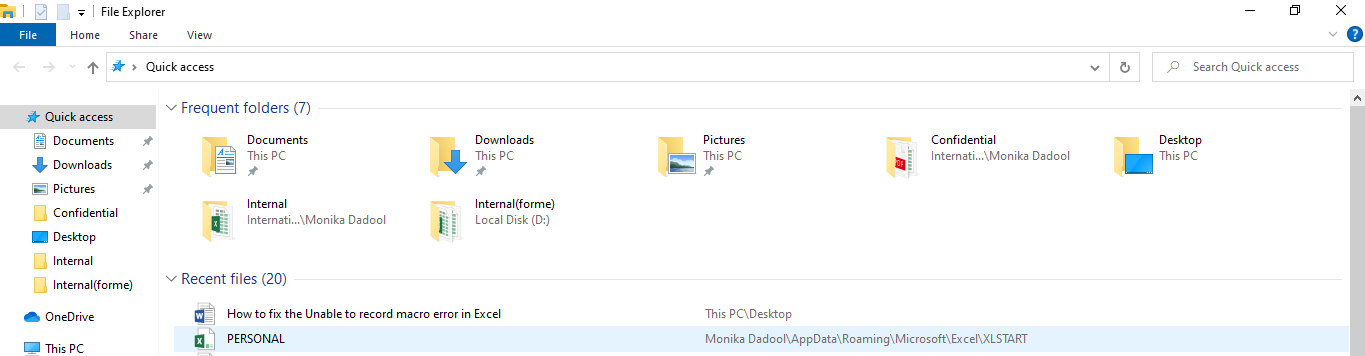
- Copy the path and paste it into Quick Access field in File Explorer.
Method 2: Unhide Personal Macro Workbook
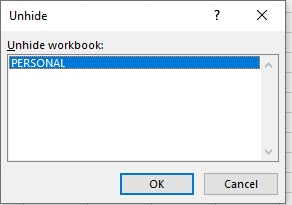
If personal macro workbook is hidden, you may unable to see and open the Personal.xlsb file. To unhide the personal Macro workbook, follow the below steps:
- In Microsoft Excel, go to View and then click Unhide

- The Unhide dialog box is displayed. Click PERSONAL and then OK.
Method 3: Enable the Macro Add-ins
You may unable to open the previously recorded macros in your personal macro workbook if the macros are disabled. To check and enable the items, follow these steps:
- Go to File > Options.
- In Excel Options, click on the Add-ins
- Select Disabled Items from the Manage section and click on Go.
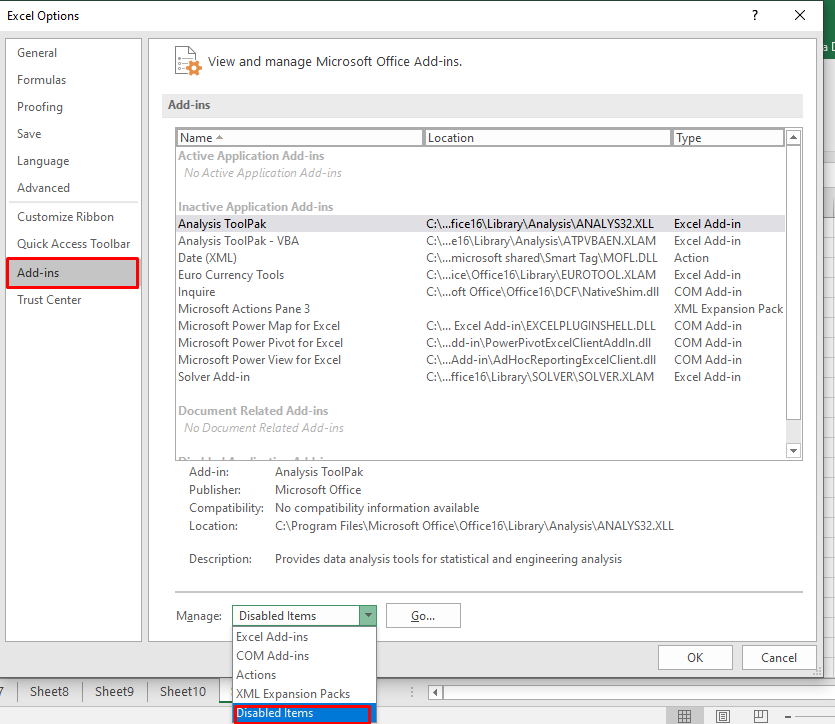
- The Disabled Items dialog box appears. Click on the disabled item and then click Enable.
Method 4: Change the Trusted Location
You may encounter the “personal macro workbook not opening” issue if the Personal.xlsb file is stored at an untrusted location. You can check and modify the path of XLSTART folder using the Trust Center window. Here are the steps:
- Open MS Excel. Go to File > Options.
- Click Trust Center > Trust Center Settings.
- In the Trust Center Settings dialog box, click on Trusted Locations.
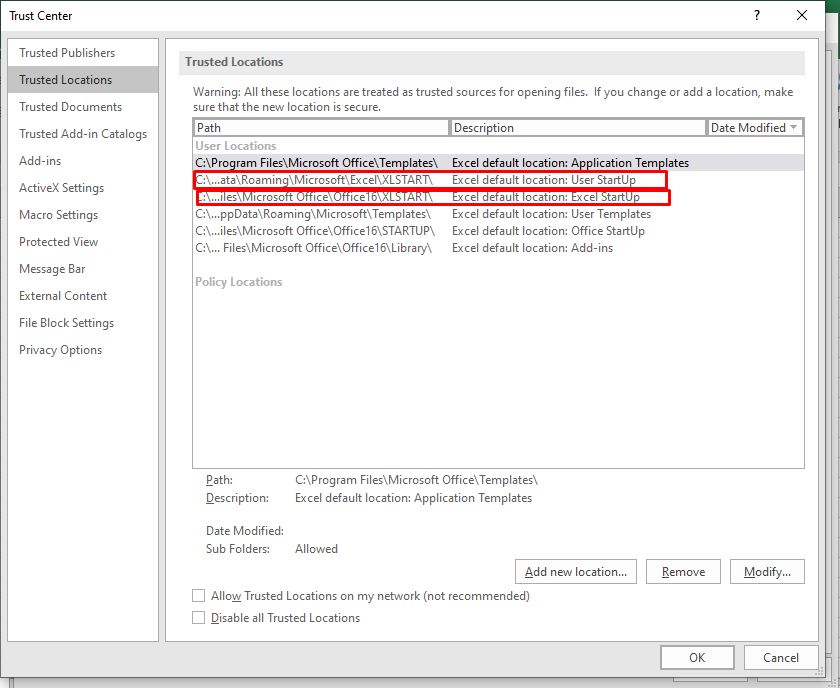
- Verify the path of the XLSTART If it is untrusted or there is any issue, then click Modify and then click OK.
Method 5: Repair your Excel File
You may fail to open personal macro workbook if it is corrupted. To repair the corrupt workbook, you can use the built-in Open and Repair utility in MS Excel. To use this tool, follow these steps:
- Open your Excel application.
- Click File > Open.

- Browse to the location where the corrupted file is stored.
- In the Open dialog box, select the corrupted workbook.
- From the Open dropdown list, click Open and Repair.
The dialog box appears with the Repair and Extract buttons. Click Repair to retrieve all possible data or the Extract option to recover the data without formulas and values.
If the Open and Repair utility fails to repair the corrupted Excel workbook, then you can use a professional Excel repair tool, such as Stellar Repair for Excel. It can easily repair severely corrupted Excel (XLSX and XLS) files and recover all the components. You can download the free trial version of the tool to preview the recoverable data.
Closure
This article discussed the ways to fix the personal macro workbook not opening issue. In case you are unable to open the personal macro workbook because of corruption in the workbook, you can use the Open and Repair utility in MS Excel. If it fails, then you can use Stellar Repair for Excel to fix corruption in the Excel file and recover all its data with complete integrity.
Also read:
- All About Factory Reset, What Is It and What It Does to Your Lava Yuva 2? | Dr.fone
- Complete guide for recovering video files on Samsung Galaxy M34 5G
- How do you play HEVC/H.265 files on Xiaomi 14 Pro?
- Complete guide for recovering pictures files on V27e.
- Complete guide for recovering video files on Asus ROG Phone 8
- In 2024, Is pgsharp legal when you are playing pokemon On Tecno Camon 20 Premier 5G? | Dr.fone
- Android Call History Recovery - recover deleted call logs from Xiaomi Redmi Note 13 Pro 5G
- In 2024, How To Unlock a Motorola Edge 2023 Easily?
- How To Transfer Data From iPhone 14 Plus To Other iPhone 14 devices? | Dr.fone
- [Updated] From Content Creator to Cash Generator Your Facebook Journey for 2024
- How To Enable USB Debugging on a Locked Infinix Smart 8 HD Phone
- [New] 2024 Approved Addressing Disrupted Video in OBS Studio
- Calls on Xiaomi 13T Go Straight to Voicemail? 12 Fixes | Dr.fone
- [Updated] Perfect Your Preview Fullscreen Mastery with Premiere Pro
- In 2024, Greening the Grid Paving the Way for Sustainable Metropolises
- Updated In 2024, Do You Want a LUT that You Can Use for Your High-Definition Content? You Can Use Rec 709 LUT Premiere Pro for Your HD Digital Media to Give the Perfect Result
- Title: Filter Not Working Error in Excel 2010 Fix 2024 | Stellar
- Author: Nova
- Created at : 2024-06-18 01:29:12
- Updated at : 2024-06-19 01:29:12
- Link: https://phone-solutions.techidaily.com/filter-not-working-error-in-excel-2010-fix-2024-stellar-by-stellar-guide/
- License: This work is licensed under CC BY-NC-SA 4.0.
