
Filter Not Working Error in Excel 2021 Fix 2024 | Stellar
Filter Not Working Error in Excel [Fix 2024]
Summary: The filter is not working issue in Excel can occur due to several reasons, like blank rows, hidden rows, merged cells, corrupted data, etc. In this post, we will mention the reasons why the filter is not working correctly in Excel and several fixes to resolve the issue. We will also mention an advanced Excel repair tool to repair the Excel file if corruption in file is the cause of the issue.


You can use the Filter function in Excel to filter data in large-sized Excel files quickly. While using Excel filters, sometimes, you face a situation where the filter is disabled or may fail to function properly.

The Excel filter usually fails to work if you have not selected the complete and correct range of data. Let’s learn more about the “Sort and Filter not working in Excel” issue and look at the possible methods to fix it.
Why the Filter is not Working in Excel?
You can face the “filter is not working” issue if you are applying the filter on a protected worksheet or trying to find the data from a hidden row. Besides this, there could be many other reasons contributing to this issue, such as:
- The data you are trying to filter is in merged cells.
- The Excel file automatically selected the data up to the first empty cell, excluding the remaining rows.
- Grouped sheets in Excel file.
- Blank row in the Excel sheet.
- You are trying to apply a filter on an invalid data range.
- The workbooks in which you’re facing the filter issues are corrupted.
- You are specifying incorrect criteria in the filter columns.
Solutions to Resolve the Filter is not Working Issue in Excel
There might be two scenarios: the Excel filter option is disabled/grayed out or the filters fail to function properly. You can follow the given troubleshooting solutions to resolve the issue based on the scenario you’re facing.
Scenario 1 – Filter Option is Disabled or Grayed Out
Method 1: Check and Un-group the Worksheet
When you apply filters to a single sheet in a grouped set, Excel disables the filter option in other sheets within the group. You can check the grouped sheets and try ungrouping them to enable the filter option. Here’s how to do so:
- In the Excel file, go to the Group section.

- Right-click on the Ungroup Sheets.
Alternatively, you can press the Shift + Alt + Left keys to ungroup the sheets.
Method 2: Unprotect Worksheet
The “disabled Excel filter” issue can also occur if your worksheet is protected. You can unprotect the worksheet to enable the filter option. To do so, go to the Review tab and then select Unprotect Sheet.

Method 3: Check and Uninstall Excel Add-ins
Sometimes, the Excel filter gets disabled due to faulty or corrupted Excel add-ins. You can run the Excel in Safe mode to check whether the issue has occurred due to add-ins. To do this, type excel /safe in the Run window and click OK.

In safe mode, if you see the filter option, it indicates some problematic Excel add-ins were causing the issue. In such a case, you can check and uninstall the faulty Excel add-ins to fix the issue.
Scenario 2 – Filter is not Working
Method 1: Try Clearing Filters
Sometimes, the Excel filter fails to work correctly if some filters from the previous sessions are still active. In such a case, you can clear the applied filters. Follow the below steps:
- In Excel file, click Sort & Filter option.
- Select clear.

Method 2: Select Entire Data
The filter not working issue in Excel can occur when the range selected for filtering is incomplete or incorrect. You need to make sure that you’ve selected the entire data range in Excel. You can use the Ctrl+A keys to select the entire content in the worksheet.
Method 3: Check and Delete Blank Cells from the Table’s Columns
When you apply a filter to the data, Excel expects data to be in a continuous range. Excel filters do not consider the blank cells, thereby resulting in incorrect functioning of the filter. To resolve this issue, check and delete all blank cells. In case your Excel file is too large to delete the blank cells, then you can add a “Serial number” row as an alternative. Adding serial number row creates a data continuity, thus helping in fixing the filter-related issue.

Method 4: Unhide Hidden Rows and Columns
Hidden rows or columns in worksheets can also affect the filter functionality. You can check and unhide rows/columns to troubleshoot the issue. Here is how to do so:
- In the affected Excel file, go to Home.
- Click on Format > Hide & Unhide.


- Click Unhide Rows or Unhide Columns (as required).

Method 5: Unmerge Cells
You can experience the filter in Excel is not working issue if you are using the filter to extract data from merged cells. Ensure to unmerge the “merged cells” before applying a filter in Excel. Follow the below steps to unmerge the merged cells in Excel:
- Navigate to the Home option.
- In the toolbar, select the Merge & Center option.
- Click Unmerge Cells.
Method 6: Repair the Workbook
Sometimes, the Filter Not Working in Excel issue can occur due to inconsistencies in file structure. If these issues occurred due to corruption in the worksheet, you can repair it using the Open and Repair tool. It is an in-built tool in Excel that is used to repair corrupted Excel files. Here are the steps to use this tool:
- In the Excel application, navigate to the File option.
- Click Open and then click Browse to choose the Excel file.
- In the Open dialog box, click the problematic Excel file.
- Click the arrow next to the Open option and select Open and Repair.
- Click Repair to recover as much data as possible.
- The application prompts a message after the repair process is complete. Click Close.
In most cases, the Open and Repair tool can easily fix corruption issues in the Excel file. However, for any reason, if the open and repair tool doesn’t work you can consider repairing the file using a professional Excel Repair tool. Stellar Repair for Excel is one such advanced and secure tool to repair Excel files. With this tool’s powerful scanning capabilities, you can repair highly corrupted Excel files and recover all their objects with complete integrity. The tool is compatible with all Windows editions, including the latest Windows 11.
Closure
Several reasons are associated with the filter not working issue in Excel. The filter option may not work as expected if you have not selected the complete and correct range of data or for many other reasons. You can follow the troubleshooting methods discussed above to fix the issue. If the filter fails to work due to corruption in the workbook, then try Stellar Repair for Excel . It is an advanced tool that can even repair severely damaged files. It also helps to recover all the data from corrupted files without changing the original formatting. You can check the tool’s functionality by downloading its demo version. It allows you to preview all the repairable objects in the corrupted Excel file.
How to Fix Excel has Encountered a Problem
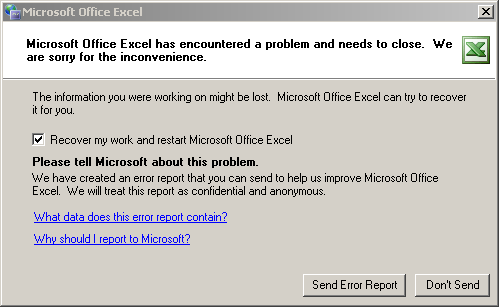
While working on MS Excel, you may encounter various errors that can hamper your work and productivity. One of the errors that you may receive is ‘Microsoft Excel has encountered a problem and needs to close’.Due to this error, your Excel program may stop and asks you to recover the data from Excel file.
What are the Reasons for ‘MS Excel has Encountered a Problem’ Error?
Following are some primary causes that may result in the ‘Microsoft Excel has encountered a problem and needs to close’ error:
- Corrupt Excel File: If you try to open a corrupt or damaged Excel file, the file may not open and displays this error message.
- File not Saved Properly: If Excel files aren’t saved correctly, this error may occur when you open the file.
- Incompatible File Version: If the MS Excel application version does not support the Excel file version, the file may not open and throws the error.
- Issues with MS Office/MS Excel Installation: This error can sometimes be caused due to damaged MS Office/MS Excel installation.
How to Fix ‘MS Excel has Encountered a Problem’ Error?
You can resolve the error by using the following methods:
1. Try to Open Excel in Safe Mode
Open the Excel application in safe mode and then try to open the Excel file. This will help you find out if the problem is caused by some incompatible add-ins. The steps are as follows:
- Hold Windows + R keys together to launch the Run dialog box.
- Type Excel /safe in the search box and hit Enter.
- If your Excel application opens in safe mode, it means that the issue is caused due to incompatible or faulty add-ins. In such a case, you need to disable the add-ins:
- Go to the File menu and click the Options menu. Further, choose the Add-ins option.
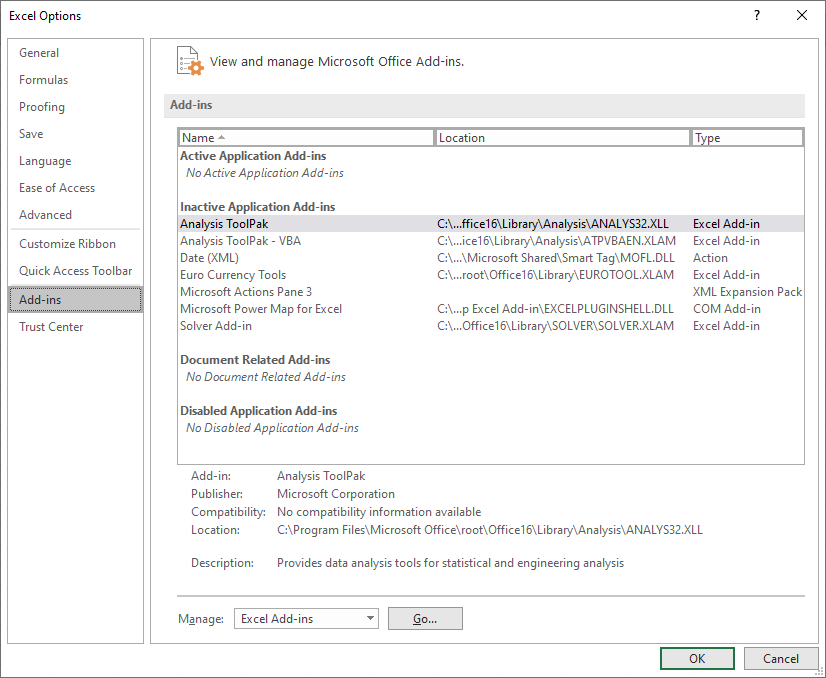
- Now, choose the Go button at the bottom of the Excel Options window.
- A list of available add-ins appears.
- Now, uncheck the boxes against the add-ins.
2. Disable Macros Using the Trust Center Settings
Sometimes, the Macros prevent Excel from managing the files. You can disable the Macros to resolve the issue. Follow these steps:
- Launch your MS Excel application.
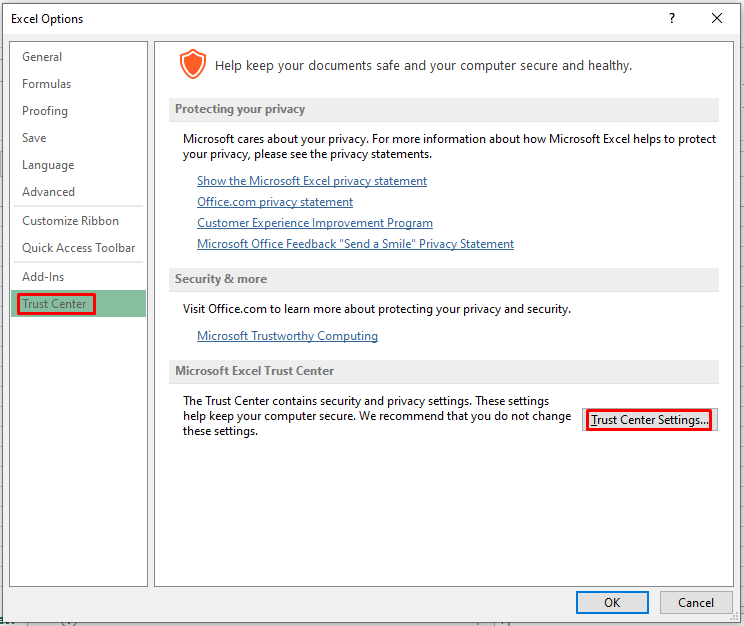
- Now, go to File > Options > Trust Center.
- Further, click the Trust Center Settings.
- Now, navigate to the Macro Settings option.
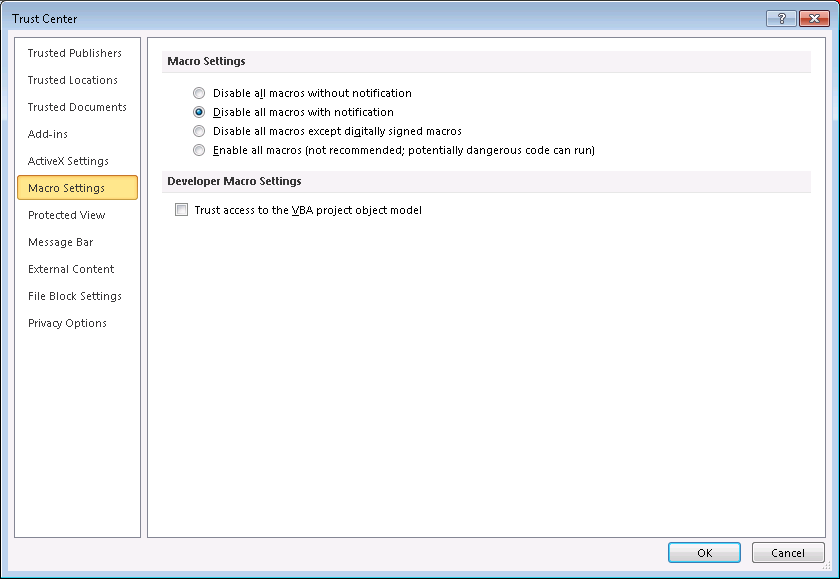
- Herein, select the ‘Disable all macros with notification’ radio button. Then, click OK.
3. Repair MS Office Application
Sometimes, problems with your MS Office application may cause the Excel has encountered a problem error. In such a case, you need to repair your MS Office application. Here are the steps to do so:
- Launch Control Panel > Uninstall a Program.
- Find your MS Office application and click the Change option.
- A new window will appear. Herein, select the Repair option.
- Now, follow the MS Office installation wizard to finish the repair process.
What to do if the above methods don’t work?
If you have tried the solutions mentioned above and are still not able to resolve the ‘Excel has encountered a problem and need to close’ error, it indicates that the Excel file is corrupt. You can use a professional Excel repair software, such as Stellar Repair for Excel , to repair the corrupt file. The software repairs the file and retrieves all the data, including the tables, charts, formulas, etc. from the damaged workbook. It is compatible with all the MS Excel versions.

To know how Stellar Repair for Excel works, see the following video:
To Wrap Up
The ‘Excel has encountered a problem and needs to close’ error may occur due to different reasons. You can fix this error by following the methods mentioned in this post. If the error has occurred due to corruption in the Excel file, you can use a third-party Excel repair tool, like Stellar Repair for Excel. The software can repair damaged or corrupt Excel file of any size and retrieve all the data.
[Fixed] Excel VBA Runtime Error 9: Subscript Out of Range
Summary: The runtime error 9 in Excel usually occurs when you use different objects in a code or the object you are trying to use is not defined. This post will discuss the reasons behind the Excel VBA error “Subscript out of Range” and the solutions to resolve the issue. It will also mention an Excel repair tool that can help fix the error if it occurs due to corruption in worksheet.
Many users have reported encountering the error “Subscript out of range” (runtime error 9) when using VBA code in Excel. The error often occurs when the object you are referring to in a code is not available, deleted, or not defined earlier. Sometimes, it occurs if you have declared an array in code but forgot to specify the DIM or ReDIM statement to define the length of array.
Causes of VBA Runtime Error 9: Subscript Out Of Range
The error ‘Subscript out of range’ in Excel can occur due to several reasons, such as:
- Object you are trying to use in the VBA code is not defined earlier or is deleted.
- Entered a wrong declaration syntax of the array.
- Wrong spelling of the variable name.
- Referenced a wrong array element.
- Entered incorrect name of the worksheet you are trying to refer.
- Worksheet you trying to call in the code is not available.
- Specified an invalid element.
- Not specified the number of elements in an array.
- Workbook in which you trying to use VBA is corrupted.
Methods to Fix Excel VBA Error ‘Subscript out of Range’
Following are some workarounds you can try to fix the runtime error 9 in Excel.
Method 1: Check the Name of Worksheet in the Code
Sometimes, Excel throws the runtime error 9: Subscript out of range if the name of the worksheet is not defined correctly in the code. For example – When trying to copy content from one Excel sheet (emp) to another sheet (emp2) via VBA code, you have mistakenly mentioned wrong name of the worksheet (see the below code).
1 | Private Sub CommandButton1_Click() |

When you run the above code, the Excel will throw the Subscript out of range error.
So, check the name of the worksheet and correct it. Here are the steps:
- Go to the Design tab in the Developer section.
- Double-click on the Command button.
- Check and modify the worksheet name (e.g. from “emp” to “emp2”).


- Now run the code.
- The content in ‘emp’ worksheet will be copied to ‘emp2’ (see below).


Method 2: Check the Range of the Array
The VBA error “Subscript out of range” also occurs if you have declared an array in a code but didn’t specify the number of elements. For example – If you have declared an array and forgot to declare the array variable with elements, you will get the error (see below):

To fix this, specify the array variable:
1 | Sub FillArray() |
Method 3: Change Macro Security Settings
The Runtime error 9: Subscript out of range can also occur if there is an issue with the macros or macros are disabled in the Macro Security Settings. In such a case, you can check and change the macro settings. Follow these steps:
- Open your Microsoft Excel.
- Navigate to File > Options > Trust Center.
- Under Trust Center, select Trust Center Settings.
- Click Macro Settings, select Enable all macros, and then click OK.

Method 4: Repair your Excel File
The name or format of the Excel file or name of the objects may get changed due to corruption in the file. When the objects are not identified in a VBA code, you may encounter the Subscript out of range error. You can use the Open and Repair utility in Excel to repair the corrupted file. To use this utility, follow these steps:
- In your MS Excel, click File > Open.
- Browse to the location where the affected file is stored.
- In the Open dialog box, select the corrupted workbook.
- In the Open dropdown, click on Open and Repair.
- You will see a prompt asking you to repair the file or extract data from it.
- Click on the Repair option to extract the data as much as possible. If Repair button fails, then click Extract button to recover data without formulas and values.
If the “Open and Repair” utility fails to repair the corrupted/damaged macro-enabled Excel file, then try an advanced Excel repair tool, such as Stellar Repair for Excel. It can easily repair severely corrupted Excel workbook and recover all the items, including macros, cell comments, table, charts, etc. with 100% integrity. The tool is compatible with all versions of Microsoft Excel.
Conclusion
You may experience the “Subscript out of range” error while using VBA in Excel. You can follow the workarounds discussed in this blog to fix the error. If the Excel file is corrupt, then you can use Stellar Repair for Excel to repair the file. It’s a powerful software that can help fix all the issues that occur due to corruption in the Excel file. It helps to recover all the data from the corrupt Excel files (.xls, .xlsx, .xltm, .xltx, and .xlsm) without changing the original formatting. The tool supports Excel 2021, 2019, 2016, and older versions.
How to repair ‘recovered’ Excel file that won’t open
Summary: You may unable to open the Excel file after file recovery. When you try to open the file you may prompt up with error messages. This blog will discuss those errors and their solutions. Besides this, it also mentions Stellar Repair for Excel to repair and recover the severely corrupted Excel file with no data loss.
Consider a scenario: A Windows 10 user accidentally deletes a folder containing multiple Excel (XLSX) files created in Excel 2013. The worst part was all the deleted files were important, and he did not have a backup, which would help him in restoring the data. Nonetheless, he was able to recover those data using a professional data recovery software. Next, he tried opening each of the recovered Excel files one by one. In doing so, his happiness turned into disappointment. And the reason was, some of the recovered Excel files failed to open prompting error messages, of course, due to corruption. In this scenario, all he needed was to repair ‘recovered’ Excel files that did not open. Know how to fix damaged Excel files that were recovered after deletion in this blog!
Before delving into the Excel file repair methods, acquaint yourself with the probable causes leading to damaged or corrupt Excel files. Although not essential, it shall be an added advantage in helping you to prevent Excel file corruption issues in the future.
The standard Excel file(s) Corruption Causes
- Power Outage – A power outage due to which a system closes suddenly or unexpectedly is a common cause of damaged Excel files.
- Forced System Shutdown – Shutting down the system forcibly without closing MS Excel files is another common cause of corrupt Excel files.
- PC Virus or Bug – Computer viruses or bugs may affect one or more data file if owners do not protect their PCs with powerful updated antivirus. Same is the case with malware attacks. The chances are that your computer is infected with one of these and has affected a few Excel files.
- Issues with Storage Devices – Damaged or corrupted Excel files can also be the outcome of hard drive issues in the data storage systems. Logical hard drive damage is one of the most significant issues.
The damaged Excel files may prompt up with error messages. These may be:
- ‘Excel unable to read file’
- ‘Filename is not valid’
- ‘This file is not in a recognizable format’
- ‘abc.xls file cannot be accessed. The file may be read-only’
- ‘Excel found unreadable content in (filename)’, ‘The file is corrupt and cannot be opened’
- ‘Microsoft Excel has encountered a problem and needs to close’
There exist multiple methods to repair Excel files which got damaged after recovery, and are as follows: XML method,
- Open Excel files with HTML
- Inbuilt ‘Open and Repair’ feature/tool in Excel
- Repair damaged Excel file from TMP file by using Excel AutoRecover and AutoBackup features
- Recover data by configuring ‘calculation option’ as manual
- Moving/copying or transferring data to a different location
- Stellar Repair for Excel software
Taking Stellar software versus other methods, the former is a software solution that repairs damaged (XLS and XLSX) file quickly in major three steps: Select->Repair->Save, whereas others fall into the category of manual processes and consume both time and resources. Among the manual processes ‘Open and Repair’ method is the least time and resource consuming, which you can try quickly by following the below steps:
Open and Repair method
- Click MS Excel tab and then the Open tab
- Select the damaged Excel file for repairing purpose
- Click the arrow present beside the Open Next, click Open and Repair tab
- Click either of the following:
- Repair tab (recovers maximum data)
- Extract Data tab (Recovers values and formulas if the repair process fails in recovering the complete data.)
Note – Use ‘Extract Data’ if ‘Repair’ is not successful.
If the Manual method is not competent enough to repair recovered Excel files that don’t open then opt for a software-based solution of deploying Stellar Repair for Excel software.
Software with 100% integrity and precision

Conclusion
As an automated software, Stellar Repair for Excel is easy-to-use. You do not need technical know-how and skill set, as required to execute the manual processes. On analyzing all these methods, it is suggested to use Stellar Repair for Excel having a user-friendly GUI to repair Excel files that became damaged after recovery, or if the recovered Excel file(s) that you once deleted accidentally has become corrupt now. Above all, it is an excellent software with multiple features and advantages. Use it to address all your MS Excel issues or if any recovered Excel file is corrupt.
Top 5 Ways to Fix Excel File Not Opening Error
Summary: MS Excel users sometimes face issues while using the MS Excel application. One such issue is the Excel file not opening error. In this post, we’ve mentioned the reasons that may result in this error and the ways to resolve it. Also, you’ll find about an Excel repair software that can help you repair corrupt Excel files.
Several Microsoft Excel users have reported encountering the ‘Excel file not opening’ error when opening their Excel file. There are several reasons that may cause this error. In this post, we’ll be discussing the reasons that may lead to the ‘Excel file not opening’ error and the top 5 ways to fix this error.
Why Does the ‘Excel File Not Opening’ Error Appear?
Following are some possible causes that may result in the ‘Excel file not opening’ error:
- There may be a problem with an add-in that is preventing you from opening the Excel files.
- There’s a chance that your Excel application is faulty.
- Your Excel program is unable to communicate with other programs or the operating system.
- The file association might have been broken. This is a common problem faced by users who have upgraded their Excel application or operating system.
- The file you’re trying to open is corrupted.
5 Ways to Fix Excel File Not Opening Error
Let’s explore the ways to resolve the Excel file not opening error:
1. Uncheck the Ignore DDE Checkbox
Dynamic Data Exchange (DDE)allows Excel to communicate with other programs. The Excel error may occur due to incorrect DDE settings. You need to ensure that the correct DDE configuration is enabled. Follow the steps provided below:
- Launch your MS Excel file.
- Go to File > Options.

- Now click on Advanced.

- Further, find the General option on the screen.

- Uncheck the option **‘Ignore other applications that use Dynamic Data Exchange (DDE)**’.
- Click OK to save the changes.
2. Reset Excel File Associations
When you launch your Excel file, the file association ensures that the Excel application is used to open the file. You can try to reset these associations and see if Excel opens after this. Proceed with the following steps to do so:
- Navigate to Start Menu and launch Control Panel.
- Now, navigate to Programs > Default Programs > Set Your Default Programs.

- A new window will open. Herein, find the Excel program in the list and select it. Now, select the option ‘Choose defaults for this program’. Click OK.

- A new window for ‘Set Program Associations’ will open.
- Check the box against the ‘Select All’ option.
- Further, click Save to reset the Excel File Associations settings.

3. Disable Add-Ins
Many people install third-party add-ins to enhance the application’s functionality. Sometimes, these add-ins can create an issue. Follow the below-mentioned steps to disable the problem creating add-ins:
- Launch MS Excel application.
- Navigate to File > Options > Add-ins.

- In the window that opens, go to the Manage option at the bottom.
- Herein, select the COM Add-ins option from the dropdown list. Click Go.

- In the COM Add-ins window, uncheck all the boxes to disable the add-ins. Click OK.

4. Repair MS Office Program
Sometimes the issue is not with your Excel file. Instead, the reason for the error can be a corrupt MS Office application. You can repair the program to fix the Excel file not opening error. Here are the steps:
- Press the Windows + R keys to launch the ‘Run’ dialog box.

- Enter the text ‘appwiz.cpl’ to launch the program and features window.
- Find the MS Office program in the list of applications.

- Right-click on it and select Change.

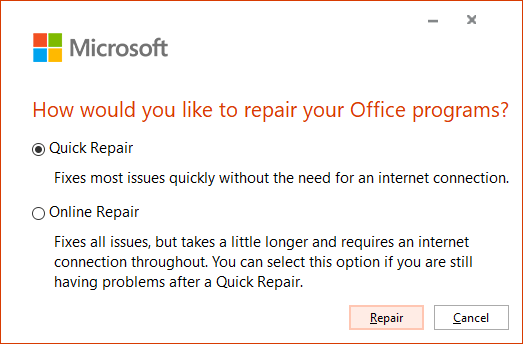
- In the new window, select the Quick Repair radio button. Click Repair.

- Follow the on-screen instructions to repair the Office application. Once the repair process is completed, you can try opening the Excel file to see if the problem is resolved.
5. Disable Hardware Graphics Acceleration
The hardware graphics acceleration assists in the system’s better performance, especially when you use MS Office applications, like MS Excel or Word. Sometimes, this causes the Excel file not opening issue. You can disable this option to try to resolve the issue. Here are the steps:
- Launch your MS Excel application.
- Navigate to File > Options > Advanced.
- Herein, go to the Display option.
- Uncheck the Disable hardware graphics acceleration checkbox. Click OK.


What If These Solutions Do Not Work?
If you have applied all the methods mentioned above and still cannot open your Excel file, there are chances that your file is corrupted. You can use a specialized Excel repair tool , such as Stellar Repair for Excel to repair the corrupted Excel file. This software has powerful algorithms that can scan and repair even severely corrupt Excel files, without any file size limitation. After repairing the file, it restores all the data, including tables, charts, rules, etc. to a new Excel, with 100% integrity.
To know how the software works, see the video below:
Conclusion
Before you proceed with resolving the Excel file not opening error, try to find out the root cause of this error. If you know the real reason, you can try the method right away. If the reason for the error is corruption in the Excel file, the best option is to repair the file using a professional Excel repair tool, such as Stellar Repair for Excel .
Excel File Corruption Warnings and Solutions
Summary: Many users reported error messages they receive when they try to save or open an Excel file. In this blog, you will learn about the warning messages that indicate your Excel file is corrupt and possible solutions to repair it. It also outlines the Stellar Repair for Excel to repair corrupt Excel files.
Excel users often report about receiving warning messages suggesting corruption in the workbook. This usually happens while opening an Excel file, ‘.xls’ or ‘.xlsx’ file created by earlier versions, or attempting to create a copy of the workbook.
Excel file corruption may occur due to several reasons including (but not limited to) virus infection, sudden system shutdown during write operation, and leaving excel file open on the shared network.
Occurrences of Excel File Corruption Warnings
Occurrence 1 – “Excel found unreadable content in

On clicking ‘Yes’, you will receive the following error:
“The file is corrupt and cannot be opened”.

Occurrence 2 – “Excel cannot open the file

Besides the warning messages outlined above, there are a few other tell-tale signs of Excel file corruption such as:
- Excel crashes or freezes, preventing you from accessing the workbook and information stored in it.
- Unexpected errors occur during the save operation listed as below:
- “An unexpected error has occurred. AutoRecover has been disabled for this session of Excel”.
- “Errors were detected while saving
”.
Solutions to Fix Excel File Corruption Issue
Follow the below-listed solutions to deal with corruption issues in Excel:
NOTE: If you encountered problem opening Excel files after upgrading to latest Windows Operating System (OS) and Office program, try updating your Office as well as Windows OS to latest patches provided on the Microsoft site. Microsoft frequently releases Office and Windows OS patches to help users’ correct known errors. Check if you can open the corrupt workbook after installing the update.
Solution 1 – Use Open and Repair Utility
Excel comes with a built-in recovery mechanism. It automatically starts ‘File Recovery Mode’ when a user opens a corrupt workbook, and attempts to open and repair the workbook. Sometimes, the recovery mode might not start automatically. In that case, you will need to repair the Excel file manually by using ‘Open and Repair ’ utility.
Steps to use Microsoft’s built-in repair utility are as follows:
Step 1: Select File > Open.
Step 2: Click the folder containing the corrupt workbook, and then click Browse.
Step 3: In the Open window, select the corrupt workbook.
Step 4: Next, click the arrow in the Open button, and then click Open and Repair.

Step 5: In the window that appears, click Repair.

If ‘Open and Repair’ doesn’t work in excel , select Extract Data to extract formulas and values from the corrupt workbook.
NOTE: If you need a quick solution to salvage your data, use an Excel file repair tool.
Or else, attempt the following solutions to deal with corruption in Excel file .
Solution 2 – Uninstall and Re-install Office Installation
NOTE: Make sure to create a backup of your Excel file before uninstalling and re-installing your Office application.
Download the Office uninstall support tool to remove the application.
You can read: Simple Ways to Open Corrupt Excel file Without any Backup
To reinstall Microsoft Office, follow these steps:
NOTE: Before proceeding with Office re-installation process, make sure that you have license keys ready.
Step 1: Open the Microsoft Office site.
Step 2: Select Sign in.
NOTE: You may skip this step if you’re already signed in.
Step 3: After signing in, from the Office sign-in page, click Install/Install Office
Your Office application will get re-installed. Now open the backed-up Excel file and see if the problem is fixed.
Solution 3 – Move Excel File to a Different Location
Often moving a corrupt Excel file to a different location can help solve the corruption problem. Here’s how:
Step 1: Open the corrupt Excel file by navigating to the following path:
C:\Users\User_Name\AppData\Roaming\Microsoft\Excel
NOTE: Make sure to replace User_Name with your user name. If you are unable to find the Excel file, you will have to search for the file manually in Program Files (x86).

Step 2: Open the Excel folder, and move the corrupt file to some other location.
Step 3: Delete the files from the Excel folder.
Now try opening the Excel file you have moved and see if the issue is resolved.
Solution 4 – Use Excel File Repair Software
If none of the above solutions works for you, use Stellar Repair for Excel. It is a specialized Excel file repair software that helps repair corrupt Excel file and recover workbook data in its original state.
Essentially, the software helps rebuild the corrupt file to restore every single object in the file. It can recover objects including user-defined charts, conditional formatting rules, formatting of the charts, properties of worksheet, engineering formulas, etc.

Steps to use Stellar Repair for Excel are as follows:
Step 1: Download, install and launch Stellar Repair for Excel software.
Step 2: In Select File window, click Browse to select the file you want to repair.

NOTE: If you are unaware of the Excel file location, click ‘Search’ in the Select File window to find the file.
Step 3: Once the files are selected, click Repair to initiate the repair process.

Step 4: Preview the repaired file and select all or specific files you want to save.

Step 5: Click Save File on Home menu.


Step 6: In Save File window, choose ‘Default Location’ or ‘Select New Folder’ to select the location where you wish to save the file. Click OK.

The selected files will be saved at the specified location.
Conclusion
You may experience Excel file corruption warning messages while opening or saving an Excel file. The file may become corrupt due to malware infection, sudden system shutdown, and forgetting to close workbook on a shared network. This post outlined occurrences of Excel file corruption warnings, and also described solutions to fix the issue.
You may try using Microsoft’s built-in ‘Open and Repair’ tool to repair corrupt workbook and recover data from it. If this solution doesn’t work, proceed with uninstalling and re-installing the Office application. Another solution is to move corrupt files to another location. But if the problem still persists, use Stellar Repair for Excel software to repair single or multiple Excel (.xls or .xlsx) files and restore data.
How to Fix Excel Run Time Error 1004
Summary: Run-time errors are windows-specific issues that occur while the program is running. This blog will teach you how to fix Excel run-time error 1004. In addition, you’ll learn about an Excel repair tool that can help fix the error 1004 if it occurs due to corruption in Excel files.
VBA (Microsoft Visual Basic for Application) is an internal programming language in Microsoft Excel. Sometimes, when users try to run VBA or generate a Macro in Excel, the Run-time error 1004 may occur. This error may occur due to the presence of more legend entries in the chart, file conflict, incorrect Macro name, and corrupt Excel files. In this blog, we have discussed the reasons and shared some solutions to resolve run-time error 1004.
Why This Error Occurs?
The run time error 1004 usually occurs when you run a VBA macro with the Legend Entries method to modify the legend entries in the MS Excel chart. It happens when the chart contains more legend entries than the available space, macro name conflicts, corrupt Excel files, or data-types mismatch in the VBA code.
Ways to Fix Excel Run-Time Error 1004?
Try the below workarounds to fix Excel run-time error 1004:
Create a Macro to Reduce Chart Legend Font Size
Sometimes, Excel throws the run-time error when you try to run VBA macro to change the legend entries in a Microsoft Excel chart. This error usually occurs when Microsoft Excel truncates the legend entries because of the more legend entries and less space availability. To fix this, try to create a macro that shrinks/minimize the font size of the Excel chart legend text before the VBA macro, and then restore the font size of the chart legend. Here is the macro code:
1 | VBCopy |
Uninstall Microsoft Work
You may encounter a run-time error 1004 in Excel version 2009 or older versions due to conflicts between Microsoft works and Microsoft Excel. This error usually occurs if your system has both Microsoft Office and Microsoft Works. Uninstalling one of them will fix the issue. Try the below steps to uninstall Microsoft Work:
- First, open the Task Manager using the shortcut CTRL + ALT + DEL altogether
- The Task Manager window is displayed.

- Click the Process tab, right-click on each program you want to close, and then click End Task.
- Stop all the running programs.
- Open the Run window and type appwiz.cpl to open the Programs and Feature window.

- Search for Microsoft Works and click Uninstall.
Try Deleting GWXL97.Xla File
The Add-ins files with .xla extension in MS-EXCEL is used to provide additional functionality to Excel spreadsheets. Sometimes, deleting the GWXL97.XLA file fixes the run-time error. Here are the steps to delete this file:
- Make sure you have an Admins rights, open the Windows Explorer
- Follow the Path C:\Programs Files\MSOffice\Office\XLSTART.
- Find and right-click on the GWXL97.XLA file
- Click Delete.
Change Trust Center Settings
Sometimes, run-time errors might arise because of incorrect security settings. The Trust Center settings help you find the Privacy and security settings for Microsoft Excel. Follow the below steps to change the Trust center settings:
- Open Microsoft Excel.
- Go to File > Options.
- The Excel options window is displayed.
- Choose Trust Center, and click Trust Center Settings.
- Tap on the Macro Settings tab, and select Trust access to the VBA project object model.

- Click OK.
Run Open and Repair Tool
The Runtime error also arises when MS Excel detects a corrupted worksheet. It automatically begins the File recovery mode and starts repairing it. However, if the Recovery mode fails to start, use the Open and Repair tool with the below steps:
- Click File > Open.
- Click the location and folder with a corrupted workbook.
- In the Open dialog box, choose the corrupted workbook.
- Click the arrow next to the Open tab, and go to the Open and Repair tab.
- Click Repair.
You can also opt for Stellar Repair for Excel if the Microsoft Excel’s built-in tool cannot fix the error.
Use Stellar Repair for Excel
Stellar Repair for Excel is a professional software for repairing damage. xls, .xlsx, .xltm, .xltx, and .xlsm files and recovering all its objects. Here are the steps to fix the error using this tool:
- First, download, install, and run Stellar Repair for Excel.
- Click the Browse tab on the interface window to choose the corrupted Excel file you need to repair.
- Click Scan. You will see the scan progress in the scanning window.
- Click OK.
- The tool can let you preview all the recoverable Excel file components including tables, pivot tables, charts, formulas, etc.
- Click Save to save the repaired file.
- A Save File dialog box will appear with the below two options:
- Default location
- New location
- Choose a suitable option.
- Click the Save option to repair the Excel file that you have chosen.
- Once the repair is complete, it will display a message “File repaired successfully.”
- Click OK.
Conclusion
Now you know the Excel run-time error 1004, its cause, and solutions. Follow the workarounds discussed in the blog to rectify the error quickly. However, Stellar Repair for Excel makes your task of removing run-time errors easy. It’s a powerful software to fix all the issues with Excel files. Also, it helps in extracting data from the damaged file and saves it to a new Excel workbook.
- Title: Filter Not Working Error in Excel 2021 Fix 2024 | Stellar
- Author: Nova
- Created at : 2024-07-17 17:13:37
- Updated at : 2024-07-18 17:13:37
- Link: https://phone-solutions.techidaily.com/filter-not-working-error-in-excel-2021-fix-2024-stellar-by-stellar-guide/
- License: This work is licensed under CC BY-NC-SA 4.0.