
Fixed Freeze Panes not Working in Excel 2016 | Stellar
[Fixed]: Freeze Panes not Working in Excel
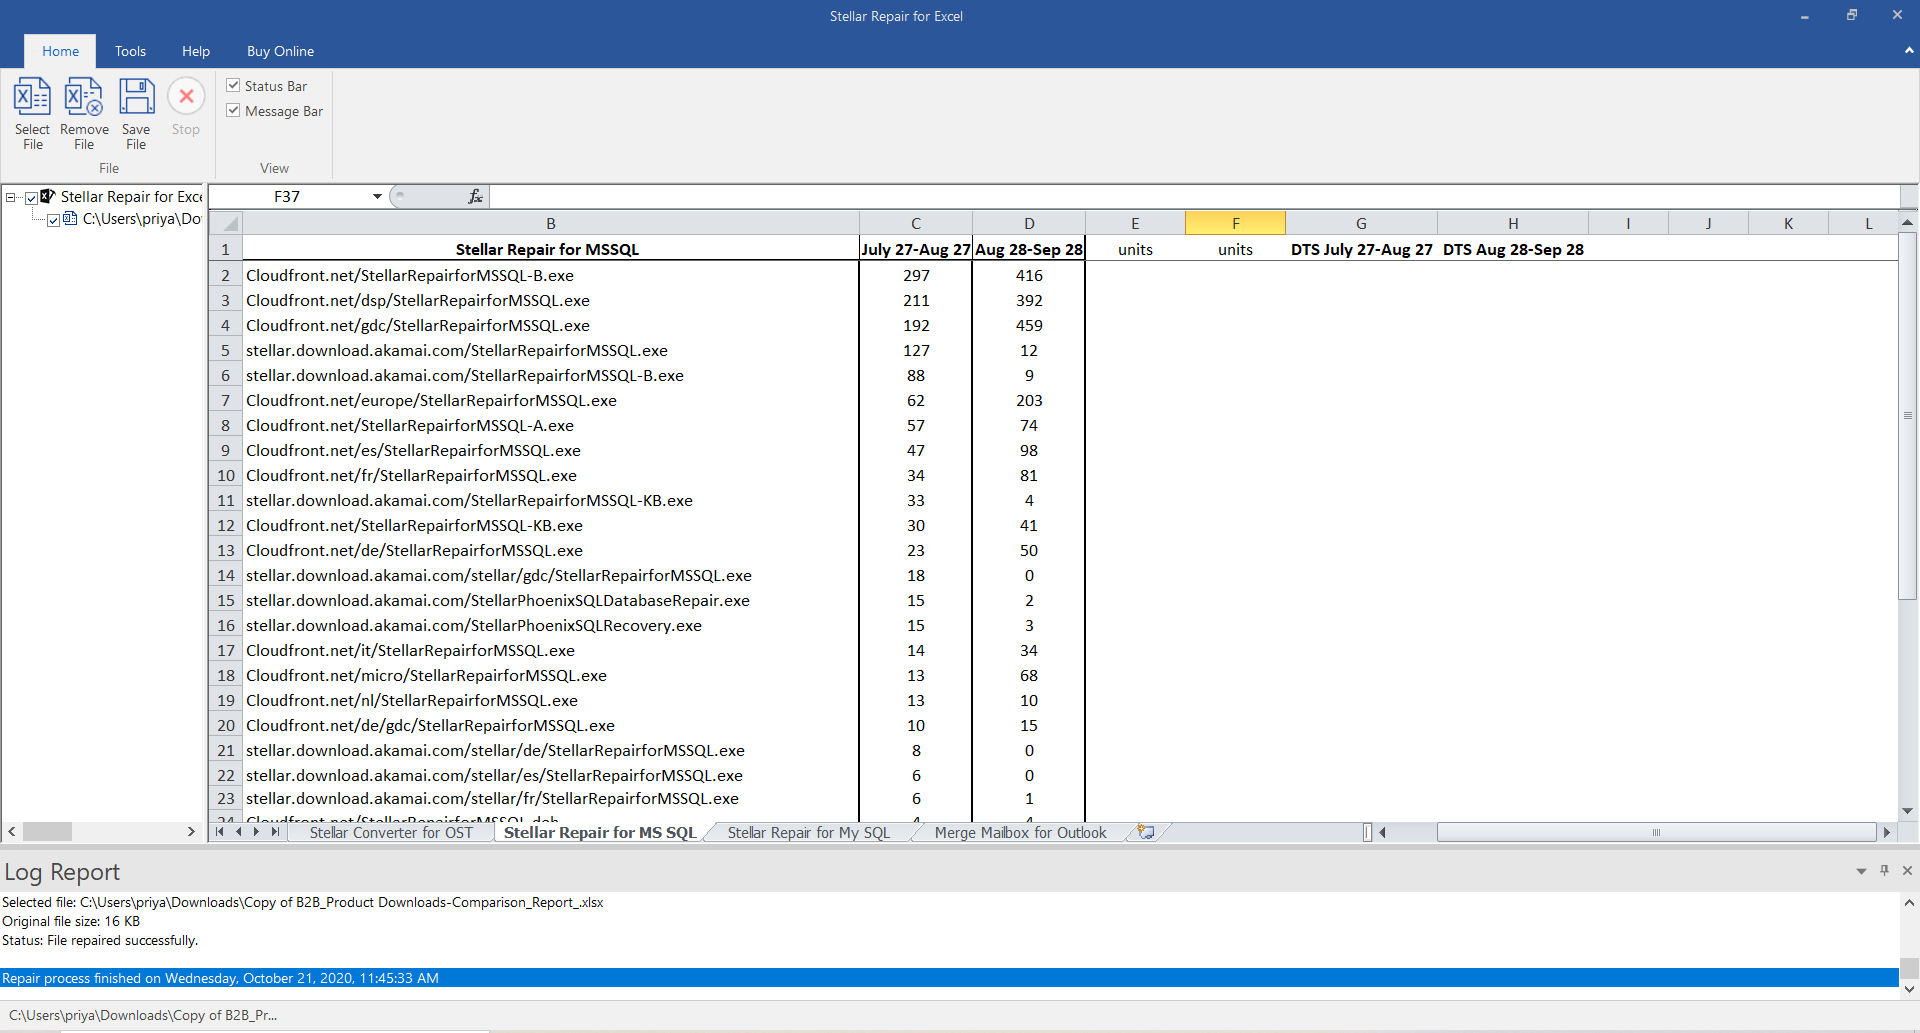
Summary: This blog discusses the “freeze panes not working” issue in Excel. It mentions the possible reasons behind the issue and offers workarounds and methods to fix it. If the issue is associated with corruption in the Excel file, you can use the specialized Excel repair tool mentioned in the blog to repair the affected file.

The freeze panes feature in Excel is used to freeze the row/column headings to keep them visible while scrolling the worksheet. It is a useful feature when you’re working on a large worksheet containing data that exceeds the rows and columns on the screen. Sometimes, you notice that the ‘Excel freeze panes feature is not working’. There could be numerous factors that can trigger this issue. Let’s know the reasons for the freeze pane not working issue in Excel and how to resolve this issue.
Why can’t I freeze panes in excel?
Several factors may contribute to the Excel freeze panes not working issue in Excel. A few of them are:
- The cell editing mode is enabled in the workbook in which you are trying to use the Freeze Panes feature.
- The Excel file is corrupted.
- The worksheet is protected.
- Advanced Options are disabled in Excel Settings.
- The Excel application is not up-to-date.
- You might be trying to lock rows in the middle of the worksheet.
- Your Excel workbook is not in normal file preview mode.
- Wrong/incorrect positioning of the frozen panes.
How to fix ‘Freeze Panes not Working’ in Excel?
The freeze panes option is available in the View bar. Sometimes, you’re unable to see the View option. It usually occurs if you are using the Excel Started version. Check and try to open the file in the advanced Excel version, which supports all the features. If you are using the advanced Excel version, then try the below workarounds to fix the freeze panes not working issue in Excel.

Workaround 1: Exit the Cell Editing Mode
If your Excel file is switched from normal file view mode to cell editing mode, you can encounter the freeze panes not working issue. In cell editing mode, certain features in Excel, such as the freeze panes, are temporarily disabled to prevent any conflicts. You can disable cell editing mode by pressing the ESC or Enter key. Now locate the View tab and check whether the freeze pane feature is working. If not, then try the next workaround.
### **Workaround 2: Change the Page Layout View**The Excel freeze panes not working issue can also occur if your workbook is opened in Page Layout view. The Page Layout view doesn’t support freeze panes. If you select page layout, the freeze panes option gets disabled.

To enable the freeze pane option, go to View and click the Page Break Preview tab.

Workaround 3: Check and Remove Options under the Data Tab
Sometimes, you can experience the “freeze panes not working” issue if Sorting, Data Filter, Group, and Subtotal options are enabled in Excel workbook. Such options, when enabled, can lead to unexpected problems with the freeze panes’ functionality. You can check and remove these features from your workbook. To do so, follow these steps:
- Open the Excel file in which you are getting the issue.
- Navigate to the Data tab.
- Check and remove the below features (if enabled):
- Sort
- Filter
- Group
- Subtotal

Workaround 4: Check and Unprotect Worksheet
The freeze panes feature may stop working if your worksheet is protected. You can try to disable the worksheet protection option. Here are the steps:
- In the Excel file, go to the Review tab.
- Click Unprotect Sheet.

After unprotecting the sheet, check whether the “freeze panes not working” issue is resolved. If not, follow the next workaround.
Workaround 5: Use Correct Cell Positioning
The freeze pane is not working issue in Excel can also occur when you use incorrect cell positioning to apply the freeze panes feature. Several users have reported facing this issue when trying to lock multiple rows with the wrong cell selection. So, use correct cell positioning to freeze the rows. For example, if you are trying to lock two rows in an Excel worksheet, then you need to click on 3rd row’s column.

What if the above Workarounds Fail to Fix the Freeze Panes not Working Issue?
If none of the above workarounds works, then there are chances that the workbook is damaged or corrupt. In such a case, you can try the below methods to repair the corrupt Excel workbook.
Run Open and Repair Utility
In case of corruption in the Excel file, you can use the Open and Repair tool in Excel to repair the file. To use this utility, follow these steps:
- In the Excel application, navigate to File and then click Open.
- Click Browse to select the workbook in which you are facing the issue.
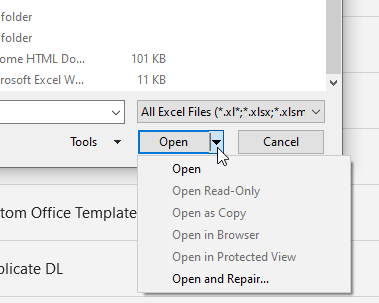
- The Open dialog box is displayed. Click on the affected file.
- Click the arrow next to the Open option and then click Open and Repair.

- Click on the Repair option to recover as much data as possible.
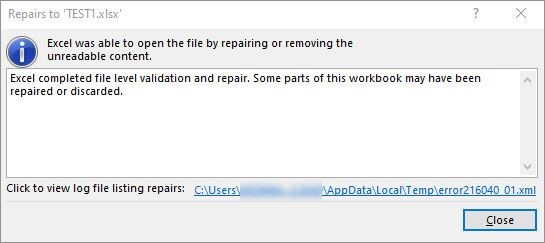
- You can see a completion message once the repair process is complete. Click Close.
Use a Professional Excel Repair Tool
If the Open and Repair tool doesn’t work to resolve complex file-related issues and your Excel file is severely corrupted, you can opt for a reliable third-party Excel repair tool, such as Stellar Repair for Excel. This tool can help you repair the Excel file and recover all the data with complete integrity. You can try the software’s demo version to scan the affected file and preview the recoverable data. The software is compatible with all MS Excel versions and Windows operating systems, including Windows 11.
Closure
The “freeze panes not working” issue in Excel can occur due to several reasons, like protected worksheet, incompatible Excel version, and incorrect cell position. Try the workarounds shared in the blog to fix the issue. If the Excel file is corrupt, you can use Stellar Repair for Excel to fix the corruption issues in the file. This tool can quickly repair the Excel file and recover all the data from the file with 100% integrity.

Solutions to open Excel Read Only Documents
‘Excel cannot open read-only documents’ is an error message that usually appears when you try to open an Excel (XLS or XLSX) file downloaded from the Internet, email, or the network server. It may also appear when you try to open an encrypted or password-protected Excel document. In such a case, MS Excel prevents the user from making any changes to the document.
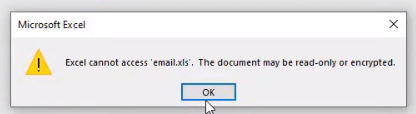
Reasons behind the “Excel cannot access ‘xxx.xls.’ The Document may be read-only or encrypted” Error
There could be several reasons that may cause the error. Some of them are as follows:
- Corrupt or damaged Excel workbook
- Incompatible or unsupported add-in
- Antivirus or malware software conflict
- Read-Only Excel file
- The file is encrypted
- File or drive read/write permissions issues
- Protected Excel workbook
- Damaged or missing MS Office (MS Excel) program files
Solutions to Open and Edit Read-Only Excel Documents
Below are a few solutions that can help you fix the ‘Excel cannot access ‘xxx.xls.’ The Document may be read-only or encrypted’ error and allow you to open and edit Excel documents.
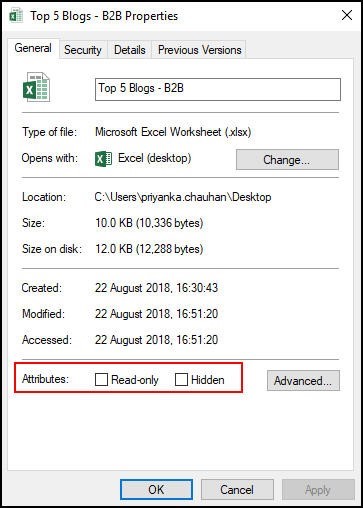
- Remove Read-only Attribute from Excel File Properties
The ‘Excel cannot open read-only documents’ error message may appear when the Excel file property is set to read-only. To check if this is the case, follow these steps:
- Right-click on the particular Excel (xls/xlsx) document and select ‘Properties’.
- Uncheck the ‘Read-only’ attribute and then click the ‘OK’ button.
Now try to open the Excel document and check if the problem is fixed.
- Adjust Antivirus Settings
A few antivirus programs block Excel files and other Office documents by opening those in ‘read-only’ mode. In such cases, try adjusting the antivirus settings to open the Excel files normally. This will allow you to edit, modify, and save the Excel workbook without encountering the “Excel cannot access ‘xxx.xls.’ The Document may be a read-only or encrypted” error message.
- Disable Protected-View
The error may appear when you try to open an Excel file received as email attachments or downloaded from unsafe source. The file may potentially contain viruses, worms, or other types of malware that could damage the system or the server.
To safeguard the system, MS Excel opens such files in Protected View. It may also open an Excel workbook in Protected Mode when it detects a problem with the file. This security feature allows you to read or view Excel files and reduces the risks to the computer system or PC.
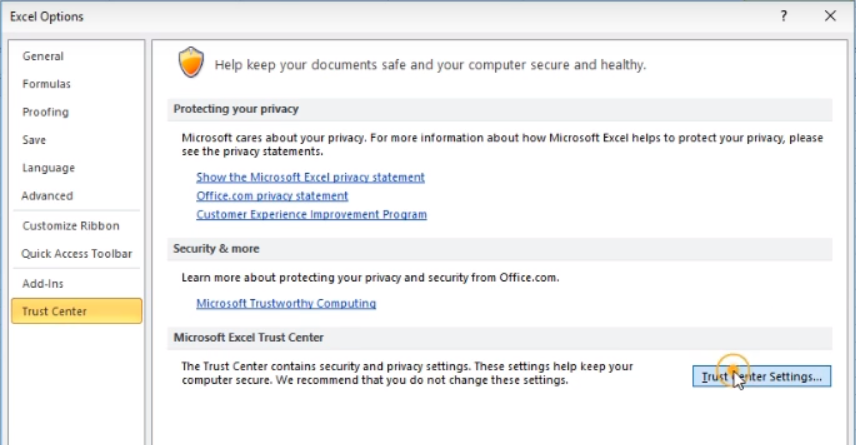
However, you can click File > Info and then click ‘Edit Anyway‘ to access and edit file content. You may also disable the Protected View setting via File > Options > Trust Center > Trust Center Settings…> Protected View. However, we do not recommend this.
- Renew/Activate Microsoft Office
If MS Office is in a deactivated state or its subscription has expired, the Office documents, including the Excel, could be in ‘read-only reduced functionality mode.’
In such a scenario, activate Microsoft Office or renew the Office subscription. Then open the Excel workbook and check if the problem of ‘Excel cannot open read-only documents’ is resolved.
- Check if OneDrive Storage is Full
If Excel files are saved on OneDrive with low or no storage space, you may encounter such issues with your files.
To know the amount of free space on OneDrive, follow these steps:
- On your PC, open Settings and navigate to OneDrive.
- Click ‘Sync Settings > File Storage‘ to see available space.
You may also visit onedrive.live.com, sign in to the account, and then check the available space. If there’s no space available or the drive is full, empty the storage space and see if the problem is resolved.
- Check and Update MS Office and Windows
Microsoft releases updates to fix known errors. Thus, it is critical to update both Windows and MS Office to the latest release and avoid issues, such as ‘Excel cannot access ‘xxx.xls.’ The Document may be read-only or encrypted.’
- Repair MS Office (MS Excel)
The error ‘Excel cannot open read-only documents’ may appear due to a problem with your MS Office (MS Excel) program. You can repair the MS Office program to resolve such errors. The steps are as follows:
- Open Control Panel and click Uninstall a Program link under Programs.
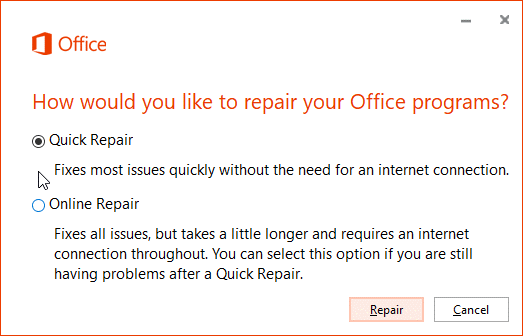
- Choose Microsoft Office from the list and click the Change button.
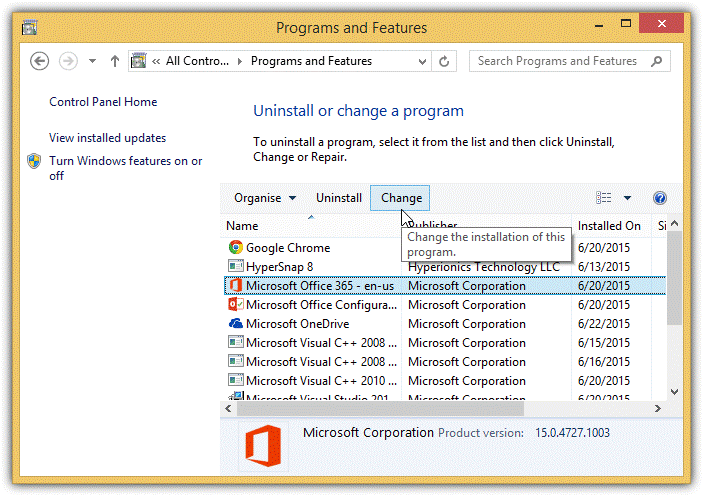
- Select Quick Repair and then click Repair to fix problems with MS Office and MS Excel. It will also restore any missing or damaged program files.
After the Repair, open the Excel workbook and check if the error is resolved.
- Check Permissions
The error message may also appear if you access an Excel workbook from a network or shared drive due to lack of write permission. Make sure you have read and write permissions assigned for the particular network drive. Alternatively, you can copy the file from the network drive and save it in your local folder to access and edit it without encountering this error message.
- Repair MS Excel File
If none of the solutions worked, the Excel workbook could be damaged or corrupt. To repair such damaged Excel workbook or spreadsheet, you can use the inbuilt ‘Open and Repair…’ option in MS Excel or install an Excel repair software , such as Stellar Repair for Excel. The software comes in handy when the Open and Repair option fails to fix the Excel workbook problems. It repairs the corrupt or damaged Excel workbook, extracts all components and content from the file with 100% integrity, and saves them in a new Excel workbook.
Conclusion
Sometimes, the ‘Excel cannot open read-only documents’ error can be resolved by a simple restart. But if it doesn’t work, you can follow the solutions discussed in this article to resolve the ‘Excel cannot open read-only documents’ issue. However, if the issue is caused due to a damaged or corrupt Excel workbook, these methods may not work. In such a case, you can use Excel’s inbuilt repair utility, i.e., Open and Repair, or install Stellar Repair for Excel software recommended by MVPs and industry experts to fix all kinds of problems with MS Excel workbooks.
Data Disappears in Excel - How to get it back
Summary: You may face the issue of ‘Excel spreadsheet data disappeared’ after changing Excel file properties and formatting rows and columns. This blog discusses the possible reasons for data disappearance and the solutions to fix the issue. Also, it mentions an Excel file repair tool to retrieve the data from the file. Sometimes, while editing or formatting a cell in an Excel spreadsheet, the data may go missing or disappear. Let’s discuss in detail the reasons that may cause the ‘Excel data disappeared’ issue along with the solutions.
Probable Reasons for Data Disappearing in MS Excel and Solutions Thereof
Reason 1 – Unsaved Data
While entering data in an Excel spreadsheet, it is important to save the data at frequent intervals. Doing so prevents any unsaved data from disappearing if you lose power or accidentally click ‘No’ when prompted to save the file. Unfortunately, such a situation is quite common as users often close the file without saving the recently made changes to a spreadsheet.

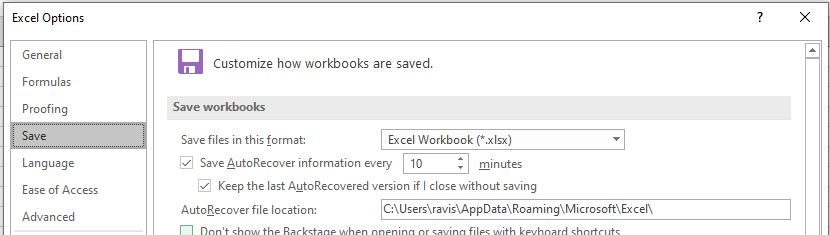
Solution – Use the ‘AutoSave’ Feature
With the AutoSave feature enabled in Excel, data won’t be lost in the event of power failure or abruptly closing the Excel program. By default, Excel automatically saves the information in a spreadsheet after every 10 minutes. You can reduce the limit to a few seconds to reduce the chances of Excel file data lost after being saved.

Reason 2 – Changing Excel Format
You can save an Excel file in various formats, like spreadsheet, text, webpage, and more. However, at times, saving the spreadsheet in a different format may lead to missing data. For example, when you save a workbook to a text file format, all formulas and calculations applied to the data will be lost.
Solution – Adjust a Spreadsheet for the Changed Format
If you’re changing the format of a spreadsheet, make space for the rows and columns. Also, remove all calculations before saving the file.
Note: If the sheet is shared on multiple computers, then save the file in compatibility mode.
Reason 3 – Merging Cells
You can combine two or more cells data to make one large cell. This technique is primarily used to fit the text of a title in a sheet. If there is data in two or more cells, then only the data in the top-left cell is displayed and the data in all other cells is deleted. If the other merged cells have been populated with data after merging, the data is not featured and it does not appear even after remerging the cells.
Solution – Merge Cells inside One Column
To merge cells without data loss, combine all the cells you want to merge within a column and do the following:
- Select the cells to be combined.
- Ensure that column width is wide enough to fit the contents of a cell.
- In the spreadsheet, under the Editing group, click ‘Fill,’ and then click ‘Justify.’

- Under Alignment, click on the ‘Merge & Center’ option to center align the text. Or, click on ‘Merge Cells’.
Note: This solution works for text only. You cannot use it to merge formulas or any numerical values. If you need to combine two or more cells with formula into a single cell, try using the Excel CONCAT function .
Reason 4 – Cell Formatting
Cells and text in the cells can be displayed in different colors to make the spreadsheet simple to create and infer. You may experience data loss when you try to modify the data or change the color or size of the data. Though the information may exist, the data may show an error due to the following reasons:
- White-colored text will not show in a white-colored cell
- Large font-sized data may not appear in small-sized cell
- Calculations may show (#VALUE) error after cell-formatting
Solution – Check and Clear Formatting
Make sure to use dark-colored text on a white-colored cell. Also, resize the cell to fit the text size. Check if numbers in a cell are entered as text. If so, you need to apply a number format to the text-formatted numbers. Read more about it, from here .
What Else You Can Do to Resolve the ‘Excel Data Disappeared’ Issue?
If you can’t recover the missing Excel file data, try to repair or extract the data from the file using the built-in Excel repair tool. Follow the below steps to use the tool:
- Open MS Excel, click File > Open > Computer > Browse.
- On the ‘Open’ window, select the file you want to repair and then click on the Open dropdown.
- Select Open and Repair.

Use the ‘Repair’ option to repair the file and recover as much data as you can from the repaired file. If this doesn’t work, use the ‘Extract’ option to recover the data.
If you fail to retrieve the disappeared data from that file using the above-listed steps, opt for an Excel repair tool , like Stellar Repair for Excel. This software has a proven track record of repairing corrupt or damaged Excel files and recover all the data.

The software helps:
- Fix all corruption errors. It helps in getting back the data which has disappeared.
- Repair a single as well as multiple Excel files.
- Recover all components of XLS/XLSX files – tables, chart sheet, cell comment, image and more.
- Preserve the worksheet properties and cell formatting.
- Support the latest Excel 2019 and earlier versions.
The Excel repair software repairs the Excel file in these simple steps:
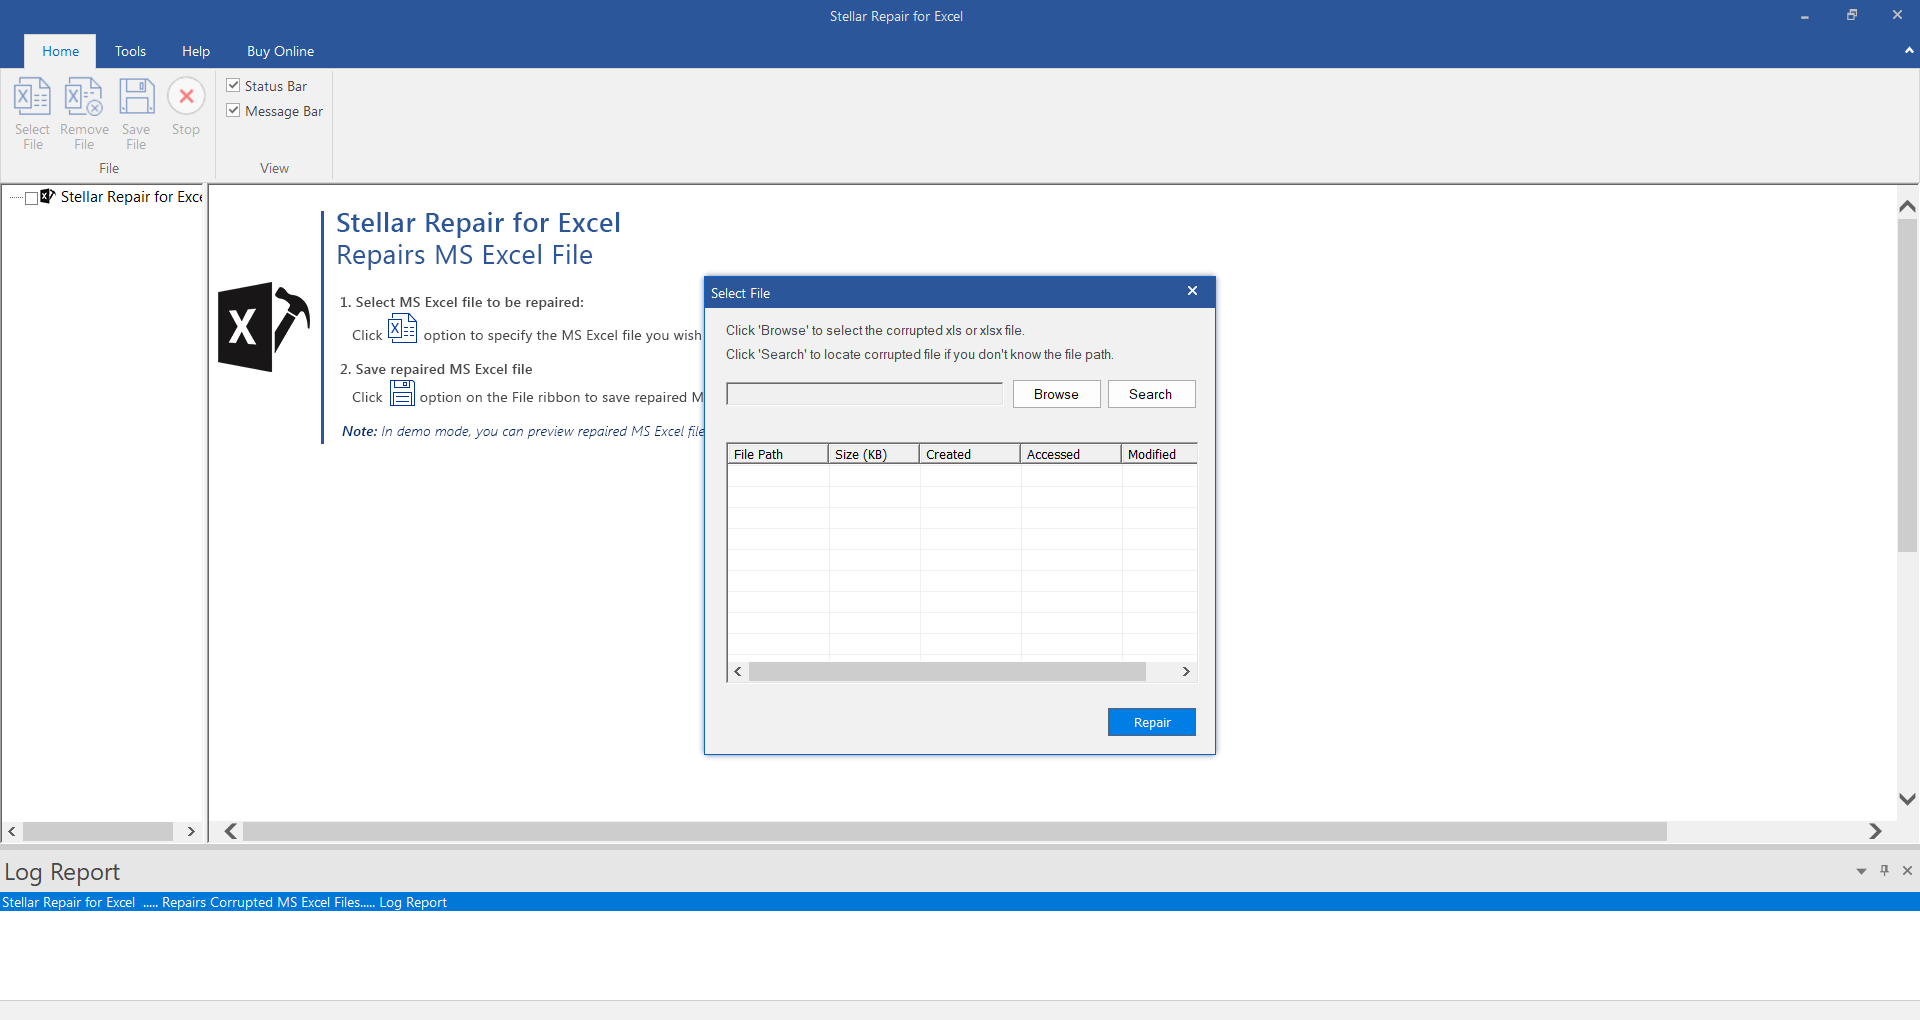
- Launch and open the software.
- Select the corrupt Excel file by using the ‘Browse’ option. If the file location is not available, then find the Excel file using the ‘Search’ option.

- Click ‘Repair’ to scan the corrupt file.

- Once the repair process is complete, verify the components of Excel file and check if the available preview shows complete data that disappeared from Excel.

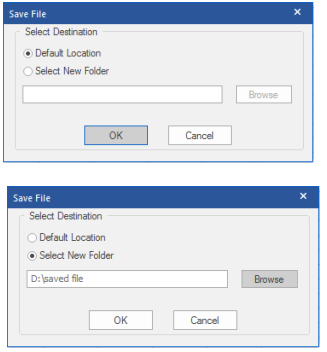
- Save file at default location or preferred location.

The Excel file with all the restored data will be saved at the selected location.
Conclusion
It is better to repair the affected Excel file than suffer the loss when data or text disappears in Excel. A professional software ensures that users get back all the data in the form of a new Excel file. Stellar Repair for Excel software repairs the corrupt file without modifying the original content and file format. The software’s easy-to-use user interface lets you perform the functions without formal software training and technical expertise.
Resolve Compile Error in Hidden Module in Excel: Causes & Solutions
The hidden module in Excel refers to a container with VBA codes, custom queries, and complex macros. The compile error in a hidden (protected) module in the Excel worksheet usually occurs when doing different activities on a macro-enabled sheet, such as merging .xls files. The error can result in macros execution failure. You need to quickly resolve this compile error to restore full functionality of the VBA code. Below, we’ll be discussing the solutions to fix this Excel error. But before that, let’s see why this error occurs.
You may encounter the Compile error in hidden module due to one of the following reasons:
- The code in the workbook is not compatible with the Excel application.
- Manual queries created in a previous version are no longer compatible with your current version of Excel.
- Missing references.
- Invalid .exe files (control information cache files) are automatically created with ActiveX control insertion in Excel file.
- Protected module is corrupted.
- The workbook with hidden module is damaged or corrupted.
- Incompatible add-ins.
- Incompatible Excel file version.
- The module is protected or password-protected.
- Missing or corrupted mscomctl.ocx file.
Excel can throw the compile error while compiling the code that exists in the protected module. So, first check the error and identify the hidden module that is creating the issue. You can unprotect the module. Also, ensure that you have permission to access the VBA code in the module. If the error still exists, follow the below troubleshooting methods.
Method 1: Re-register ActiveX Control Files or mscomctl.ocx Files
You can get the compile error in the Excel file, containing the VBA code related to ActiveX controls or OCX files. The ActiveX control files and OCX files (mscomctl.ocx files) are the components of Microsoft’s standard controls library. The compile error in the hidden module can occur if these files are missing. In this case, you can use the Regsvr32 tool to re-register the OCX files. The Regsvr32 is a command-line utility to register and unregister OLE controls in the Windows registry.
Method 2: Delete .exd Files
The .exd files are temporary files created by Excel when inserting ActiveX controls objects. These temporary files can lead to a compile error if they are corrupted. So, if this issue has occurred, particularly in the Excel file containing ActiveX controls, then deleting .exd files might fix the issue. To delete the .exd file, follow the below steps:
- First, open the Run window by pressing the Windows+R keys.
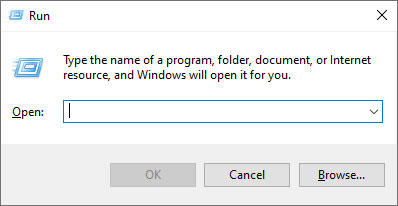
- In the Run window, type %appdata%.
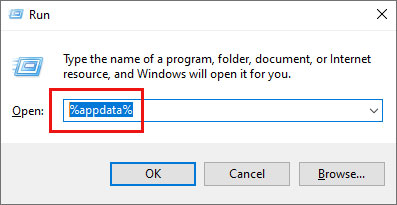
- In the Roaming window, click on the Microsoft option.
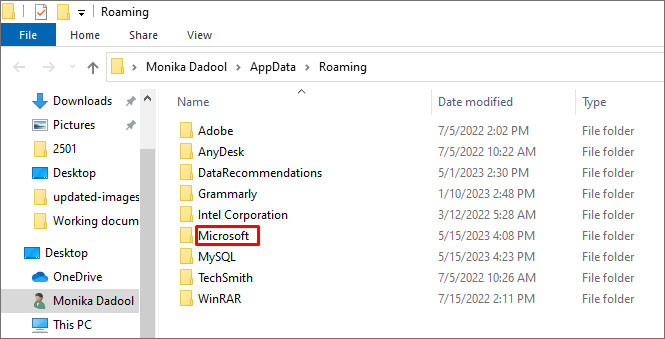
- Under Microsoft, you will see a list of folders. Search and click on Forms.
- Right-click on a file with .exd extension and select Delete.
- Once you delete the .exd files, restart your Excel application.
Method 3: Rollback the Office Updates
MS Office updates or upgrades may also cause the compile error in hidden module in Excel. If the error has occurred after downloading the recent Microsoft Office updates, try reverting to the previous version or uninstalling the recent updates to fix the issue.
Method 4: Unselect Missing References
The compile error in hidden module determine path in Excel can also occur if your file contains a reference to object library/type library, which is labelled as Missing. You can locate, check, and uncheck the references marked as ‘Missing’ to fix the issue. Here are the steps:
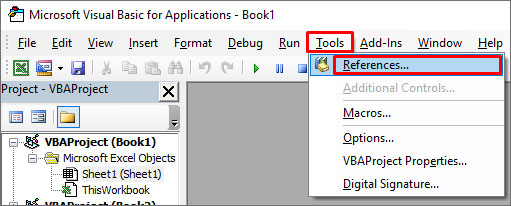
- Open your Excel and press Alt + F11 keys.
- The Visual Basic Editor is displayed.

- Go to the Tools option and then click References.
- In the References-VBAProject window, under Available References, search and unselect the references starting as “Missing”.
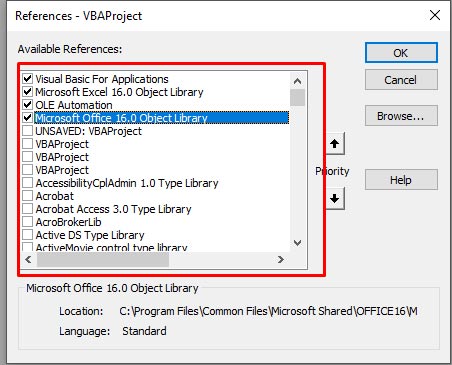
- Click OK.
Method 5: Check the Code in Module
The compile error in hidden module can occur if there are issues in the code within the module. The problems include incorrect or missing syntaxes, missing parameters/references, or the code contains incompatible functions or a wrong name of the object. You can check and fix these issues in the code by opening the VBA editor.
Method 6: Check and Remove Add-ins
In Excel, the compile error in macro-enabled files can also occur due to incompatible add-ins. You can check and disable the add-ins in Excel using the below steps:
- First, open the Run window and type excel /safe and then click OK. The Excel application will open in safe mode.
- Now try to open the affected Excel file. If it opens without the error, then check and remove the latest installed Excel add-ins.
- Navigate to the File option and then select Options.
- In the Excel Options window, click Add-ins.
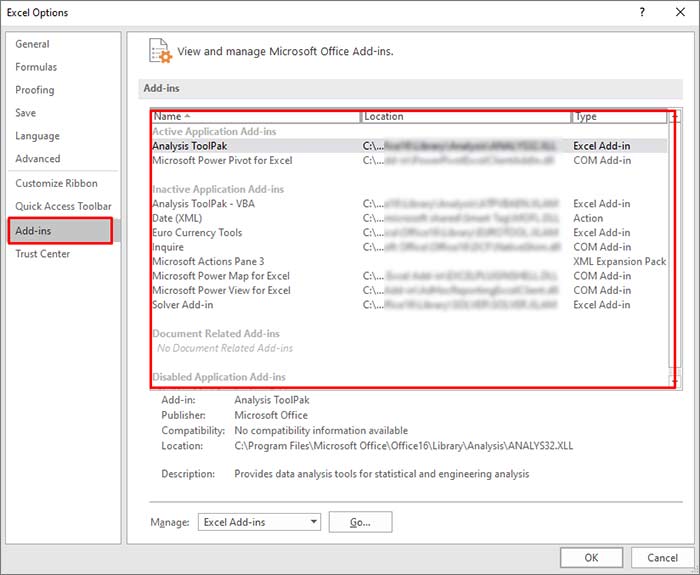
- Under Add-ins, search and select the latest add-ins, and then click on Go.
- In the Add-ins window, uncheck the add-ins and then click OK.

- Restart Excel and then check if the error is fixed or not.
Method 7: Repair the Corrupt Excel File
Corruption in the Excel file can affect the macros in the hidden module, which may result in the compile error. In such a case, you can try repairing the Excel file using Microsoft’s inbuilt utility -Open and Repair. To use this tool, follow these steps:
- Open your Excel application.
- Click the File tab and then click Open.
- Click Browse to select the affected workbook.
- The Open dialog box will appear. Click on the corrupted file.
- Click the arrow next to the Open button and then Open and Repair.
- You will see a dialog box with three buttons - Repair, Extract Data, and Cancel.

- Click on the Repair button to recover as much of the data as possible.
- After repair, a message is displayed. Click Close.
What if None of the Above Solutions Works?
If the above methods fail to get rid of the “compile error in hidden module” in Excel, then use an Excel repair tool such as Stellar Repair for Excel. This tool is specifically designed to repair the corrupted Excel file. It can recover all the components from corrupted Excel file (macros, queries, formulas, etc.) without changing their original formatting. The tool is compatible with all Excel versions and can be downloaded on a Windows system. You can download the free trial version of Stellar Repair for Excel to scan the corrupted Excel file and preview the data.
Closure
You can get the “compile error in hidden module” when Excel detects any issue while compiling the code in a protected module. It can occur when there is an issue with the macro-enabled Excel workbook or Excel add-ins. You can follow the above-mentioned methods to fix the issue. If the error occurs due to corruption in the database file, then you can try Stellar Repair for Excel . It can repair severely corrupted Excel files. It also helps recover all the Excel workbook’s components, including macros and queries. The tool has a simple and user-friendly interface.
Fix Cannot Paste the Data Error in Microsoft Excel
When copying and pasting the cell contents or attributes from one workbook to another, you can encounter the “Cannot paste the data” error. The error indicates that the values you are trying to paste do not match the cell format (Currency, Date, Text, etc.) used in the column. The error can occur if you are attempting to paste information into a merged cell. You can also get this error if the data you are trying to paste contains more columns than the destination worksheet can accept or if the copy area and paste area aren’t the same size.
Why you cannot Paste the Data in Microsoft Excel?
You can experience the “Excel cannot paste the data” error due to one of the following reasons:
- Locked cells
- Data size limitation
- Formatting issues
- The file size is too large
- Overloaded clipboard
- Data type mismatch
- Invalid range
- Lack of permissions
- Excel file is corrupted
- Compatibility issues
- While pasting the merged cells
Methods to Fix MS Excel Cannot Paste the Data Error
The “Microsoft Excel cannot paste the data” error usually appears when copying and pasting data within the spreadsheet. It primarily affects the copy-and-paste feature within the Excel file. However, the impact of this error may vary with the data you are working with. When this error occurs, first try restarting the Excel application. Ensure that you’ve saved all your important data before restarting the application to prevent data loss. If, after performing this basic step, you still face the issue, then try the following troubleshooting methods.
Method 1: Check and Unlock Cells in Excel
You can get the Excel cannot paste the data error if the cells you are trying to paste in the Excel file are locked. You can check and unlock the specific cells in the Excel file using the below steps:
- Go to the Home tab in your Excel file and click Format Cell Font popup launcher.

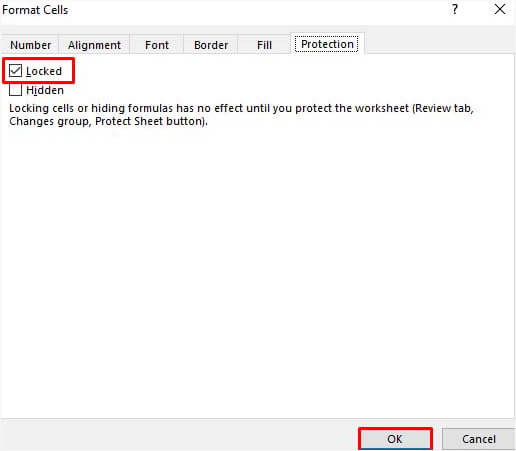
- In the Format Cells dialog box, click Protection.
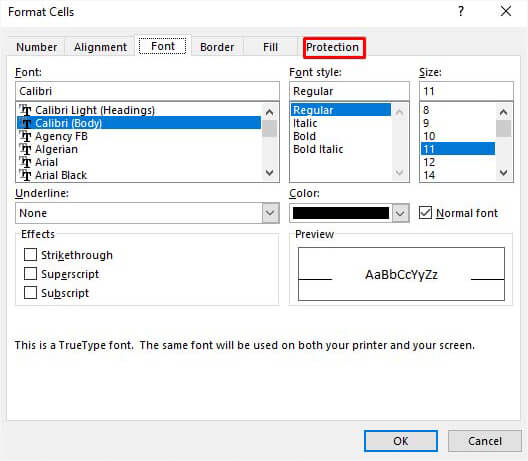
- Under the Protection option, unselect the locked field and then click OK.
Method 2: Check and Fix the Cell Format
Sometimes, you can get the “Cannot paste the data” error in Excel if there is an issue with the formatting of the cells in the column (in which you are trying to paste the data). You can check whether the cell formats of the columns of the source file (from where you are copying data) match the destination file (in which you are pasting the cell data). If not, then change the cell format. Here’s how to do so:
- In the Excel file, click on the affected column heading (whose cells you need to modify).
- Navigate to the Home tab and click the General dropdown menu.

- Click on the desired cell format that matches the values you are trying to paste into the column.
Method 3: Check Copy and Paste Area Size
The “data cannot be pasted” issue can also occur if Excel detects the copy area of the range of cells is not of the same size and shape as that of the paste area. So, make sure the size of the range of cells for the paste area is same as the copied area. To ensure this, you can try the following:
- Use Upper-left Cell
You can select the upper-left cell instead of the complete range to paste.
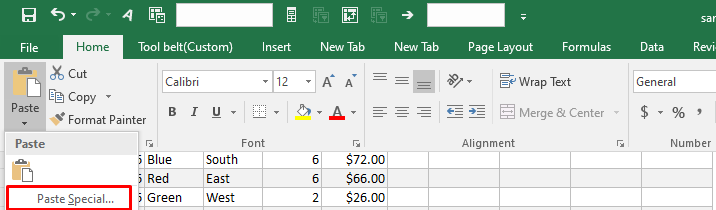
Use Paste Special Option
You can use the Paste Special option to paste the data. To use this option, go to Home > Paste Special.
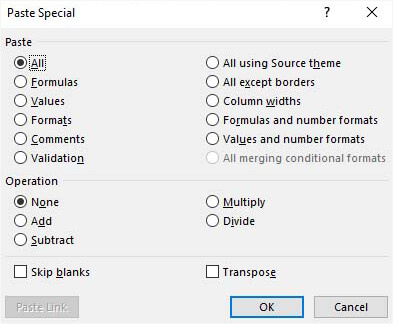
- You can choose from the different options, such as paste all, formulas, operations, Transpose, skip blanks, etc. to take control over how the data is pasted.
Method 4: Check and Unmerge Cells
The merged cells in the workbook can create discrepancies when copying and pasting data. These can create mismatch between the source and destination cell areas, resulting in errors. Make sure you are not pasting the data copied from merged cells. You can check and unmerge the cells using the below steps:
- Open the Excel file (in which you are copying data) and go to the Home tab.
- Click Merge & Center > Unmerge Cells.

Parental Control Software
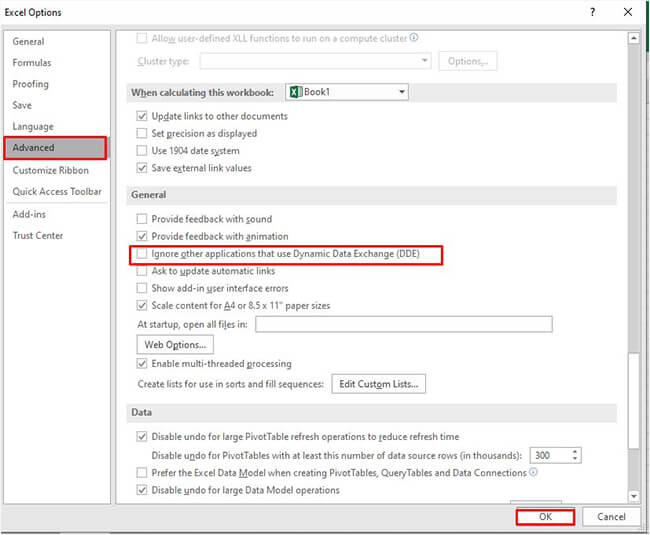
### **Method 5: Unselect the Excel DDE (Dynamic Data Exchange) Option**Sometimes, you can get the Excel cannot paste the data error while copying and pasting data from Excel file to external data sources or applications. It usually appears if you have established DDE links between them. To resolve this, you can uncheck the “Ignore other applications that use Dynamic Data Exchange (DDE)” option. Follow the below steps to do so:
- Open your Excel file.
- Go to File > Options.
In Excel Options, click Advanced and unselect “Ignore other applications that use Dynamic Data Exchange (DDE). Click OK.
Here are some additional solutions you can try to fix the “Cannot paste the data” error in Excel
Check the Excel File Format
Sometimes, the copy and paste error can occur if you try to move data from an older version of Excel file (XLS) into a newer version file (XLSX) or vice versa. You can try to change or convert the file format to resolve the issue.
Clear Clipboard
Too many items on the clipboard can prevent you from copying and pasting the data. You can empty your clipboard by deleting all clips. To do this, go to Home and click the Clipboard option.
Change the Column’s Cell Format
You can get the “Cannot paste the data” error when the information you need to paste does not match the cell format in the column. In such a case, you can change the column’s cell format. To do this, navigate to the Home option and then click on the General menu arrow. Then, change the cell format suitable to the type of information you are trying to paste in that column.
Add Columns
The copy-and-paste error in Excel can also occur if there are not enough columns to accept the data that you are trying to paste. You can insert more columns and then try copying and pasting data. To insert additional columns, click on the column heading, click Home, and then select Insert.
Remove Incompatible Add-ins
Sometimes, incompatible or faulty add-ins can also create conflicts with Excel’s clipboard operations, leading to the error. To check if add-ins are causing the issue, open the Excel file in safe mode. In safe mode, if you are able to paste the data, then check and uninstall the incompatible Excel Add-ins.
What to do if Nothing Works?
If the above methods do not work, then corruption in the Excel file could be the cause of the “Cannot paste the data” error. In such a case, you can use Excel’s built-in Open and Repair utility to repair the corrupted file. Here’s how to use this utility to repair the Excel file:
- Open your Excel application.
- Navigate to File and then click Open.
- Click the Browse option to select the affected Excel file.
- The Open dialog box opens up. Click on the corrupted file.
- From the Open dropdown, select the Open and Repair option.
- The Excel will prompt you to choose one of the below options:
- Repair
- Extract
- Cancel
- Select the Repair option to extract maximum data from the file. If the Repair option fails, choose the Extract option to recover the data, excluding formulas and values.
The Open and Repair utility may not be able to repair your Excel file if it is severely corrupted. In such a situation, the best possible way out is to use a professional Excel repair software to repair the file. You can try Stellar Repair for Excel. It can repair highly damaged or corrupted Excel (.xls, .xlsx, .xltm, .xltx, or .xlsm) file and recover all the objects from the file by maintaining the original formatting. The tool supports 2007 and higher editions of MS Excel. You can download the demo version of the software to preview the repaired objects and verify its functionality.
Conclusion
The “Excel cannot paste the data” error in Excel can occur due to different factors. You can check and clear the clipboard, unmerge the cells, unlock the cells, and use various other methods mentioned above to troubleshoot the error. If you fail to copy and paste the data due to file corruption, then opt for an advanced Excel repair software, like Stellar Repair for Excel. It is a reliable tool that can help you repair highly damaged/corrupted Excel files. It enables you to recover all the objects from the corrupted Excel file, with complete integrity.
How Do I Restore Excel File ?
Excel (XLS/XLSX) file corruption is a common issue that may arise due to problems, such as abrupt system shutdown, system crash, malware or virus intrusion, unsupported add-in, etc. However, MS Excel comes with a recovery feature that allows users to recover or restore Excel files lost or corrupted when the MS Excel quits unexpectedly or computer crashes due to hardware or software-related issues.
But sometimes, the restored version of the Excel file may not contain all the data or changes you made recently. In such cases, you are left with the option to repair the damaged or corrupt Excel file with the help of an Excel repair software, such as Stellar Repair for Excel .


Solutions to Restore Excel File
Below we have discussed various solutions to repair, recover, and restore unsaved, lost, corrupt, or inaccessible Excel files with the help of MS Excel options and Excel repair software.
NOTE: Some of these methods work only if you had enabled or configured certain required settings or options before corruption or losing the Excel file.
1. Restore Lost or Unsaved Excel File via ‘Recover Unsaved Workbooks’ Option
The Recover Unsaved Workbooks option allows you to restore the Excel file that you forgot to save before closing MS Excel or it stopped working. The steps are as follows:
- Navigate to ‘_File > Open._’
- Scroll to the bottom and click on ‘Recover Unsaved Workbooks.’ This opens a File Explorer browser window.

- Now look for the Excel file that you lost and then double-click on it to open and restore the Excel file.
- Once the file is open, click on File > Save As and save it to your desired location.
However, this option works only if you had enabled and set up the ‘Save AutoRecover information every X minutes_’ option and enabled the ‘_Keep the last AutoRecovered version if I close without saving’ option.
Also, this may not restore the most recent copy of your Excel file, but it will surely save your time that went into creating and editing the workbook.
2. Repair and Restore Corrupt or Inaccessible Excel File
If the Excel file you are trying to open or access is corrupt, MS Excel will display an error message. When MS Excel detects corruption, it starts ‘File Recovery Mode’ to repair the Excel workbook.
However, if it doesn’t start automatically, you can manually repair minor corruption error and restore the Excel file by following these steps:
- Navigate to File > Open and then navigate to the corrupt or damaged Excel file location.
- Select the file and then click on the arrow beside the ‘Open’ button to choose the ‘Open and Repair…’ option.
- Now click ‘Repair’ if you want to recover maximum data from a corrupt or inaccessible Excel workbook and restore it to a new Excel file.

If the ‘Repair’ option fails, use the Extract Data option that extracts values, data, and formulas from the Excel workbook.
3. Revert Excel File to Last Saved Version
When an Excel file gets corrupt or damaged while working, you may revert the Excel file to the last saved version. This allows you to restore the Excel file version that isn’t corrupt or damaged. The steps are as follows,
- Click File > Open.
- Double-click the name of the workbook that you have opened in Excel.
- Click Yes to reopen the workbook.
The workbook opens without any changes you’ve made that might have caused the workbook to become corrupted.

4. Use Excel Repair Software to Restore Excel File
If the corrupt or damaged Excel file isn’t repaired by using MS Excel options or you lost data after restoring the unsaved version or after reverting to the last version, you can rely on an Excel repair software, such as Stellar Repair for Excel.
The software repairs Excel files with 100% integrity and restores the Excel data, such as table, Pivot tables, charts, etc., while preserving the workbook properties and formatting. The software is safe as it doesn’t alter or make changes to the original Excel file and saves the repaired data to a new Excel workbook at your desired location.
It supports Excel files (XLS and XLSX), created in MS Excel 2019, 2016, or older versions. It resolves Excel corruption errors, such as Unable to open Excel file, in a few clicks.
To repair a corrupt or inaccessible Excel workbook by using Stellar Repair for Excel software, follow these 3 simple steps,
- Select the corrupt or damaged Excel workbook file (XLS/XLSX).
- Repair and then preview the Excel workbook.

- Save the workbook at default or your desired location.
Once saved, you can open and start editing or working on the Excel sheet. Make sure to enable AutoRecovery and AutoSave options to avoid data loss due to corruption.
Conclusion
In this article, we discussed methods and solutions to restore Excel file when it gets damaged or corrupt due to various issues. Although Excel can help you recover or restore Excel file after corruption, it can resolve only minor corruption errors. Thus, it may fail if the Excel file corruption is severe. In such cases, an Excel repair software, such as Stellar Repair for Excel, comes in handy. It resolves Excel corruption, repairs tables, charts, chart sheets, Pivot table, etc., and restores them to a new Excel sheet with 100% consistency.
Filter Not Working Error in Excel [Fix 2024]
Summary: The filter is not working issue in Excel can occur due to several reasons, like blank rows, hidden rows, merged cells, corrupted data, etc. In this post, we will mention the reasons why the filter is not working correctly in Excel and several fixes to resolve the issue. We will also mention an advanced Excel repair tool to repair the Excel file if corruption in file is the cause of the issue.
You can use the Filter function in Excel to filter data in large-sized Excel files quickly. While using Excel filters, sometimes, you face a situation where the filter is disabled or may fail to function properly.

The Excel filter usually fails to work if you have not selected the complete and correct range of data. Let’s learn more about the “Sort and Filter not working in Excel” issue and look at the possible methods to fix it.
Why the Filter is not Working in Excel?
You can face the “filter is not working” issue if you are applying the filter on a protected worksheet or trying to find the data from a hidden row. Besides this, there could be many other reasons contributing to this issue, such as:
- The data you are trying to filter is in merged cells.
- The Excel file automatically selected the data up to the first empty cell, excluding the remaining rows.
- Grouped sheets in Excel file.
- Blank row in the Excel sheet.
- You are trying to apply a filter on an invalid data range.
- The workbooks in which you’re facing the filter issues are corrupted.
- You are specifying incorrect criteria in the filter columns.
Solutions to Resolve the Filter is not Working Issue in Excel
There might be two scenarios: the Excel filter option is disabled/grayed out or the filters fail to function properly. You can follow the given troubleshooting solutions to resolve the issue based on the scenario you’re facing.
Scenario 1 – Filter Option is Disabled or Grayed Out
Method 1: Check and Un-group the Worksheet
When you apply filters to a single sheet in a grouped set, Excel disables the filter option in other sheets within the group. You can check the grouped sheets and try ungrouping them to enable the filter option. Here’s how to do so:
- In the Excel file, go to the Group section.

- Right-click on the Ungroup Sheets.
Alternatively, you can press the Shift + Alt + Left keys to ungroup the sheets.
Method 2: Unprotect Worksheet
The “disabled Excel filter” issue can also occur if your worksheet is protected. You can unprotect the worksheet to enable the filter option. To do so, go to the Review tab and then select Unprotect Sheet.

Method 3: Check and Uninstall Excel Add-ins
Sometimes, the Excel filter gets disabled due to faulty or corrupted Excel add-ins. You can run the Excel in Safe mode to check whether the issue has occurred due to add-ins. To do this, type excel /safe in the Run window and click OK.


In safe mode, if you see the filter option, it indicates some problematic Excel add-ins were causing the issue. In such a case, you can check and uninstall the faulty Excel add-ins to fix the issue.
Scenario 2 – Filter is not Working
Method 1: Try Clearing Filters
Sometimes, the Excel filter fails to work correctly if some filters from the previous sessions are still active. In such a case, you can clear the applied filters. Follow the below steps:
- In Excel file, click Sort & Filter option.
- Select clear.


Method 2: Select Entire Data
The filter not working issue in Excel can occur when the range selected for filtering is incomplete or incorrect. You need to make sure that you’ve selected the entire data range in Excel. You can use the Ctrl+A keys to select the entire content in the worksheet.
Method 3: Check and Delete Blank Cells from the Table’s Columns
When you apply a filter to the data, Excel expects data to be in a continuous range. Excel filters do not consider the blank cells, thereby resulting in incorrect functioning of the filter. To resolve this issue, check and delete all blank cells. In case your Excel file is too large to delete the blank cells, then you can add a “Serial number” row as an alternative. Adding serial number row creates a data continuity, thus helping in fixing the filter-related issue.
Method 4: Unhide Hidden Rows and Columns
Hidden rows or columns in worksheets can also affect the filter functionality. You can check and unhide rows/columns to troubleshoot the issue. Here is how to do so:
- In the affected Excel file, go to Home.
- Click on Format > Hide & Unhide.

- Click Unhide Rows or Unhide Columns (as required).

Method 5: Unmerge Cells
You can experience the filter in Excel is not working issue if you are using the filter to extract data from merged cells. Ensure to unmerge the “merged cells” before applying a filter in Excel. Follow the below steps to unmerge the merged cells in Excel:
- Navigate to the Home option.
- In the toolbar, select the Merge & Center option.
- Click Unmerge Cells.
Method 6: Repair the Workbook
Sometimes, the Filter Not Working in Excel issue can occur due to inconsistencies in file structure. If these issues occurred due to corruption in the worksheet, you can repair it using the Open and Repair tool. It is an in-built tool in Excel that is used to repair corrupted Excel files. Here are the steps to use this tool:
- In the Excel application, navigate to the File option.
- Click Open and then click Browse to choose the Excel file.
- In the Open dialog box, click the problematic Excel file.
- Click the arrow next to the Open option and select Open and Repair.
- Click Repair to recover as much data as possible.
- The application prompts a message after the repair process is complete. Click Close.
In most cases, the Open and Repair tool can easily fix corruption issues in the Excel file. However, for any reason, if the open and repair tool doesn’t work you can consider repairing the file using a professional Excel Repair tool. Stellar Repair for Excel is one such advanced and secure tool to repair Excel files. With this tool’s powerful scanning capabilities, you can repair highly corrupted Excel files and recover all their objects with complete integrity. The tool is compatible with all Windows editions, including the latest Windows 11.
Closure
Several reasons are associated with the filter not working issue in Excel. The filter option may not work as expected if you have not selected the complete and correct range of data or for many other reasons. You can follow the troubleshooting methods discussed above to fix the issue. If the filter fails to work due to corruption in the workbook, then try Stellar Repair for Excel . It is an advanced tool that can even repair severely damaged files. It also helps to recover all the data from corrupted files without changing the original formatting. You can check the tool’s functionality by downloading its demo version. It allows you to preview all the repairable objects in the corrupted Excel file.
- Title: Fixed Freeze Panes not Working in Excel 2016 | Stellar
- Author: Nova
- Created at : 2024-07-17 17:16:36
- Updated at : 2024-07-18 17:16:36
- Link: https://phone-solutions.techidaily.com/fixed-freeze-panes-not-working-in-excel-2016-stellar-by-stellar-guide/
- License: This work is licensed under CC BY-NC-SA 4.0.