How to Bypass MDM on iPhone SE with Ease Via third Tools?

How to Bypass MDM on iPhone SE with Ease via Third-party Tool
If, for any reason, you find yourself unable to approach the administrator or obtain the necessary login credentials for MDM removal on iPhone SE, you can use a third-party tool like Wondershare Dr.Fone Screen Unlock feature.
Dr.Fone ’s Screen Unlock is a quick and reliable feature designed specifically for unlocking various types of screen locks on iOS devices, including MDM. You can either bypass MDM restrictions or remove local MDM from the iPhone SE with ease.
How to bypass MDM on iPhone SE with Dr. Fone’s Screen Lock feature:
- Step 1: Launch the Dr.Fone Screen Unlock feature on your computer.
Start by opening Wondershare Dr.Fone on your computer. Open the "Toolbox" menu, then choose Screen Unlock > iOS.


- Step 2: Access MDM Unlock
Within the Dr.Fone software, locate and select "Unlock MDM iPhone" This action will facilitate the unlocking of the MDM lock on your device.


- Step 3: Select Bypass MDM
On the next screen, choose the “Bypass MDM” option. Then, proceed by clicking "Get Start" > "Start to Bypass" to begin the MDM bypass procedure.

- Step 4: Deactivate the Find My Feature
You will be asked to deactivate the Find My feature on your iPhone SE. To complete this step, access your device’s "Settings." Then, select your name at the top, navigate to "iCloud," and disable the Find My feature.

- Step 5: Monitor Bypass Progress
Next, the tool will begin the process of bypassing the remote MDM lock. Wait and track the progress on the following screen.
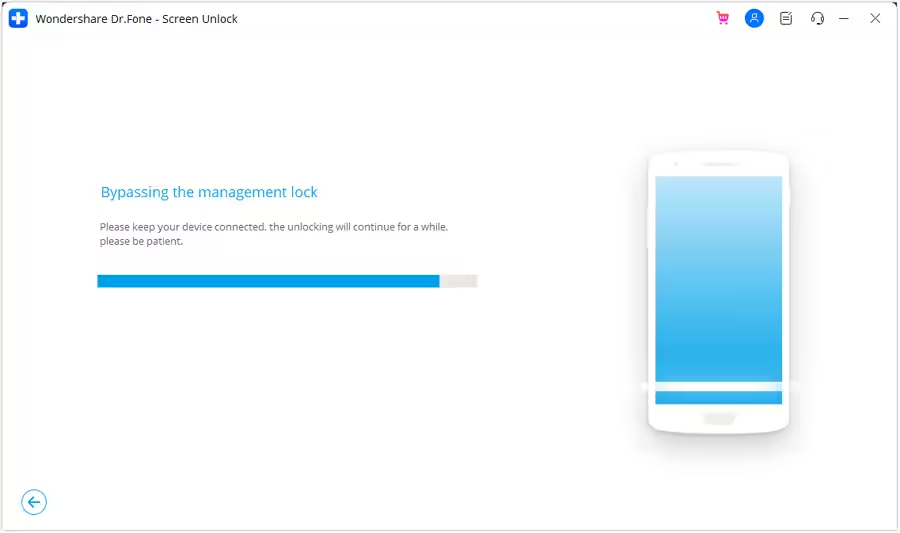
After successfully completing the process, you will receive a confirmation message. Click "Done" to confirm and close the window.
What Is Remote Management on iPhone SE
Providing employees with company-issued iPhones or other organizational devices has become a common practice in the corporate landscape. These devices serve as multifunctional tools, facilitating seamless communication, productivity, and access to critical business applications.
If you noticed the “Remote Management” screen on your iPhone SE, that’s the manifestation of MDM at work. As we have mentioned, MDM is a security feature to oversee and control devices used by their employees. This ensures that company policies are enforced and sensitive information is protected.
MDM allows administrators to configure settings, install applications, and enforce security protocols on connected devices. They can stop you from using certain things, such as the App Store and AirDrop. MDM also handles VPN settings and lists of blocked websites.
How to Remove Remote Management on iPhone SE via Settings
The primary reason people want to remove remote management on iPhone is that they’ve acquired it from their workplace or as a second-hand purchase. If the remote management profile isn’t removed, you won’t be able to use the iPhone fully. Sometimes, even a factory reset won’t unlock the iPhone if the remote management is still in place.
Thankfully, if the devices are still logged in with the MDM profile credentials, you can still resolve this through the Settings menu.
How to remove Remote Management on iPhone via Settings:
- Step 1: Locate iPhone Settings.
Open the "Settings" app on your iPhone SE. Scroll until you find "General" from the menu and tap.
- Step 2: Open your profile on VPN & Device Management.
In the General Settings, open the "VPN & Device Management" option and tap on the profile associated with the MDM.
- Step 3: Check for the
"Remove"button.
Look for a button that says "Remove" within the profile. If you see this button, you can proceed to remove remote management from iPhone on your own. Follow any on-screen prompts or confirmations to complete the removal process.

- Step 4: Contact MDM Admin if Needed:
If you do not see the "Remove" button, it means that you need to contact the MDM administrator for further assistance. Reach out to them to initiate the removal process.
Bypassing Activation Lock using official methods (iPhone SE)
An Activation Lock is not the end of the world, as Apple might have you believe. Nothing in the world is perfect, except for the world itself. As such, there are ways to bypass Activation Lock on an Apple device that you bought used, and the previous owner forgot to unlock or did so intentionally and is now trying to fleece you for more money to unlock it. Or an employee who just left the job surrendered their iPhone SE but forgot to erase the device before submitting and consequently, the device is still associated with their Apple ID, and you need to bypass Activation Lock for that iPhone SE to make it useable again. There are a few ways you can go about it.
Bypassing Activation Lock Using Apple ID
Disabling Activation Lock on iPhone SE is easy if you have the Apple ID credentials that are associated with the iPhone SE.

- Step 1: Enter device Recovery Mode and Restore the device to factory settings.
- Step 2: When you set up the device again, you will be required to sign in to the Apple ID associated with the device. Do that and you are golden!
Bypassing Activation Lock from iCloud Website
You may also do away with Activation Lock using the Find My iPhone app in iCloud remotely by erasing the device and removing the device from the associated iCloud account.
- Step 1: Visit the iCloud website on a computer at https://icloud.com .
- Step 2: Sign In and go to
Find iPhone.

- Step 3: Click All Devices and select the device that was sold to the user.
- Step 4: Click Erase iPhone and if the device is still there after the erase is complete, click Remove From Account.

This process requires that the data service be functional on the iPhone in question, otherwise, this will not work. When the process is done, restart the iPhone and set it up with your Apple ID to remove the lock.
Bypassing Activation Lock Using Microsoft Intune
If you are an IT administrator and are using Microsoft services, you may have given employees iPhones. When employees leave or are made to leave, it is possible that the devices they leave behind are still signed in with a password only they know. There is a way Apple provides for Microsoft Intune to disable Activation Lock for corporate devices.

- Step 1: Sign in to the admin center on Microsoft Endpoint Manager.
- Step 2: Select Devices under Intune.
- Step 3: Select All Devices.
- Step 4: Locate the device you want to disable the lock for, and under the Hardware section, copy the Activation Lock Bypass Code given under Conditional Access.
- Step 5: Under the Overview pane of the device, select Wipe.
- Step 6: When the device resets, it prompts for the Apple ID and password. Leave the ID blank and enter the bypass code as a password.
The device will be reset, and employees can set it up again with a new Apple ID.
Unlock Disabled iPhone SE Using iTunes or macOS Finder
Of course, there is an official way that Apple provides for users to restore device firmware using iTunes or macOS Finder. For this, iPhone SE is put under Recovery Mode manually and Finder or iTunes is used to reinstall software on it directly from Apple. This process is fine for people who are conversant in tech, since this process can throw up a lot of errors that are just numbers, and people can get confused as to what they mean, resulting in frustration.
Step 1: Connect your iPhone SE to a Windows/ macOS device and launch iTunes. If you are on a Mac that runs macOS Catalina or higher, open Finder since you would not have access to iTunes anymore.
Step 2: Pick your iPhone SE and do the following:
- (2.1) Press the volume up button and let it go.
- (2.2) Press the volume down button and let it go.
- (2.3) Press the Side Button (power button, on the right side of your iPhone SE) and keep it pressed till Finder or iTunes detects the phone in Recovery Mode.

- Step 3: Choose Restore to download and reinstall the latest iOS on your iPhone SE and unlock your iPhone SE.
When the iPhone SE reboots, it will be reset to factory settings, and you can set it up again as you did when brand new.
What Can You Do with Face ID?
Most of us know that we can unlock iPhone SE with our face via Face ID instead of a thumbprint or passcode. But actually, Face ID does more than just that. Let us learn more cool things you can do with Face ID, which helps you to make a decision if you still want to disable it. Here‘s what you can do on your iPhone SE with Face ID:
Unlock Your iPhone SE
As an authentication mechanism, Face ID enables you to unlock your iPhone SE with a look. How to do that? Here are the steps:
- Step1: Pick your iPhone SE up in your hands or tap the screen to wake it up.
- Step2: Look at the iPhone.
When the lock symbol changes to the unlocked position, you can swipe up to unlock your iPhone SE using Face ID and get to the Home Screen.Note that Face ID will not work in landscape mode on an iPhone SE.
Making Purchases Using Face ID on Your iPhone SE
Face ID allows you to authenticate yourself to make purchases in the App Store, Book Store, and iTunes Store and use Apple Pay wherever supported.
Lowering Ringer and Alarm Volume Automatically
Face ID also enables what Apple calls Attention Aware features that are conveniences afforded to users who have a Face ID enabled iPhone.

Setting up and using Attention Aware features is easy:
Step 1: Go to
Settings>Face IDand passcode.Step 2: Toggle Require Attention For Face ID On.
Step 3: Toggle Attention Aware Features On.
That’s it. Now, when you get a call and your iPhone SE is ringing loud, looking at your iPhone SE will cause it to lower the volume. When an alarm goes off, you can lower the volume by simply looking at your iPhone. Additionally, your iPhone screen will not dim or switch off for the duration you are looking at it. This means you can now read those books on Kindle without constantly tapping the screen for it to stay awake.
Autofill Passwords and Usernames in Safari and Other Apps
Face ID also allows users to fill passwords in Safari automatically for a faster and more convenient login experience on your iPhone 15/14/13 with Face ID.
Step 1: Go to Settings > Face ID and Passcode and toggle Password Autofill On.
Step 2: Now, when you use Safari to open a website that requires a login, tapping the username field or password field will bring up the keyboard, and on top of that keyboard there will be your credentials for the website if you have saved them in iCloud Passwords. Tap the credentials.
Step 3: Look at your iPhone to authenticate yourself with Face ID and Safari will autofill the credentials for you.
Authenticate Yourself for Third-Party Apps
Face ID is also used for authenticating you for third-party apps that support Face ID. This means you can use Face ID to authenticate yourself for banking apps, password managers, and other apps that support Face ID.
Animojis and Memojis
Up until now, we saw how Face ID enables productivity features and how convenient it is to use it. Now, we come to the fun part - Animojis. Apple launched Face ID in 2017 on the iPhone X with much fanfare and a huge part of that fanfare was Animojis. Over time, Apple brought new capabilities to the iPhone and added Memojis alongside Animojis.

Animojis are animated emojis. These are made possible with advanced algorithms enabled by the TrueDepth camera in Face ID. Animated emojis or Animojis can mimic your facial expressions and you can use them in your message conversations in apps.
Here‘s how to send Animojis in conversations on your new iPhone SE:
Step 1: Open a message conversation in the Messages app.
Step 2: Tap the Memoji button (a character in a yellow frame) and swipe to select the desired Animoji/ Memoji you want to send.

Step 3: Tap the Record button and you now have 30 seconds to do what you want with your face and the character will reproduce it on screen for you.
Step 4: When done, the Record button changes to Send:

Tap Send to send your first Memoji/ Animoji.
Reasons for Locked Apple ID
There can be a few reasons why your Apple ID is locked. You forgot the password and now it is locked since you entered the wrong password too many times. A scarier prospect, albeit a real one, is that some malicious actor attempted to login into your Apple ID account but failed. Had they succeeded, you would have gotten a message that ‘your Apple ID is being used on another device’ now.
Apple does a lot to ensure that your Apple ID remains safe. You trust Apple with a lot of your data, including financial data by way of your credit cards associated with Apple ID to make purchases on the App Store and iTunes Store. Therefore, some of the time, Apple preempts issues by proactively locking up your Apple ID or even disabling it. It goes without saying that sometimes it is something so simple as a software error that is believed to have locked up Apple IDs for many users around the world a while ago. It is also entirely possible that it was some malicious actor probing the servers for accounts.
All of these will result in a locked Apple ID that users will have to reset their password to in order to gain access back.
Unlock Disabled iPhone SE Without A Computer
here are millions in the world who do not use the traditional computer so to speak. They have entered the post-PC era as they say, and their needs are met without a regular desktop or a laptop. They live wirelessly. They travel the world. Are you one of them? How would you unlock disabled iPhone SE with no desktop/ laptop computer around? You have a few options.
You can use your other iOS device with Find My iPhone app to unlock your disabled iPhone SE or you can use the iCloud website from your other device and Find iPhone app to unlock your disabled iPhone SE.
The second option is to get a loaner device from someone you know. A loaner device is a device you borrow from someone to use for a purpose and return it when you are done with it. In this case, you can ask for a computer from someone you know and use it to unlock your disabled iPhone SE and return the device back. That way, you can use iTunes or macOS Finder if you’re more favorable to using that method.
When using a computer, the simplest, easiest, most flexible, and robust method to unlock disabled iPhone SE is using third-party tools such as Dr.Fone – Screen Unlock (iOS). However, Dr.Fone is not just for troubleshooting and unlocking your disabled devices. Dr.Fone is like that multi-utility knife that can do a variety of things.
Using Dr.Fone you can not only unlock your iPhone SE with ease, you can also use it periodically as a backup and restore tool that gives power in your hands. How does it do that? When you launched Dr.Fone , you had several modules to choose from and you chose Screen Unlock to unlock your disabled device. Instead of that, you can choose the Phone Backup module to backup and restore data from and to your device. Why would you use a third-party tool to backup and restore?
As you may be aware, using iTunes or macOS Finder allows you to backup and restore data onto your iPhone easily, but, the one glaring omission here is that it does not allow you to choose what you want to backup and what you want to restore. This is a much-coveted feature that is glaringly absent from the Apple world so far, and with Dr.Fone ‘s iOS Phone Backup feature you can have that choice in your hands, just like you do with Android. Dr.Fone allows you to choose what you want to backup, so, you can back up just your photos, just your text messages, just your files, or any combination thereof, for the matter. And, when it comes to restore, you can restore selectively as well. So, suppose you backed up your entire data using Dr.Fone , now you can restore just the text messages if you so want.
Unlock Disabled iPhone SE Using iCloud Website
unlock your disabled iPhone SE is using the iCloud website to gain access back. This is a fairly easy way and doesn’t require going through complex hoops.
Find My is available both online via the iCloud website and on iOS devices and on Macs. In case the only Apple product you own is the currently disabled iPhone SE, you can use Find My on the iCloud website from any other computer you may have to unlock your disabled iPhone SE.
Step 1: Visit https://icloud.com and log in into the same iCloud account/ Apple ID as the disabled iPhone SE.
Step 2: Go to Find My, select your iPhone SE.

- Step 3: Click Erase iPhone and confirm.
This will start the wipe process on your iPhone remotely and your iPhone will be reset to factory settings. You can now proceed to setup your iPhone once again.
- Title: How to Bypass MDM on iPhone SE with Ease Via third Tools?
- Author: Nova
- Created at : 2024-07-17 17:48:46
- Updated at : 2024-07-26 18:01:36
- Link: https://phone-solutions.techidaily.com/how-to-bypass-mdm-on-iphone-se-with-ease-via-third-tools-by-drfone-ios-unlock-ios-unlock/
- License: This work is licensed under CC BY-NC-SA 4.0.