
In 2024, How to Use Life360 on Windows PC For Tecno Pova 5? | Dr.fone
How to Use Life360 on Windows PC For Tecno Pova 5?
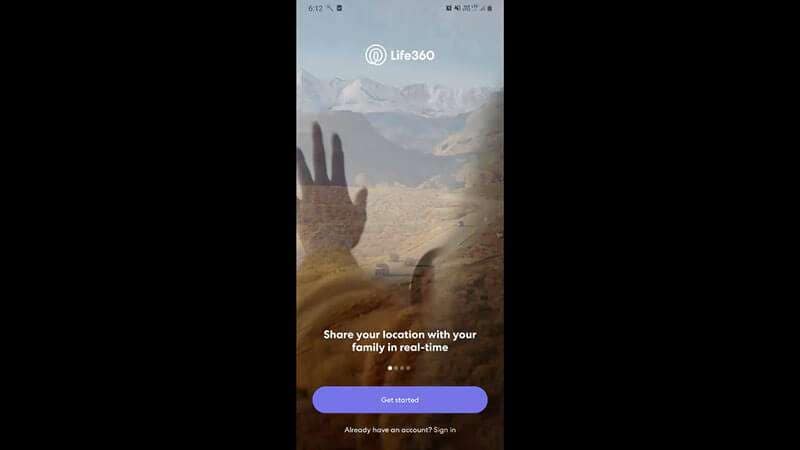
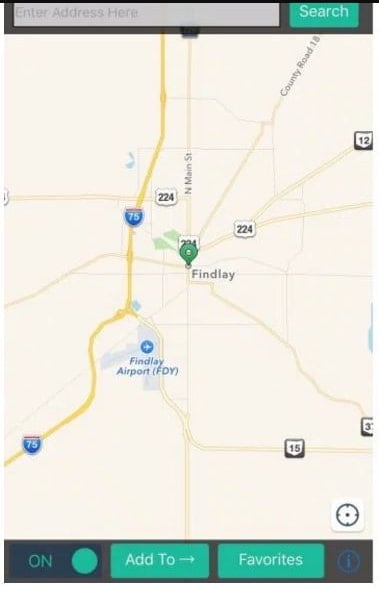
Life360 is an online platform that utilizes geo-location services to help users share their real-time location with friends and family. The app allows people to create a family group and stay connected to each other through features like chatting, sharing location, sending safety alerts, etc.
As of now, you cannot run Life360 on computer as it is only available for Android and iOS. Why? Because as opposed to a PC, one can easily carry their device everywhere! It means whether your kid is stuck in traffic and needs your help or your parents have lost their way back home, Life360 will instantly send you an alert on your device.
However, that doesn’t mean you cannot use Life360 on a PC. While it may seem a bit odd, there are a couple of methods that’ll allow you to get the Life360 app for Windows. In today’s guide, we are going to share some of these methods that’ll help you run the Life360 app on Windows.
So, without wasting another second, let’s dive straight into the guide.
Part 1: Why people seek to use Life360 on PC?
First things first; why would anyone want to use a family locator app like Life360 on their PC? Well, the truth is everyone has their own reason to get Life360 for PC. For instance, let’s say you are in the middle of an important project and don’t want to be bothered by alerts on your smartphone. However, you still don’t want to compromise with the safety of your family members.
In this situation, you can simply run the Life360 app on PC. This will allow you to directly keep track of the whereabouts of family members on your Windows system and you won’t have to constantly check your phone.
Life360 can also be used on a computer when your phone’s battery has completely drained and there’s no power outlet nearby. In this case, you can simply power-on your laptop, start the Life360 app and send your current whereabouts to family members.

Part 2: Is it possible to use Life360 on Windows PC?
Life360 is an extremely useful app for people who are always concerned about their closed ones. The app is basically designed with a vision to keep family members connected and safe. In addition to location sharing, the app also provides exclusive features like crash detection, place alerts, speed alerts, battery monitoring, etc.
The app also makes it easier for parents to monitor their child’s movement. Using the app, you can always know that your kids have safely reached school and back home. For any parent, knowing whether the kids are safe, is one less thing to worry about.
However, as we mentioned earlier, Life360 hasn’t been released for Windows yet. So, there’s no direct way to install and run the app on a Windows PC. While Life360 may release a dedicated Windows software in the future, as of now, you can only run it using the alternative methods.
These methods include:
Part 3: Use Life360 on Windows PC with Android emulator
The first and the most convenient way to run Life360 on computer is to use an Android Emulator. An emulator is basically a software that creates a virtual Android system on your computer. As a result, you’ll be able to run Android apps on your computer.
While there are dozens of Android emulators, Bluestacks seems to be the most popular and user-friendly option among all. Unlike other emulators, Bluestacks is easy to set up and use.
Here’s how you can run Life360 on a computer using Bluestacks Android emulator./
Step 1: Head over to Bluestacks official website and tap the download button.
Step 2: Open the installer and tap the “download” button. This will initiate the download process on your System.
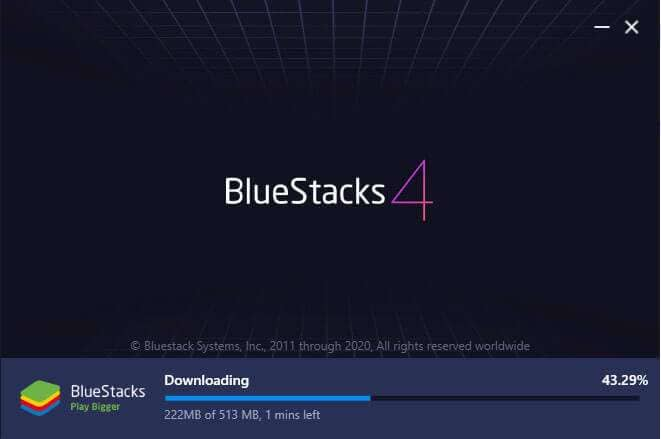
Step 3: Once the installation process completes, Bluestacks will start to boot. Keep in mind that the first boot may take some time, depending on your system configurations.

Step 4: In the home screen, tap the “Google Play Store” icon. You’ll be asked to sign-in with your Google account. Enter the right credentials and log-in to the Google Play Store.

Step 5: In the top search bar, type-in Life360 and tap the “install” button to download the app.

Step 6: Life360 is now installed on your computer. Open the app and enter your login details. You’ll now be able to run Life360 on your PC.

Part 4: Use Life360 by mirroring Android to Windows PC
While running an emulator is a great way to get Life360 on PC, it has its own set of challenges. For instance, running an Android emulator is not easy when you have a low-configuration PC. Emulators like Bluestacks requires high system configuration otherwise they take forever to load.
In this situation, we have another alternative for you to run Life360 on PC. You can simply mirror your Android to your Windows system. Mirroring the Android device will allow you to see its content on the PC itself.
Here’s how you can mirror the Android device on your PC.
Step 1: Make sure that Bluetooth is activated on both devices.
Step 2: On your Windows PC, open “Settings” and select the “Systems” tab.

Step 3: Choose the “Projecting to this PC” option in the left menu-bar and make sure that “Available Everywhere” is selected.

Step 4: If you’re running Android Pie or above on your device, scroll down to open notification drawer and select “Smart View” (or “Cast” in some devices). You’ll see your PC listed here. Tap the button to start Android mirroring.

Step 5: It may take some while for the connection to establish. Once it does, you’ll be able to cast your device screen onto your computer and you’ll be able to run life360 on your system.
Keep in mind that you’ll still require your device to navigate through the content on your computer. Any action that you perform on your device will be replicated on your computer screen as well.
Final Verdict
Life360 is probably among the top family locators for Android users. Apart from its extensive range of features, the app provides a user-friendly interface, which allows it easier for even elders to use the app without any issues. Even though there isn’t a dedicated Life360 software for Windows, you can follow the above-mentioned methods to run the Life360 on PC.
You Might Also Like
## Location-based appsGPS spoof for dating apps
GPS spoof for social apps
Pokemon Go on PC
AR game tricks

Change Phone GPS Location Easily
- ● Teleport GPS location to anywhere
- ● Play AR games without moving
- ● Spoof Location on the popular Apps
Methods to Change GPS Location On Tecno Pova 5

The Internet is a vast space and you have a plethora of content on different websites and platforms. You can call it a two-way - give and take relationship when it comes to the dynamics of data exchange between the world wide web and the users.
When you visit websites, they use cookies to track your activities. When you visit a restaurant, the phone detects and saves the GPS in the memory. You click a picture in the Maldives, your phone seeks out geographic points to prepare the right time and date stamps.
You need your GPS to download and use certain apps. Similarly, your GPS might be the reason you are unable to play some games or use some applications. Change GPS Location Tecno Pova 5 and this won’t be a problem for you.
But if you are wondering how can I change my location on my iPhone? These 5 methods will help you get fruitful results.
Part 1: Change GPS Location on Tecno Pova 5 using a Professional PC Program
The PC Programs are entirely Software based and do a tremendous job to spoof Tecno Pova 5 iOS 16 Location . You don’t have to buy any new equipment and you will be operating using your computer.
You can get this done within minutes if you have the right program with you. One of the best options in the market is Wondershare’s Dr.Fone. This is how you use Dr. Fone Virtual Location spoofer for GPS Spoofing iPhone.
Dr.Fone - Virtual Location
1-Click Location Changer for both iOS and Android
- Teleport from one location to another across the world from the comfort of your home.
- With just a few selections on your computer, you can make members of your circle believe you’re anywhere you want.
- Stimulate and imitate movement and set the speed and stops you take along the way.
- Compatible with both iOS and Android systems.
- Work with location-based apps, like Pokemon Go , Snapchat , Instagram , Facebook , etc.
3981454 people have downloaded it
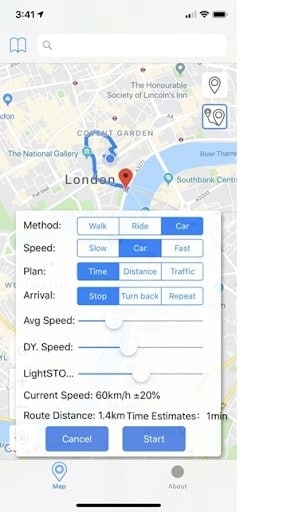
Step 1: Go to the official website of Dr.Fone - Virtual Location (iOS) . This is easily available when you google it or you can also follow this link here. Then you can download the executive file, install and then launch the application. Once the home page opens, you will find several options - Opt for ‘Virtual Location’. It is usually at the bottom of the page.

Step 2: Now take your Tecno Pova 5 device and connect it to the computer that has Dr. Fone. Then click on ‘Get Started’.

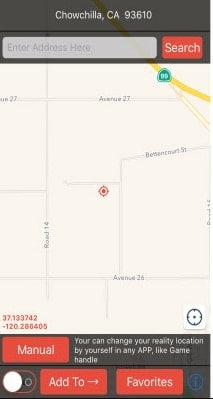
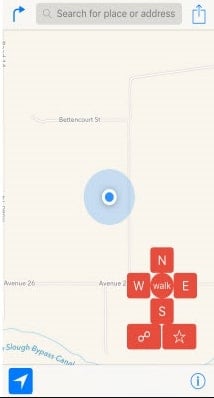
Step 3: Now, the world map will display on the screen and you can clearly see the coordinates and directions as well. On the top right corner, the third icon is called the ‘Teleport Mode’. Click on that and enter the name of the place in the search box. You can even pinpoint it, if you are sure about the place.

Step 4: If you are completely sure that you got the address right, click on the ‘Move Here’ option. It moves your Pin from your present location to your new virtual location.

If you are looking for a way to change Tecno Pova 5 Location without Jailbreak, then this is one of the safest options for you. Also, you have other additional features like Phone Transfer, and Whatsapp Transfer along with Location spoofing. The application will never go to waste, won’t occupy much of your computer/PC/Laptop’s space and you can get the fake location iOS within minutes.
Part 2: Change GPS Location on Tecno Pova 5 using External Device
You can achieve the iOS Spoof Location using External devices as well. These devices do not cause any inconvenience to you. They are meant to be small, fit into the lightning port of your iPhone, and act as an external source that will spoof the Tecno Pova 5 location and the same will reflect in every app that uses or detects your iPhone’s geographic location.
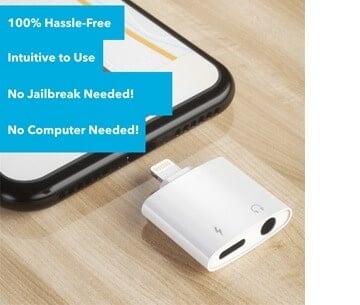
The best external device to change phone location Tecno Pova 5 is Double Location Dongle. This simple device can be utilized by following the steps below -
Step 1: The Double Location Dongle is a very small, white rectangle that connects to your iPhone’s port. But along with it, you also have to install the Companion app for location spoofing. Once you have both of them ready, connect the Tecno Pova 5 device to your iPhone.

Note: The Companion App is not available on the App store. You have to download it from Double Location’s official website.
Step 2: The next step is to open the Double Location iOS companion app and then settle on the Map Tab.

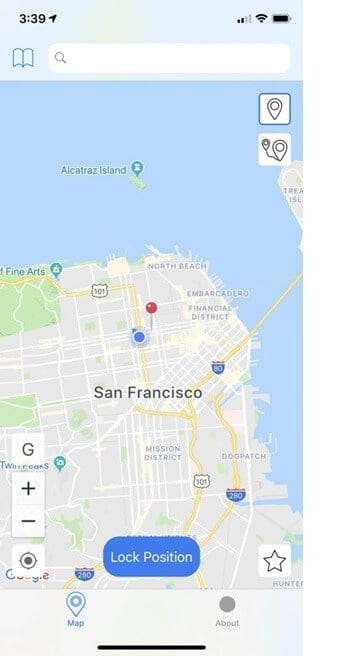
Step 3: Unlike what we had seen in the Dr. Fone step, we cannot enter the location into any search box. You should move the pin to the location that you want to virtually shift to. Double Location provides some very good options that will help you during gaming. You can change all the appropriate settings and proceed.
Step 4: On the bottom of the screen, Go for the lock position option. Once you do that, there will be a virtual shift in your geographic position and all your apps will register your new coordinates.

Part 3: Change GPS Location on Tecno Pova 5 using XCode
You can change the geolocation Tecno Pova 5 by using your coding expertise as well. That is why XCode exists. This Computer Program lets you change your Location in Tecno Pova 5 by giving some GIT Commands to the PC while your Tecno Pova 5 stays connected to it. By following these steps, you can understand how to do it. But if you’ve never had a liking for programming and coding languages, then you should probably skip this -
Step 1: Download and install XCode from the AppStore, directly to your Mac device. Launch the application.

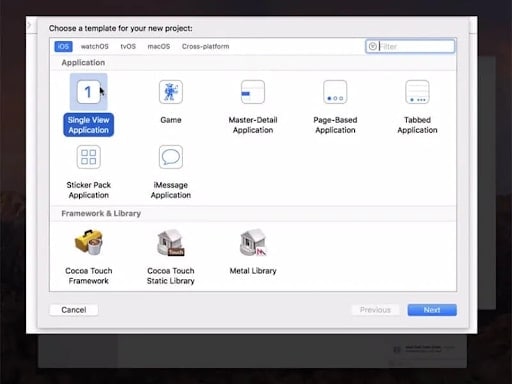
Step 2: Once you see the XCode window open, Go for the ‘Single View Application’ to start a new Project and go on by clicking on ‘Next’. You can set up a name and details for this particular project.
Step 3: A screen display will appear asking you about your identity. This is where the minimal coding part starts. You need to enter some GIT Commands to continue with the project.
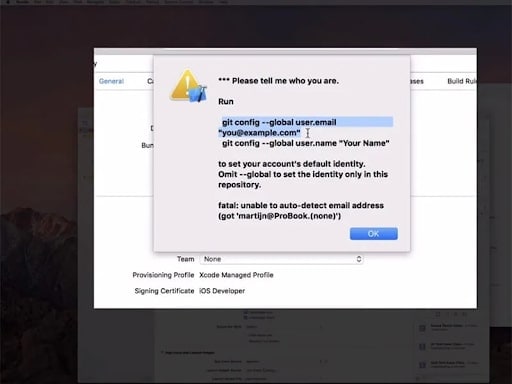
Step 4: Launch and run the terminal on your Mac device and enter these commands - git config –global user.email “[email protected]“ and git config –global user. name “your name”.You need to add your own details in the quoted space and continue to verify your identity.
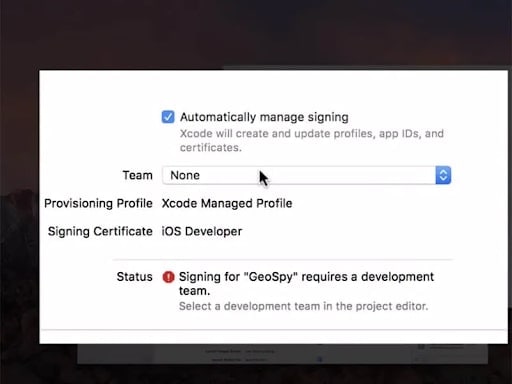
Step 5: Once you enter the commands, go to the next step and establish the Development Team. Then you can proceed to connect your Tecno Pova 5 device to your Mac device. Use the normal cable to do that.
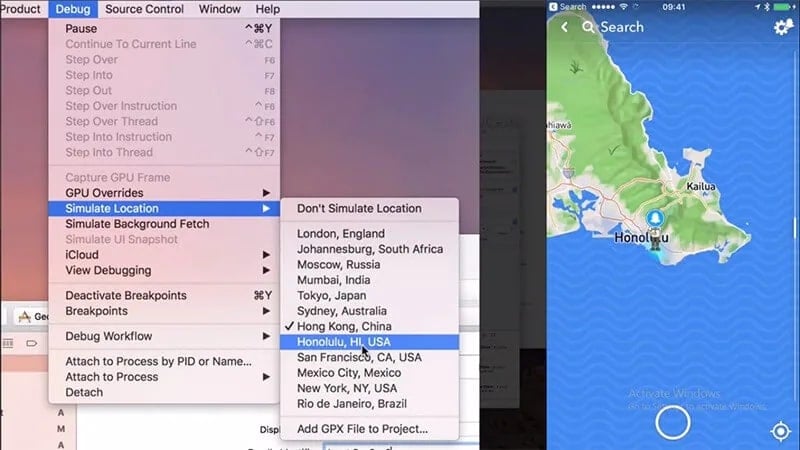
Step 6: To allow the program to process the Symbol Files, you will have to choose the model of your device. Go to the ‘Build Device’ option and continue as per the prompts. However, make sure that you keep your Tecno Pova 5 unlocked for quick detection by the computer software.
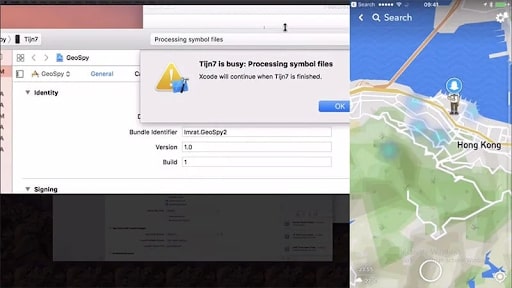
Step 7: Once that is done, you can come back to the actual location spoofing part. Go to the debug Menu > Simulation Location and specify the exact location that you want to virtually shift to. Once you are okay with it, the same will reflect on your Tecno Pova 5 as well.
Part 4: Change GPS location on Tecno Pova 5 using Cydia Location Faker App
Cydia is also based on software applications and changes location in seconds, However, you need to note that you have to jailbreak your phone. If you don’t know how to do it or do not want to take the risk, Cydia’s LocationFaker app may not be the right fit for you. But if you are a jailbreak expert, this is a very comfortable GPS Changer for iPhone.
Step 1: Download the Cyndia LocationFaker app from the official website. LocationFaker8 is available for the iOS 8.0 model.
Step 2: After launching the app, enter the virtual location into the search box.
Step 3: If you are done with choosing the new location, shift the toggle from ‘OFF’ to ‘ON’ at the bottom of the page.
Step 4: Now we can decide which apps can access our new virtual location. At the bottom of the page, you will find an ‘i’ icon. Go click on it and choose the ‘White List’ option. This one will then take you to the app list and you can decide which of them will have access to the phone’s location.
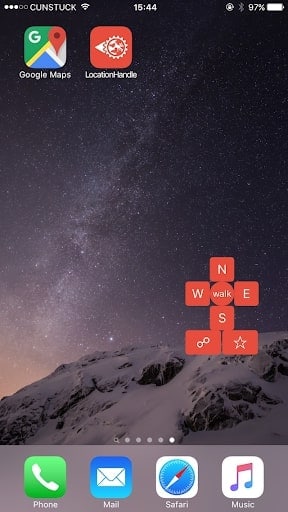
Part 5: Change GPS Location on Tecno Pova 5 using Location Handle
Location Handle is another useful application that you can use to change your location by a few meters or simply go with an automated movement system that changes your location gradually as if you are moving from one place to another. This is how you use it -
Step 1: Download the Location Handle app from the website or App store
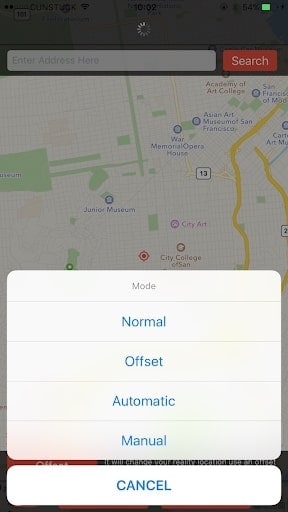
Step 2: There are four different types - Normal Mode - teleport to a new location; Offset Mode - Move a few feet away from the present location ; Automatic Mode - Slowly change your location from one point to another, as if walking ; Manual Mode - Change your location using a joystick.
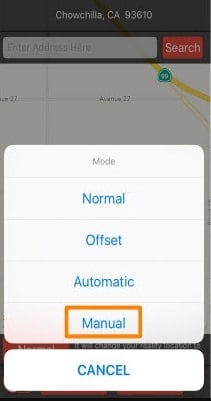
Step 3: Consider the Manual mode, because we want to change location to a far-off place and not necessarily for gaming.
Step 4: Once the Manual mode is activated, the map will be displayed and you can change the pin location. You can enter the location name in the search box.
Step 5: The Joystick will appear on the page and you can use it to shift your location to wherever you want. Once you fix on the location, proceed and the new location will be updated.
Conclusion
We hope you are no longer wondering How to change Location services on Tecno Pova 5. These 6 methods are very effective and you can always opt for the one that is most comfortable for you. If you want a hassle-free PC program, we have that narrowed down for you. If you are a coding enthusiast, then we’ve listed a method that best fits you. Whatever the reason, with an iOS Fake GPS, life becomes much easier and sometimes even safe on the internet. You can explore beyond the boundaries without moving from your couch!
3uTools Virtual Location Not Working On Tecno Pova 5? Fix Now
The map frequently breaks or 3uTools is unable to retrieve it. This is because 3uTools is unable to establish a connection with the Google Maps API. Additionally, if your internet connection is unreliable, this may happen.
There isn’t much you can do if this is the reason why your 3uTools virtual location isn’t working this is a technical problem that can only be fixed by a technical expert. You could try restarting 3uTools and performing the spoofing process again to update it. You might also try switching to “Mapbox” and see if it solves the issue.
Let’s have a look at the possible working solutions for the 3utools Virtual Location Not Working problem.
Part 1: What is 3uTools VirtualLocation?
A program that can help someone manage their device is known as 3uTools. You can set a virtual location on your iPhone, iPad, or any other iDevice using the VirtualLocation option in the program. In addition, you can broadcast the location on social media and get around service and game area restrictions.
To set up 3uTools, there are only a few steps to take.
- Step 1: Set up 3uTools on your computer first.
- Step 2: Connect your iPhone to the PC on which you installed 3uTools in Step 2.
- Step 3: Launch 3uTools and choose the Toolbox option from the top menu in step 3.
- Step 4: Select the VirtualLocation icon from the toolbox.
- Step 5: A new window will open. You can enter the longitudes and latitudes of the location you want to set in the window.
- Step 6: Click the Modify virtual location button after entering the pertinent coordinates. You can notice the new location after a little period of time.

Tips: Is 3uTools Virtual Location not working? Don’t worry, we’ve got the solution! Dr.Fone - Virtual Location offers a seamless and reliable virtual location experience. Say goodbye to issues and hello to hassle-free location changes. Fix it right now with Dr.Fone - Virtual Location!
Part 2: Fix 3utools Virtual Location Not Working Issue [8 ways]
1. Solving the internet issues
Many times, 3uTools is unable to load the map, or the map crashes. The reason for this is that 3uTools is unable to connect to the Google Maps API. This can also occur if your internet connection is unstable.
If this is the cause of your 3uTools virtual location not working, there isn’t much you can do because this is a technical issue that can only be resolved by a technical expert. You might try relaunching 3uTools and repeating the spoofing procedure to refresh it. You may also try changing to “Mapbox” to see if it addresses the problem.
2. Restarting and Closing the Software
When all of the aforementioned options fail, a decent option is to close the software and restart it after a few minutes. This is because the software frequently encounters an error, which is resolved when you close the software, making this a viable choice. We would also advise you to go to the Task Manager after closing the software and End Task it.

3. 3uTools reinstallation
The most common cause of any software not working is poor installation. Some crucial files or components of the software are left behind as a result of faulty installation. As a result, reinstallation or the usage of a different location spoofing program is the only choice remaining.

4. Restarting Your Computer
Restarting your computer is another easy option that many 3uTools users have found useful. If your virtual location feature stops working, simply close the app and restart your computer. This would delete the software from the Random access memory, as well as any bugs or errors that were preventing it from working.

5. Verifying the network connection and that the phone is unlocked
When you encounter a ‘not working’ problem when using the 3uTools software, the first thing you should do is check to ensure that your internet is operational and that there are no interruptions in your connections. You can resolve this by troubleshooting your internet and ensuring that its wire is correctly hooked in, as well as ensuring that your phone is already unlocked.

6. Checking that all dependent components have been downloaded
Another major reason why many individuals experience problems with the 3uTools program is a lack of necessary components. While dependent components are normally downloaded along with the software, this is not always the case. As a result, it is critical to check that you have downloaded all necessary components to ensure that the software works properly.
7. Changing the Source Map
Users frequently report that the map is not loaded. The maps on the 3uTools software fail to load as soon as users activate the virtual location option. You can attempt “Load embedded maps” to solve this issue.

Alternatively, change the source map between Google Maps and Open Street Maps.
8. Uninstalling iTunes and rebooting your system
Many customers have reported encountering the “3uTools virtual location developer image load failed” problem, with the majority of them appearing to be iOS 17 users. 3uTools either does not load the location images or the screen becomes frozen.
Remove iTunes from your computer. Then, try restarting it. Install iTunes from the App Store once more. Restart your computer. After that, connect your iPhone to a PC and confirm that it is unlocked.
Part 3: Best 3uTools Virtual Location Alternative Program You Can Use in 2024
Stop fretting if you frequently encounter the 3uTools virtual location not working problem despite attempting various fixes. The Dr.Fone - Virtual Location is one of the best 3uTools alternatives that is still available.
The Dr.Fone - Virtual Location, a leader in the fake GPS market, is a well-reviewed and user-friendly location changer. You can easily modify your location by doing a simple drag and click. be it the adaptability, usability, or precision of the instrument. Dr.Fone is the best since it contains everything. The following are the steps to use Dr.Fone - Virtual Location to change location.
Dr.Fone - Virtual Location
The best 3uTools virtual location alternative!
- Teleport from one location to another across the world from the comfort of your home.
- With just a few selections on your computer, you can make members of your circle believe you’re anywhere you want.
- Stimulate and imitate movement and set the speed and stops you take along the way.
- Compatible with both iOS and Android systems.
- Work with location-based apps, like Pokemon Go , Snapchat , Instagram , Facebook , etc.
3981454 people have downloaded it
Step 1: Open the Dr.Fone - Virtual Location application
 safe & secure
To begin, you must download Dr.Fone - Virtual Location (iOS/Android). Install and execute the software after that.

Select “Virtual Location” from the drop-down option to connect your iPhone or Android phone to your PC. From the drop-down option, choose “Get Started” to begin the virtual location function.
If you’re playing Pokemon Go on your mobile, connect it to a computer system. When you open the Dr.Fone application, the terms and conditions will be displayed. Read them carefully, accept them, and then click ‘Get Started.’
Step 2: Teleport to any destination
You will be directed to a website that displays a global map as well as your current location on the globe. You may simply zoom in and out to get a better sense of the coordinates and location. ‘Teleport Mode’ should be selected in the upper right corner of the page.
Step 3: Practice moving between different locations
After that, you can change your current location to wherever you wish to go. This could be as close as a neighboring country or as far away as a different country. If you’re playing Pokemon Go, keep it nearby. Then choose ‘Move Here.’

Step 4: Observe the location change
Your location will immediately change, and the new location will be registered on all sites you visit within a few minutes. So you’re good to go!
You can watch the video below to fix 3uTools location issue with Dr.Fone - Virtual Location!

Conclusion
Now you have read about possible working solutions for 3uTools Virtual Location Not Working problem, you may not be able to implement each of them or find the reasons behind what’s happening. The simplest thing that you can do in this regard to get your problem solved immediately is to use Dr.Fone - Virtual Location which is a well-reviewed and user-friendly location changer.
safe & secure
- Title: In 2024, How to Use Life360 on Windows PC For Tecno Pova 5? | Dr.fone
- Author: Nova
- Created at : 2024-07-17 17:55:43
- Updated at : 2024-07-18 17:55:43
- Link: https://phone-solutions.techidaily.com/in-2024-how-to-use-life360-on-windows-pc-for-tecno-pova-5-drfone-by-drfone-virtual-android/
- License: This work is licensed under CC BY-NC-SA 4.0.