
In 2024, How To Use Special Features - Virtual Location On Vivo S17? | Dr.fone
How To Use Special Features - Virtual Location On Vivo S17?
Wondershare Dr.Fone - Virtual Location comes with multiple unique features that can be used to enhance the flow of spoofing location. With all these amazing features, you can easily change your iOS location without blinking an eye. Rather than making things complicated, Dr.Fone makes it easy for you to manage operations when you perform actions like changing Android locations.
Part 1: Circle Route (For Multi-Stop Route)
The circle route feature is under the multi-stop route mode. When your starting point is close to the ending point, a pop-up asks if you want to set up a circle route. Click Yes to create a circular path on the map.

Part 2: Realistic Mode (For One-Stop Route and Multi-Stop Route)
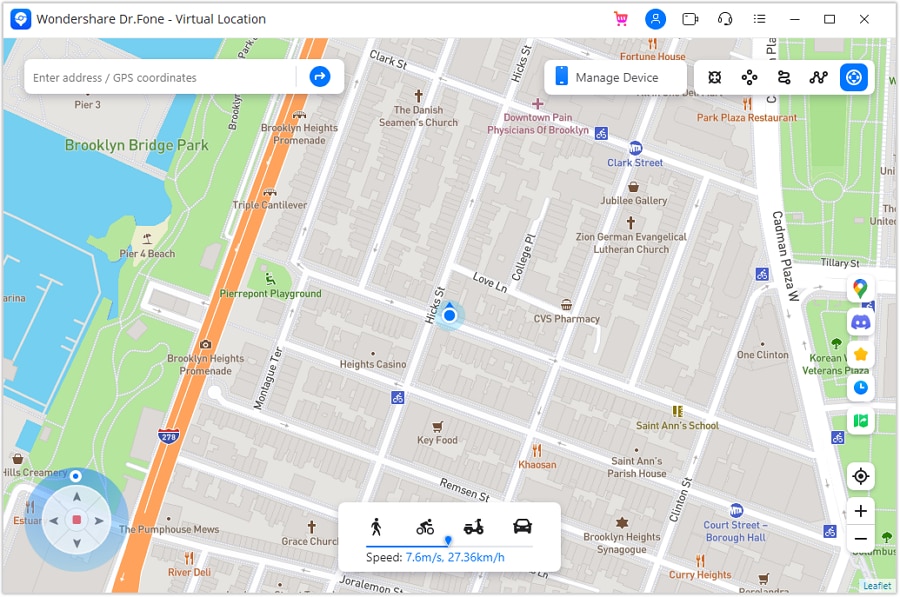
This particular feature makes the simulation look realistic with the ability to fluctuate the speed of the simulation. If you wish to turn on realistic mode for the one-stop or multi-stop route, look for the respective checkmark option in the panel on the left.

Part 3: Fluctuation Mode (For Teleport Mode)
Whenever you are teleporting your smartphone device to another location, you can try using the fluctuation mode feature offered against it. As you activate Teleport Mode from the top-right section and search for a location, you will discover the Fluctuation Mode toggle in the confirmation tab. Turn on the toggle to slightly switch the location from the selected point to show realistic motion.

Part 4: Cooldown Timer (For Teleport Mode and Jump Teleport Mode)
While teleporting the location of your smartphone to different places for playing games like Pokemon Go, you are bound to activate a cooldown timer within your location-changing app to show realistic movement. By locating the Cooldown Timer on the right pane of icons, activate it, and this feature will automatically calculate the cooling time by measuring the distance between your destination and the starting point.

It is recommended not to start the movement until the cooldown time is completed to avoid unnecessary bans. Moreover, you can also activate the Auto jump after cooldown in the Jump teleport mode after turning on the Cooldown Timer.
This option will automatically jump you to the next destination once the timer ends. It is helpful for games like Pokemon Go, where the game servers can detect frequent jumps with no cooldown time.
Part 5: Import/Export GPX File
You can also import and export specific navigated locations from Dr.Fone in the form of GPX files. While you can export GPX files for keeping a record of your location, you can also import such files for inserting specific locations to simulate or teleport to. Find out how you can import and export GPX files with this location-changing application:
Step 1Export the GPX File
If you have defined a proper location to simulate at a particular instant using Dr.Fone - Virtual Location, you can have this location exported by clicking the Export icon on the top of the left panel. This will open a window where you can set the location for saving the GPX file.

Step 2Import a GPX File
For importing a GPX file on the platform, click the Import button on the right pane. As this opens a window, select the GPX file you wish to import to the platform.

Step 3Wait for the File to be Read
Wait for a moment until Dr.Fone - Virtual Location recognizes the specific locations within the GPX file and displays them on the map.

Part 6: Historical Records
If you want to use a similar track record on your smartphone again, you can access the historical records saved on the platform for easy access.
Step 1Open Historical Records
Click the Historical Records button on the right pane to access the entire history involving the connected smartphone and the location spoofing platform.

Step 2Access Any Location from the History
Select the Go button adjacent to any particular historical record to re-launch a similar simulation for the Vivo S17 device. You can also click Clear All to delete all historical records.

Part 7: Favorite List
You can also set up favorite locations within the platform to define quick accessibility to your favorite locations. To do that, you have to follow the guidelines shown next:
Step 1Favorite Specific Locations
While setting up locations in Jump Teleport Mode, One-Stop Route, or Multi-Stop Route, you can tap on the Favorite icon adjacent to every marked location or favorite an entire route with the Favorite icon on the top of the left panel.

Step 2Access your Favorite Section
To look for your favorite locations, look for the Favorite icon on the right pane to open a list containing all locations you have marked. You can choose the Move option to automatically move into a particular location in no time.

Methods to Change GPS Location On Vivo S17

The Internet is a vast space and you have a plethora of content on different websites and platforms. You can call it a two-way - give and take relationship when it comes to the dynamics of data exchange between the world wide web and the users.
When you visit websites, they use cookies to track your activities. When you visit a restaurant, the phone detects and saves the GPS in the memory. You click a picture in the Maldives, your phone seeks out geographic points to prepare the right time and date stamps.
You need your GPS to download and use certain apps. Similarly, your GPS might be the reason you are unable to play some games or use some applications. Change GPS Location Vivo S17 and this won’t be a problem for you.
But if you are wondering how can I change my location on my iPhone? These 5 methods will help you get fruitful results.
Part 1: Change GPS Location on Vivo S17 using a Professional PC Program
The PC Programs are entirely Software based and do a tremendous job to spoof Vivo S17 iOS 16 Location . You don’t have to buy any new equipment and you will be operating using your computer.
You can get this done within minutes if you have the right program with you. One of the best options in the market is Wondershare’s Dr.Fone. This is how you use Dr. Fone Virtual Location spoofer for GPS Spoofing iPhone.
Dr.Fone - Virtual Location
1-Click Location Changer for both iOS and Android
- Teleport from one location to another across the world from the comfort of your home.
- With just a few selections on your computer, you can make members of your circle believe you’re anywhere you want.
- Stimulate and imitate movement and set the speed and stops you take along the way.
- Compatible with both iOS and Android systems.
- Work with location-based apps, like Pokemon Go , Snapchat , Instagram , Facebook , etc.
3981454 people have downloaded it
Step 1: Go to the official website of Dr.Fone - Virtual Location (iOS) . This is easily available when you google it or you can also follow this link here. Then you can download the executive file, install and then launch the application. Once the home page opens, you will find several options - Opt for ‘Virtual Location’. It is usually at the bottom of the page.

Step 2: Now take your Vivo S17 device and connect it to the computer that has Dr. Fone. Then click on ‘Get Started’.


Step 3: Now, the world map will display on the screen and you can clearly see the coordinates and directions as well. On the top right corner, the third icon is called the ‘Teleport Mode’. Click on that and enter the name of the place in the search box. You can even pinpoint it, if you are sure about the place.

Step 4: If you are completely sure that you got the address right, click on the ‘Move Here’ option. It moves your Pin from your present location to your new virtual location.

If you are looking for a way to change Vivo S17 Location without Jailbreak, then this is one of the safest options for you. Also, you have other additional features like Phone Transfer, and Whatsapp Transfer along with Location spoofing. The application will never go to waste, won’t occupy much of your computer/PC/Laptop’s space and you can get the fake location iOS within minutes.
Part 2: Change GPS Location on Vivo S17 using External Device
You can achieve the iOS Spoof Location using External devices as well. These devices do not cause any inconvenience to you. They are meant to be small, fit into the lightning port of your iPhone, and act as an external source that will spoof the Vivo S17 location and the same will reflect in every app that uses or detects your iPhone’s geographic location.
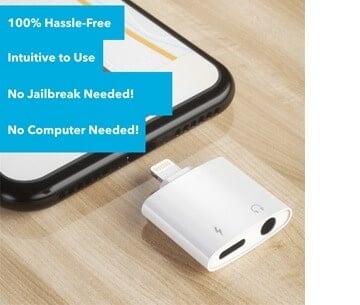
The best external device to change phone location Vivo S17 is Double Location Dongle. This simple device can be utilized by following the steps below -
Step 1: The Double Location Dongle is a very small, white rectangle that connects to your iPhone’s port. But along with it, you also have to install the Companion app for location spoofing. Once you have both of them ready, connect the Vivo S17 device to your iPhone.
Note: The Companion App is not available on the App store. You have to download it from Double Location’s official website.
Step 2: The next step is to open the Double Location iOS companion app and then settle on the Map Tab.

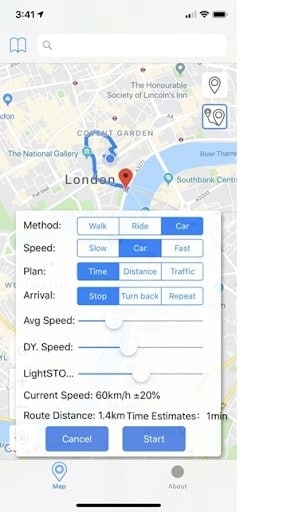
Step 3: Unlike what we had seen in the Dr. Fone step, we cannot enter the location into any search box. You should move the pin to the location that you want to virtually shift to. Double Location provides some very good options that will help you during gaming. You can change all the appropriate settings and proceed.
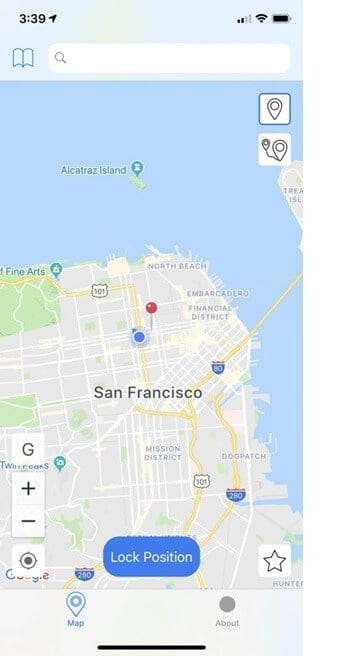
Step 4: On the bottom of the screen, Go for the lock position option. Once you do that, there will be a virtual shift in your geographic position and all your apps will register your new coordinates.
Part 3: Change GPS Location on Vivo S17 using XCode
You can change the geolocation Vivo S17 by using your coding expertise as well. That is why XCode exists. This Computer Program lets you change your Location in Vivo S17 by giving some GIT Commands to the PC while your Vivo S17 stays connected to it. By following these steps, you can understand how to do it. But if you’ve never had a liking for programming and coding languages, then you should probably skip this -
Step 1: Download and install XCode from the AppStore, directly to your Mac device. Launch the application.

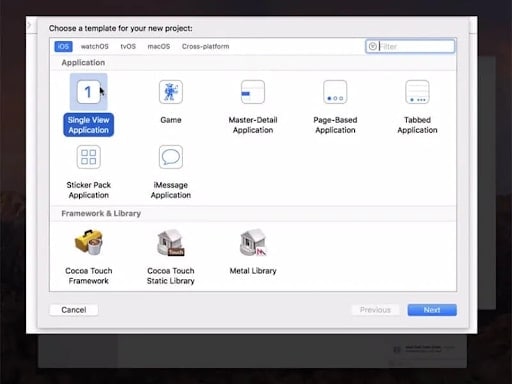
Step 2: Once you see the XCode window open, Go for the ‘Single View Application’ to start a new Project and go on by clicking on ‘Next’. You can set up a name and details for this particular project.
Step 3: A screen display will appear asking you about your identity. This is where the minimal coding part starts. You need to enter some GIT Commands to continue with the project.
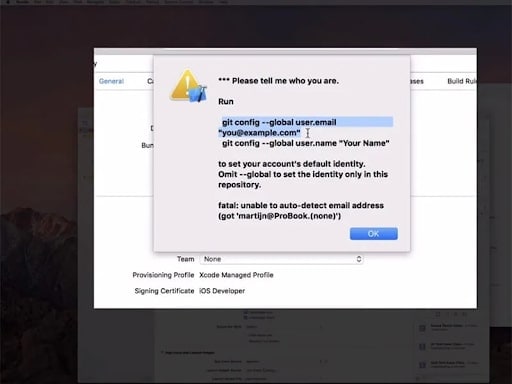
Step 4: Launch and run the terminal on your Mac device and enter these commands - git config –global user.email “[email protected]“ and git config –global user. name “your name”.You need to add your own details in the quoted space and continue to verify your identity.
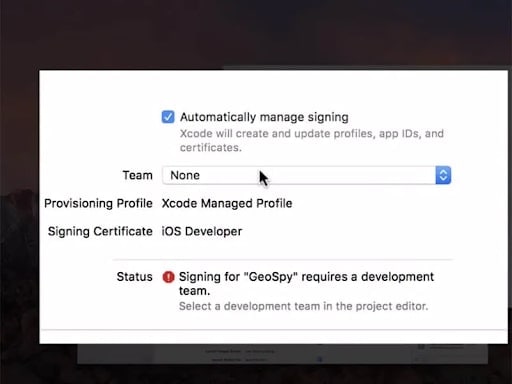
Step 5: Once you enter the commands, go to the next step and establish the Development Team. Then you can proceed to connect your Vivo S17 device to your Mac device. Use the normal cable to do that.
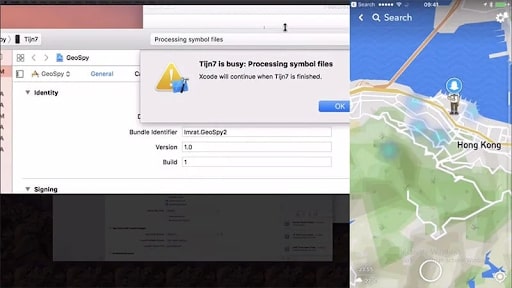
Step 6: To allow the program to process the Symbol Files, you will have to choose the model of your device. Go to the ‘Build Device’ option and continue as per the prompts. However, make sure that you keep your Vivo S17 unlocked for quick detection by the computer software.
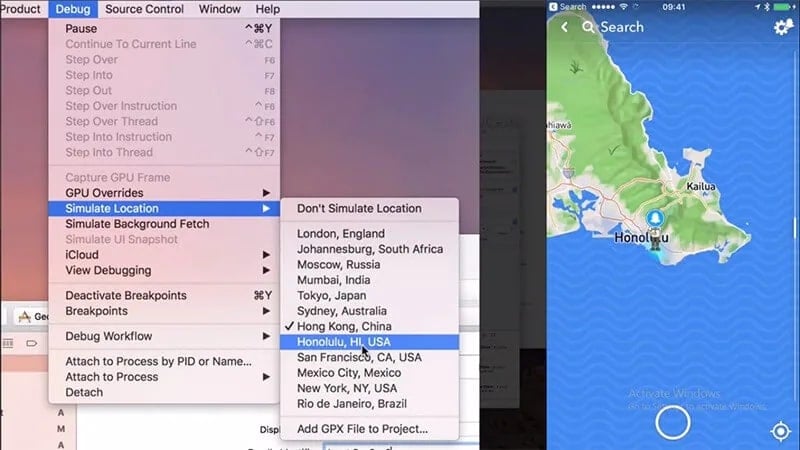
Step 7: Once that is done, you can come back to the actual location spoofing part. Go to the debug Menu > Simulation Location and specify the exact location that you want to virtually shift to. Once you are okay with it, the same will reflect on your Vivo S17 as well.
Part 4: Change GPS location on Vivo S17 using Cydia Location Faker App
Cydia is also based on software applications and changes location in seconds, However, you need to note that you have to jailbreak your phone. If you don’t know how to do it or do not want to take the risk, Cydia’s LocationFaker app may not be the right fit for you. But if you are a jailbreak expert, this is a very comfortable GPS Changer for iPhone.
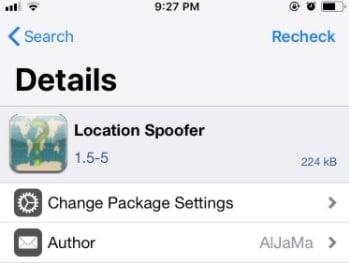
Step 1: Download the Cyndia LocationFaker app from the official website. LocationFaker8 is available for the iOS 8.0 model.
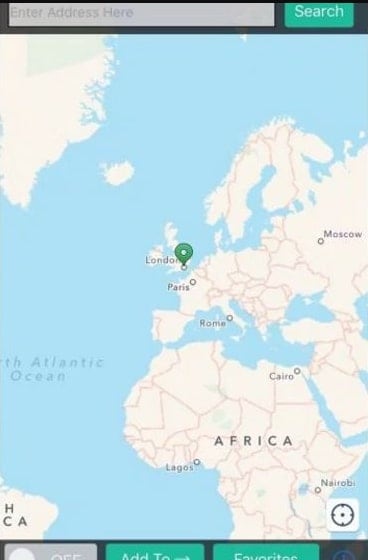
Step 2: After launching the app, enter the virtual location into the search box.
Step 3: If you are done with choosing the new location, shift the toggle from ‘OFF’ to ‘ON’ at the bottom of the page.
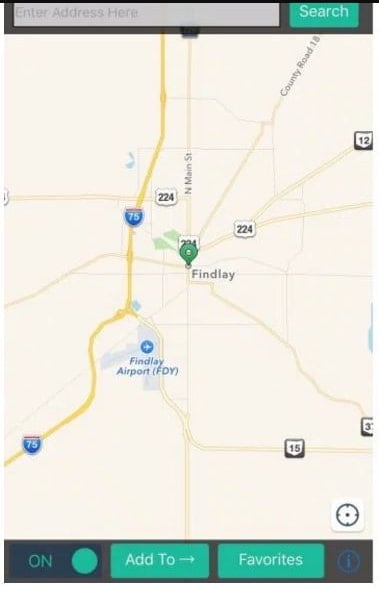
Step 4: Now we can decide which apps can access our new virtual location. At the bottom of the page, you will find an ‘i’ icon. Go click on it and choose the ‘White List’ option. This one will then take you to the app list and you can decide which of them will have access to the phone’s location.
Part 5: Change GPS Location on Vivo S17 using Location Handle
Location Handle is another useful application that you can use to change your location by a few meters or simply go with an automated movement system that changes your location gradually as if you are moving from one place to another. This is how you use it -
Step 1: Download the Location Handle app from the website or App store
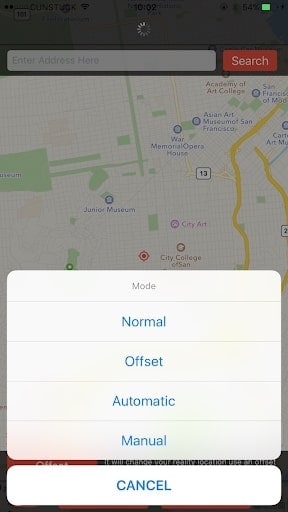
Step 2: There are four different types - Normal Mode - teleport to a new location; Offset Mode - Move a few feet away from the present location ; Automatic Mode - Slowly change your location from one point to another, as if walking ; Manual Mode - Change your location using a joystick.
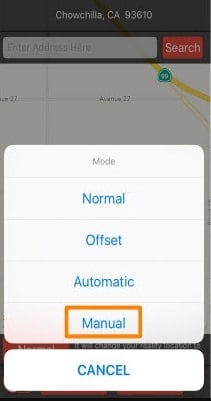
Step 3: Consider the Manual mode, because we want to change location to a far-off place and not necessarily for gaming.
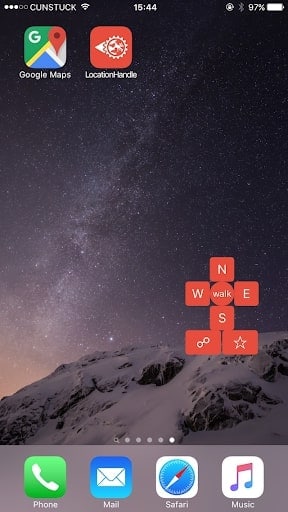
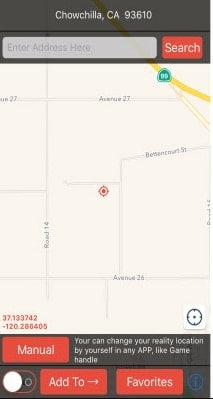
Step 4: Once the Manual mode is activated, the map will be displayed and you can change the pin location. You can enter the location name in the search box.
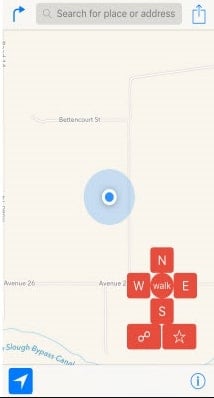
Step 5: The Joystick will appear on the page and you can use it to shift your location to wherever you want. Once you fix on the location, proceed and the new location will be updated.
Conclusion
We hope you are no longer wondering How to change Location services on Vivo S17. These 6 methods are very effective and you can always opt for the one that is most comfortable for you. If you want a hassle-free PC program, we have that narrowed down for you. If you are a coding enthusiast, then we’ve listed a method that best fits you. Whatever the reason, with an iOS Fake GPS, life becomes much easier and sometimes even safe on the internet. You can explore beyond the boundaries without moving from your couch!
How To Simulate GPS Movement With Location Spoofer On Vivo S17?
When you are playing location-based games like Pokemon Go, you might need to simulate GPS movement to catch more Pokemon. To do this, you can use the GPS movement feature of Wondershare Dr.Fone - Virtual Location . This feature allows you to simulate GPS movement between two or multiple spots on the map. Here’s how you can do it:
Part 1: Simulate Movement Along a Route (One-Stop Route)
You can set up a one-stop route when mocking locations fake with Dr.Fone - Virtual Location. This particular feature helps users to set up looping or round trips within a specific location. To perform the steps for simulating movement, look ahead for a better understanding:
Step 1Access One-Stop Route Function
Once you launch Wondershare Dr.Fone - Virtual Location and connect your smartphone successfully, proceed to select the One-Stop Route function from the top-right section. The function is represented by the third icon from the left in the section. While you have already teleported to another location or are using your current location, you can tap anywhere on the map to set your destination location.

Step 2Define Simulation Parameters
Enter a number to define how many times you want to go back and forth, and select whether you want a Round trip or a Loop trip. Drag the slider on the speed option to set how fast you want to walk. Proceed to click Move Here on the bottom to start the movement simulation.

Step 3Start Simulation Movement
The respective simulation starts, and you can see your position is moving on the map with the speed you set. If you wish to hold the simulation, click Pause or tap Clear to revert to your original state.

Part 2: Simulate Movement Along a Route (Multi-Stop Route)
You can try the multi-stop mode if you want to pass by multiple places along a route on the map. Learn how it is done when you are trying to **spoof location on Android/**iOS:
Step 1Start Multi-Stop Route and Set Parameters
Activate the Multi-Stop Route mode from the top-right section next to the One-Stop Route mode. After activating the mode, set multiple spots on the map by clicking your required place. Define the number of trips and speed. Click Start Moving to initiate the process.
Note: Select the spots along a specific road to prevent the game developer from thinking you are cheating.

Step 2View Multi-Stop Route Movement
As the simulation starts, click Pause at any instance where you want to stop the simulation. You can also Clear all settings if required.

Part 3: Use Joystick for More Flexible GPS Control (Joystick Movement)
Dr.Fone has integrated the joystick feature into the Virtual Location program to spare 90% of the labor for GPS control. You can always find the joystick on the lower left part in teleport mode. And you can also click the joystick button in the upper right (the 5th one) to use the joystick feature.
The joystick, like one-stop route or multi-stop route modes, aims to facilitate GPS movement on the map. But what’s better? The joystick lets you move on the map by changing directions in real time. Here are the two main scenes where you will definitely love the joystick.
- Automatic GPS movement: Click the Start button in the middle, and the automatic movement starts. Then just change the directions as you like by 1) clicking the left or right arrows, 2) dragging the spot around the circle, 3) pressing keys A and D on the keyboard, or 4) pressing keys Left and Right on the keyboard.
- Manual GPS movement: Move forward by constantly clicking the Up arrow in the program and long-pressing the key W or Up on the keyboard. Reverse by constantly clicking the Down arrow, or long-pressing the key S or Down on the keyboard. You can also tweak the directions using the four ways above before moving forward or reverse.
- Title: In 2024, How To Use Special Features - Virtual Location On Vivo S17? | Dr.fone
- Author: Nova
- Created at : 2024-09-12 21:27:37
- Updated at : 2024-09-19 21:23:30
- Link: https://phone-solutions.techidaily.com/in-2024-how-to-use-special-features-virtual-location-on-vivo-s17-drfone-by-drfone-virtual-android/
- License: This work is licensed under CC BY-NC-SA 4.0.