
In 2024, Methods to Change GPS Location On Motorola Razr 40 Ultra | Dr.fone
Methods to Change GPS Location On Motorola Razr 40 Ultra

The Internet is a vast space and you have a plethora of content on different websites and platforms. You can call it a two-way - give and take relationship when it comes to the dynamics of data exchange between the world wide web and the users.
When you visit websites, they use cookies to track your activities. When you visit a restaurant, the phone detects and saves the GPS in the memory. You click a picture in the Maldives, your phone seeks out geographic points to prepare the right time and date stamps.
You need your GPS to download and use certain apps. Similarly, your GPS might be the reason you are unable to play some games or use some applications. Change GPS Location Motorola Razr 40 Ultra and this won’t be a problem for you.
But if you are wondering how can I change my location on my iPhone? These 5 methods will help you get fruitful results.
Part 1: Change GPS Location on Motorola Razr 40 Ultra using a Professional PC Program
The PC Programs are entirely Software based and do a tremendous job to spoof Motorola Razr 40 Ultra iOS 16 Location . You don’t have to buy any new equipment and you will be operating using your computer.
You can get this done within minutes if you have the right program with you. One of the best options in the market is Wondershare’s Dr.Fone. This is how you use Dr. Fone Virtual Location spoofer for GPS Spoofing iPhone.
Dr.Fone - Virtual Location
1-Click Location Changer for both iOS and Android
- Teleport from one location to another across the world from the comfort of your home.
- With just a few selections on your computer, you can make members of your circle believe you’re anywhere you want.
- Stimulate and imitate movement and set the speed and stops you take along the way.
- Compatible with both iOS and Android systems.
- Work with location-based apps, like Pokemon Go , Snapchat , Instagram , Facebook , etc.
3981454 people have downloaded it
Step 1: Go to the official website of Dr.Fone - Virtual Location (iOS) . This is easily available when you google it or you can also follow this link here. Then you can download the executive file, install and then launch the application. Once the home page opens, you will find several options - Opt for ‘Virtual Location’. It is usually at the bottom of the page.

Step 2: Now take your Motorola Razr 40 Ultra device and connect it to the computer that has Dr. Fone. Then click on ‘Get Started’.

Step 3: Now, the world map will display on the screen and you can clearly see the coordinates and directions as well. On the top right corner, the third icon is called the ‘Teleport Mode’. Click on that and enter the name of the place in the search box. You can even pinpoint it, if you are sure about the place.

Step 4: If you are completely sure that you got the address right, click on the ‘Move Here’ option. It moves your Pin from your present location to your new virtual location.

If you are looking for a way to change Motorola Razr 40 Ultra Location without Jailbreak, then this is one of the safest options for you. Also, you have other additional features like Phone Transfer, and Whatsapp Transfer along with Location spoofing. The application will never go to waste, won’t occupy much of your computer/PC/Laptop’s space and you can get the fake location iOS within minutes.
Part 2: Change GPS Location on Motorola Razr 40 Ultra using External Device
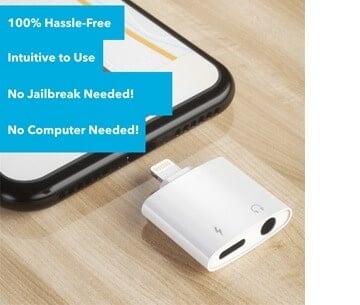
You can achieve the iOS Spoof Location using External devices as well. These devices do not cause any inconvenience to you. They are meant to be small, fit into the lightning port of your iPhone, and act as an external source that will spoof the Motorola Razr 40 Ultra location and the same will reflect in every app that uses or detects your iPhone’s geographic location.
The best external device to change phone location Motorola Razr 40 Ultra is Double Location Dongle. This simple device can be utilized by following the steps below -
Step 1: The Double Location Dongle is a very small, white rectangle that connects to your iPhone’s port. But along with it, you also have to install the Companion app for location spoofing. Once you have both of them ready, connect the Motorola Razr 40 Ultra device to your iPhone.
Note: The Companion App is not available on the App store. You have to download it from Double Location’s official website.
Step 2: The next step is to open the Double Location iOS companion app and then settle on the Map Tab.

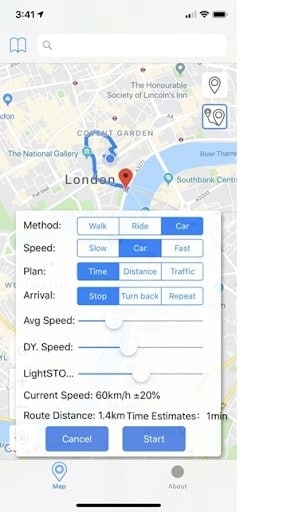
Step 3: Unlike what we had seen in the Dr. Fone step, we cannot enter the location into any search box. You should move the pin to the location that you want to virtually shift to. Double Location provides some very good options that will help you during gaming. You can change all the appropriate settings and proceed.
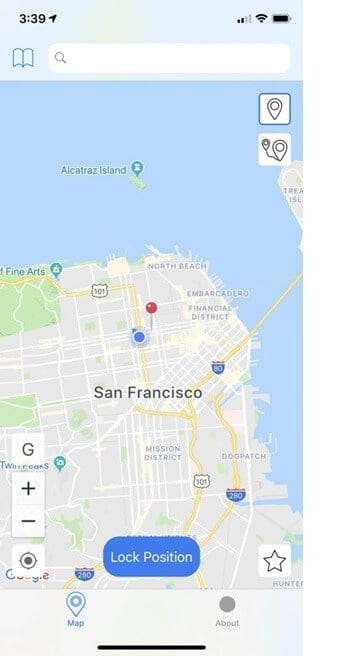
Step 4: On the bottom of the screen, Go for the lock position option. Once you do that, there will be a virtual shift in your geographic position and all your apps will register your new coordinates.
Part 3: Change GPS Location on Motorola Razr 40 Ultra using XCode
You can change the geolocation Motorola Razr 40 Ultra by using your coding expertise as well. That is why XCode exists. This Computer Program lets you change your Location in Motorola Razr 40 Ultra by giving some GIT Commands to the PC while your Motorola Razr 40 Ultra stays connected to it. By following these steps, you can understand how to do it. But if you’ve never had a liking for programming and coding languages, then you should probably skip this -
Step 1: Download and install XCode from the AppStore, directly to your Mac device. Launch the application.

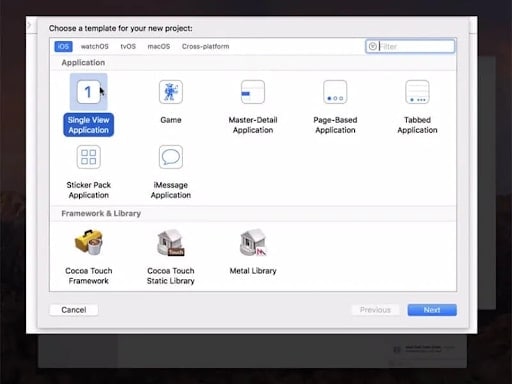
Step 2: Once you see the XCode window open, Go for the ‘Single View Application’ to start a new Project and go on by clicking on ‘Next’. You can set up a name and details for this particular project.
Step 3: A screen display will appear asking you about your identity. This is where the minimal coding part starts. You need to enter some GIT Commands to continue with the project.
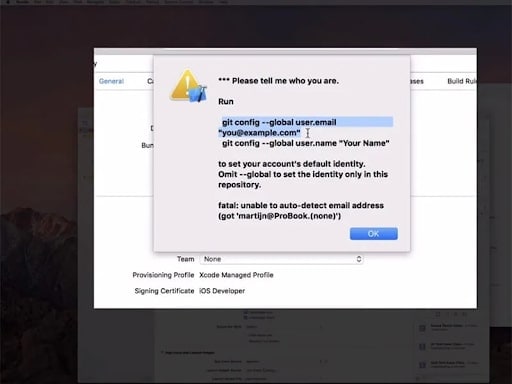
Step 4: Launch and run the terminal on your Mac device and enter these commands - git config –global user.email “[email protected]“ and git config –global user. name “your name”.You need to add your own details in the quoted space and continue to verify your identity.
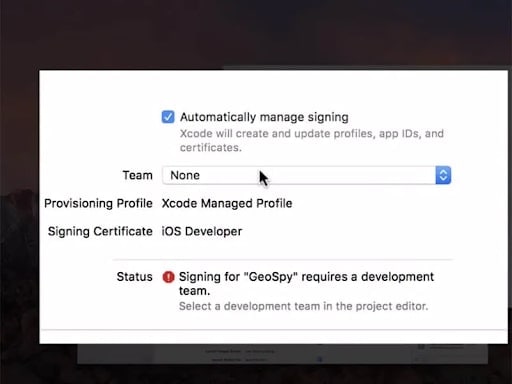
Step 5: Once you enter the commands, go to the next step and establish the Development Team. Then you can proceed to connect your Motorola Razr 40 Ultra device to your Mac device. Use the normal cable to do that.
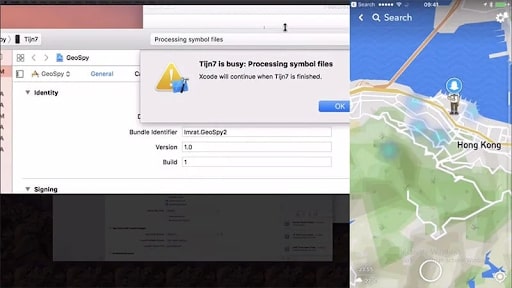
Step 6: To allow the program to process the Symbol Files, you will have to choose the model of your device. Go to the ‘Build Device’ option and continue as per the prompts. However, make sure that you keep your Motorola Razr 40 Ultra unlocked for quick detection by the computer software.
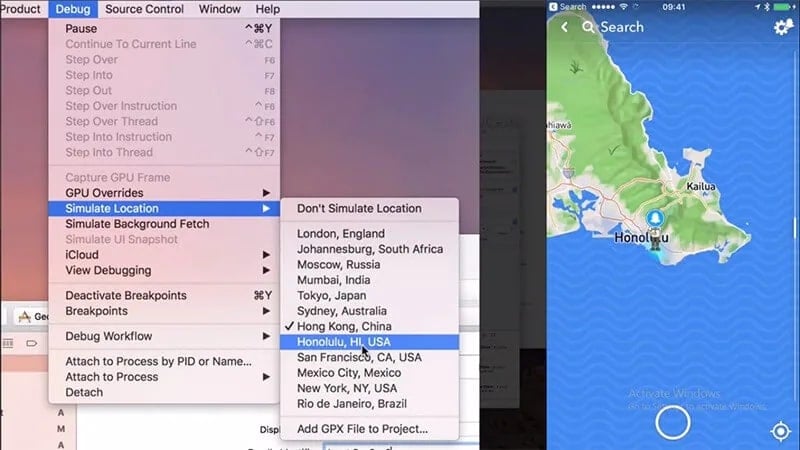
Step 7: Once that is done, you can come back to the actual location spoofing part. Go to the debug Menu > Simulation Location and specify the exact location that you want to virtually shift to. Once you are okay with it, the same will reflect on your Motorola Razr 40 Ultra as well.
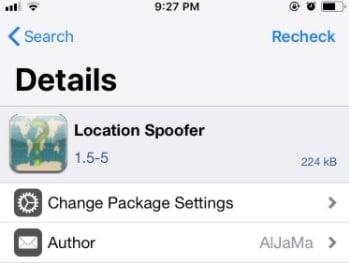
Part 4: Change GPS location on Motorola Razr 40 Ultra using Cydia Location Faker App
Cydia is also based on software applications and changes location in seconds, However, you need to note that you have to jailbreak your phone. If you don’t know how to do it or do not want to take the risk, Cydia’s LocationFaker app may not be the right fit for you. But if you are a jailbreak expert, this is a very comfortable GPS Changer for iPhone.
Step 1: Download the Cyndia LocationFaker app from the official website. LocationFaker8 is available for the iOS 8.0 model.
Step 2: After launching the app, enter the virtual location into the search box.
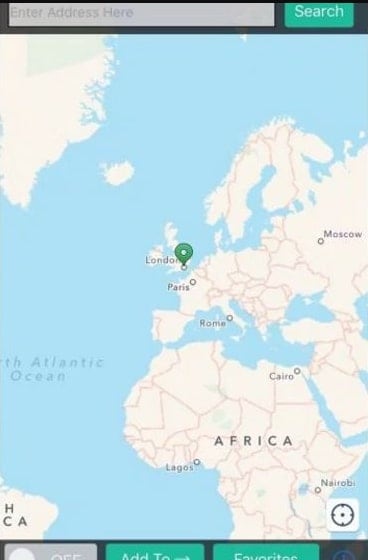
Step 3: If you are done with choosing the new location, shift the toggle from ‘OFF’ to ‘ON’ at the bottom of the page.
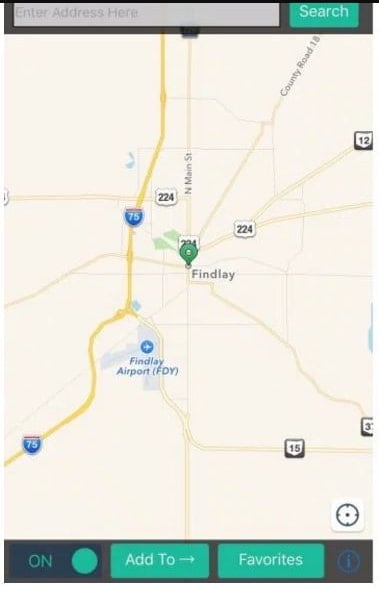
Step 4: Now we can decide which apps can access our new virtual location. At the bottom of the page, you will find an ‘i’ icon. Go click on it and choose the ‘White List’ option. This one will then take you to the app list and you can decide which of them will have access to the phone’s location.
Part 5: Change GPS Location on Motorola Razr 40 Ultra using Location Handle
Location Handle is another useful application that you can use to change your location by a few meters or simply go with an automated movement system that changes your location gradually as if you are moving from one place to another. This is how you use it -
Step 1: Download the Location Handle app from the website or App store
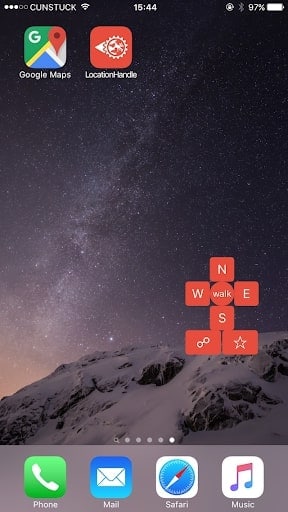
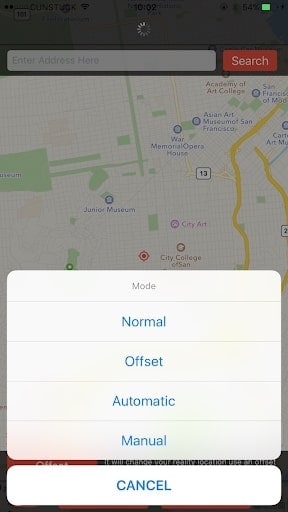
Step 2: There are four different types - Normal Mode - teleport to a new location; Offset Mode - Move a few feet away from the present location ; Automatic Mode - Slowly change your location from one point to another, as if walking ; Manual Mode - Change your location using a joystick.
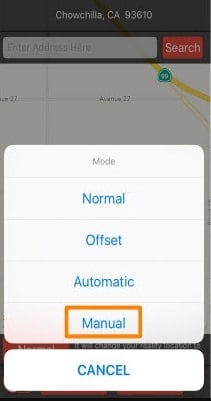
Step 3: Consider the Manual mode, because we want to change location to a far-off place and not necessarily for gaming.
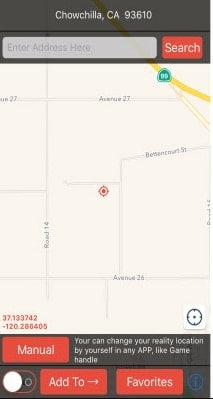
Step 4: Once the Manual mode is activated, the map will be displayed and you can change the pin location. You can enter the location name in the search box.
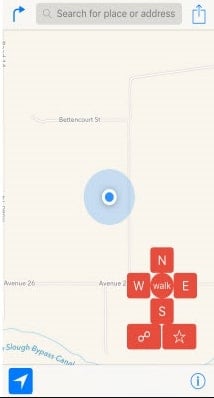
Step 5: The Joystick will appear on the page and you can use it to shift your location to wherever you want. Once you fix on the location, proceed and the new location will be updated.
Conclusion
We hope you are no longer wondering How to change Location services on Motorola Razr 40 Ultra. These 6 methods are very effective and you can always opt for the one that is most comfortable for you. If you want a hassle-free PC program, we have that narrowed down for you. If you are a coding enthusiast, then we’ve listed a method that best fits you. Whatever the reason, with an iOS Fake GPS, life becomes much easier and sometimes even safe on the internet. You can explore beyond the boundaries without moving from your couch!
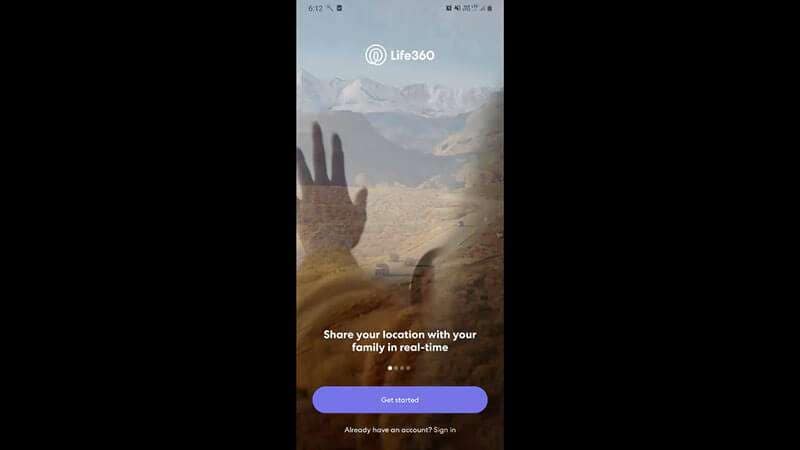
How to Use Life360 on Windows PC For Motorola Razr 40 Ultra?
Life360 is an online platform that utilizes geo-location services to help users share their real-time location with friends and family. The app allows people to create a family group and stay connected to each other through features like chatting, sharing location, sending safety alerts, etc.
As of now, you cannot run Life360 on computer as it is only available for Android and iOS. Why? Because as opposed to a PC, one can easily carry their device everywhere! It means whether your kid is stuck in traffic and needs your help or your parents have lost their way back home, Life360 will instantly send you an alert on your device.
However, that doesn’t mean you cannot use Life360 on a PC. While it may seem a bit odd, there are a couple of methods that’ll allow you to get the Life360 app for Windows. In today’s guide, we are going to share some of these methods that’ll help you run the Life360 app on Windows.
So, without wasting another second, let’s dive straight into the guide.
Part 1: Why people seek to use Life360 on PC?
First things first; why would anyone want to use a family locator app like Life360 on their PC? Well, the truth is everyone has their own reason to get Life360 for PC. For instance, let’s say you are in the middle of an important project and don’t want to be bothered by alerts on your smartphone. However, you still don’t want to compromise with the safety of your family members.
In this situation, you can simply run the Life360 app on PC. This will allow you to directly keep track of the whereabouts of family members on your Windows system and you won’t have to constantly check your phone.
Life360 can also be used on a computer when your phone’s battery has completely drained and there’s no power outlet nearby. In this case, you can simply power-on your laptop, start the Life360 app and send your current whereabouts to family members.
Part 2: Is it possible to use Life360 on Windows PC?
Life360 is an extremely useful app for people who are always concerned about their closed ones. The app is basically designed with a vision to keep family members connected and safe. In addition to location sharing, the app also provides exclusive features like crash detection, place alerts, speed alerts, battery monitoring, etc.
The app also makes it easier for parents to monitor their child’s movement. Using the app, you can always know that your kids have safely reached school and back home. For any parent, knowing whether the kids are safe, is one less thing to worry about.
However, as we mentioned earlier, Life360 hasn’t been released for Windows yet. So, there’s no direct way to install and run the app on a Windows PC. While Life360 may release a dedicated Windows software in the future, as of now, you can only run it using the alternative methods.
These methods include:
Part 3: Use Life360 on Windows PC with Android emulator
The first and the most convenient way to run Life360 on computer is to use an Android Emulator. An emulator is basically a software that creates a virtual Android system on your computer. As a result, you’ll be able to run Android apps on your computer.
While there are dozens of Android emulators, Bluestacks seems to be the most popular and user-friendly option among all. Unlike other emulators, Bluestacks is easy to set up and use.
Here’s how you can run Life360 on a computer using Bluestacks Android emulator./
Step 1: Head over to Bluestacks official website and tap the download button.
Step 2: Open the installer and tap the “download” button. This will initiate the download process on your System.
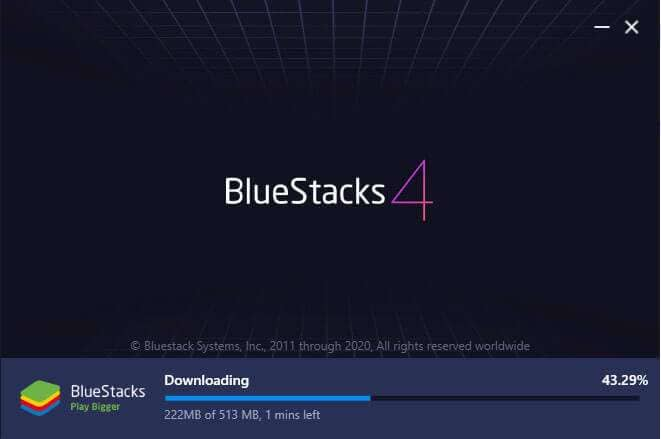
Step 3: Once the installation process completes, Bluestacks will start to boot. Keep in mind that the first boot may take some time, depending on your system configurations.

Step 4: In the home screen, tap the “Google Play Store” icon. You’ll be asked to sign-in with your Google account. Enter the right credentials and log-in to the Google Play Store.

Step 5: In the top search bar, type-in Life360 and tap the “install” button to download the app.

Step 6: Life360 is now installed on your computer. Open the app and enter your login details. You’ll now be able to run Life360 on your PC.

Part 4: Use Life360 by mirroring Android to Windows PC
While running an emulator is a great way to get Life360 on PC, it has its own set of challenges. For instance, running an Android emulator is not easy when you have a low-configuration PC. Emulators like Bluestacks requires high system configuration otherwise they take forever to load.
In this situation, we have another alternative for you to run Life360 on PC. You can simply mirror your Android to your Windows system. Mirroring the Android device will allow you to see its content on the PC itself.
Here’s how you can mirror the Android device on your PC.
Step 1: Make sure that Bluetooth is activated on both devices.
Step 2: On your Windows PC, open “Settings” and select the “Systems” tab.

Step 3: Choose the “Projecting to this PC” option in the left menu-bar and make sure that “Available Everywhere” is selected.

Step 4: If you’re running Android Pie or above on your device, scroll down to open notification drawer and select “Smart View” (or “Cast” in some devices). You’ll see your PC listed here. Tap the button to start Android mirroring.

Step 5: It may take some while for the connection to establish. Once it does, you’ll be able to cast your device screen onto your computer and you’ll be able to run life360 on your system.
Keep in mind that you’ll still require your device to navigate through the content on your computer. Any action that you perform on your device will be replicated on your computer screen as well.
Final Verdict
Life360 is probably among the top family locators for Android users. Apart from its extensive range of features, the app provides a user-friendly interface, which allows it easier for even elders to use the app without any issues. Even though there isn’t a dedicated Life360 software for Windows, you can follow the above-mentioned methods to run the Life360 on PC.
You Might Also Like
Location-based apps
GPS spoof for dating apps
GPS spoof for social apps
Pokemon Go on PC
AR game tricks

Change Phone GPS Location Easily
- ● Teleport GPS location to anywhere
- ● Play AR games without moving
- ● Spoof Location on the popular Apps
Prevent Cross-Site Tracking on Motorola Razr 40 Ultra and Browser
Have you ever wondered why you get the advertisements of the websites you visited a few minutes ago on your social media sites? Here comes to Cross-Site Tracking, also termed CST, and it is a process where third-party cookies and sites track your browser history.
![]()
The CST process is like invading your privacy by collecting your browser history and personal information. So, to prevent these services, there are several ways by which you can cross-site tracking on your system as well as Motorola Razr 40 Ultra phone browsers. Keep reading to learn how to stop cross-site tracking on both Motorola Razr 40 Ultra and browser.
Part 1: Why Do We Need to Stop Cross-site Tracking?
Cross-site Tracking is all about collecting your browsing data and other information for advertising purposes. Though the process can prove convenient for many as it provides additional information about the products and services you have searched for and offers tailor-made content, it is intrusive and about breaching your privacy.
Cross-site tracking collects information about your browsing history. The third-party cookies also monitor the content type you have visited and your personal information, which is risky.
Besides invading privacy, the CST also poses several other issues. Based on your browsing history, additional content you have not asked for is loaded on your visited sites, slows down the page loading process, and puts an extra burden on your battery. Moreover, too much-unwanted content can interfere with the basic information you are looking for.
So, it is always better to prevent cross-site tracking for all the above and more reasons.
Further reading: A detailed guide on faking location in Mozilla Firefox . Don’t worry about your location privacy anymore!
Part 2: Can Private Browsing be traced?
Yes, private browsing can be traced. When you work in private browsing mode, the web browser does not save the browsing history, which means that anyone who uses your system will not check your online activities. But websites and cookies can track your browsing history as well as other information.
Part 3: How to Disable Cross-website Tracking on Safari for iOS Devices?
Safari is the most commonly used platform by iOS users. So, to prevent CST for Safari on your iOS devices and Mac systems, below is a complete guide.
Deactivate Safari cross-website tracking for iPhone & iPad
Safari cross-site tracking can be prevented using the below steps on your iPhone and iPad.
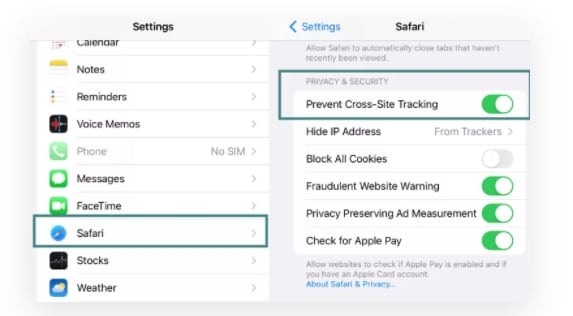
- Step 1. Launch the Settings app on your iOS device.
- Step 2. Find the Safari option by scrolling down the menu.
- Step 3. Move the slider to turn on “Prevent Cross-Site Tracking” under the PRIVACY & SECURITY option.
Deactivate Safari cross-website tracking for Mac
Use the steps below to turn off cross-site tracking on Safari on your Mac systems.
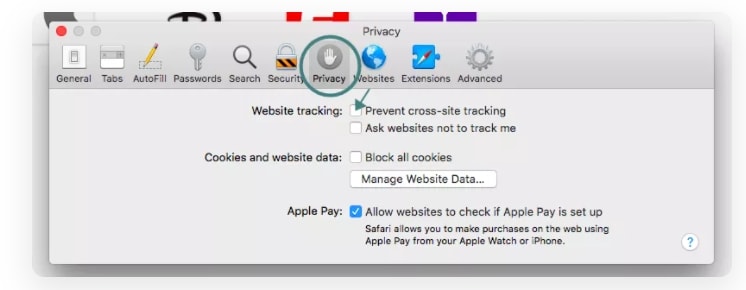
- Step 1. On your Mac system, open the Safari app.
- Step 2. Move to Safari > Preferences > Privacy
- Step 3. Enable the “Prevent cross tracking” option by clicking on the box next to it.
Part 4: How to Disable Cross-site Tracking on Google Chrome
Chrome is used widely on Windows systems and Android devices, and to prevent the CST from your browser, a detailed guide is given below.
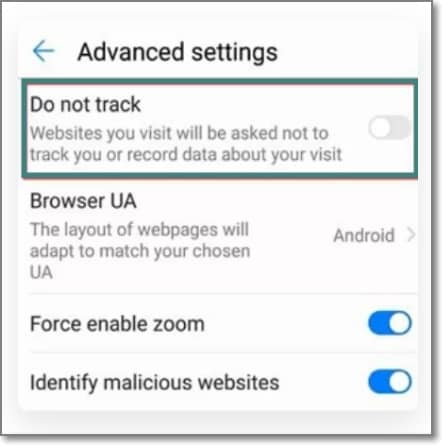
Enable “Do Not Track” on Google Chrome for Android
- Step 1. On your Motorola Razr 40 Ultra, open the Chrome app.
- Step 2. At the right side of the address bar, click on the More option and choose Settings.
- Step 3. Choose the Privacy option from the Advanced tab.
- Step 4. Click on the “Do Not Track” option to turn on the feature.
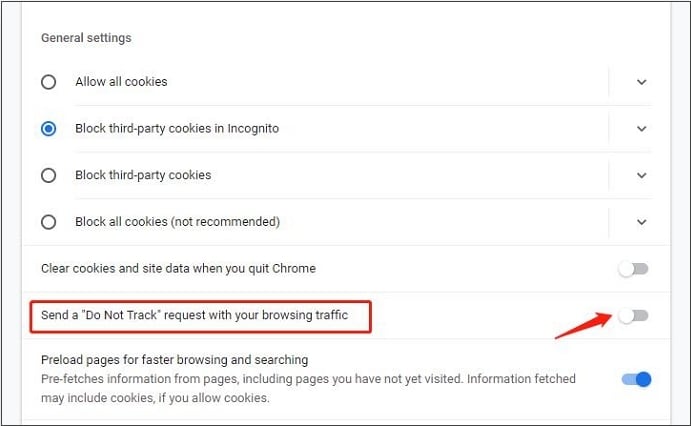
Enable “Do Not Track” on Google Chrome for Computer
- Step 1. Launch Chrome on your system, and from the menu at the upper-right corner, click on the Settings option.
- Step 2. From the “Privacy and Security” tab, choose the “Cookies and other site data” option.
- Step 3. Tap and enable the slider next to “Send a “Do not track” request with your browsing traffic.”
Part 5: Recommended Solution: Fake a Location to Stop Cross-Site Location Tracking Using Dr. Fone
What if you let the sites and cookies track your phone location without worrying about your privacy? Yes, it can be done by spoofing your location. So, if you set a fake location while browsing the internet, you will not have to worry about cross-site tracking, as anyways, the sites and cookies will get misled browsing information that cannot harm you in any manner.
Setting a fake location on your iOS devices, a professional tool is needed, for we recommend Wondershare Dr.Fone - Virtual Location as the best tool. Using this Android and iOS-based software, you can set any fake GPS location on your device. The tool is simple to use and does not require any mastery of technical know-how.
Key features
- Simple tool to teleport to any GPS location in a single click.
- Allows simulating GPS movement along the route.
- All popular models of Android and iOS devices are compatible.
- Compatible with all location-based apps on your phone.
- Compatible with Windows and Mac systems.
Here is a video tutorial for you to take an overview of how to use Dr.Fone - Virtual Location to fake location on your Android and iOS devices.
 safe & secure
Steps to set fake location on your Android and iOS devices using DrFone-Virtual Location
Step 1. Download, install and launch the software on your Windows or Mac systems. On the main software interface, choose the Virtual Location option.
Step 2. Connect your iPhone or Android device to your system using a USB cable and then tap on the Get Started option on your software interface.
Step 3. A new window on the software interface will open, showing your connected phone’s real and actual location. If the detected location is incorrect, click on the “Center On” icon to display the right device location.

Step 4. Next, you need to activate the “teleport mode” and click o the 3rd icon at the upper-right corner.
Step 5. Next, you have to enter now the fake location to which you wish to teleport to at the upper-left corner. Click on Go.
Step 6. Finally, tap on the Move Here button and the new fake location for your connected Android or iOS device at the pop-up box.

Check the new location of your phone from the app.
Wrap it up
Preventing Cross-site tracking can be done on different browsers and devices using the guides listed in the above parts of the article. Settings a fake location for your device using Dr. Fone-Virtual Location is another interesting way to prevent tracking your browsing history by spoofing the sites and cookies. Setting a fake place will not only avoid monitoring your browsing history but will also work with all location-based apps on your phone.
safe & secure
Also read:
- [New] Unlock Higher Views Ideal Video Post Times
- All About Factory Reset, What Is It and What It Does to Your Motorola Defy 2? | Dr.fone
- Complete Fixes To Solve iPhone 11 Pro Randomly Asking for Apple ID Password | Dr.fone
- Complete guide for recovering music files on Nokia
- Complete guide for recovering pictures files on Samsung Galaxy M34.
- In 2024, How to Successfully Bypass iCloud Activation Lock on iPhone SE (2020)
- In 2024, How to use Snapchat Location Spoofer to Protect Your Privacy On Honor X9b? | Dr.fone
- In 2024, Life360 Circle Everything You Need to Know On Apple iPhone 12 Pro | Dr.fone
- In 2024, Life360 Circle Everything You Need to Know On OnePlus Nord N30 SE | Dr.fone
- Most Effective Techniques to Restore Audio on Your Desktop/Laptop Speakers
- Noble Mic Necessities for YouTube Newbies on the Cheap
- Selección Exclusiva De Reproductores Libres en UHD Gratis HEVC/H.265 Para Windows 11 & Mac, La Mejor Elección Del Año 2020
- Step by Step Resolution for 'TL-WN722N Not Showing Up' Problem on a Windows System
- What Families Are Enjoying: Top Movies on Amazon Prime Video in July 2E24
- Title: In 2024, Methods to Change GPS Location On Motorola Razr 40 Ultra | Dr.fone
- Author: Nova
- Created at : 2025-01-05 00:33:03
- Updated at : 2025-01-11 16:35:03
- Link: https://phone-solutions.techidaily.com/in-2024-methods-to-change-gps-location-on-motorola-razr-40-ultra-drfone-by-drfone-virtual-android/
- License: This work is licensed under CC BY-NC-SA 4.0.