
In 2024, Methods to Change GPS Location On Nokia C12 Plus | Dr.fone
Methods to Change GPS Location On Nokia C12 Plus

The Internet is a vast space and you have a plethora of content on different websites and platforms. You can call it a two-way - give and take relationship when it comes to the dynamics of data exchange between the world wide web and the users.
When you visit websites, they use cookies to track your activities. When you visit a restaurant, the phone detects and saves the GPS in the memory. You click a picture in the Maldives, your phone seeks out geographic points to prepare the right time and date stamps.
You need your GPS to download and use certain apps. Similarly, your GPS might be the reason you are unable to play some games or use some applications. Change GPS Location Nokia C12 Plus and this won’t be a problem for you.
But if you are wondering how can I change my location on my iPhone? These 5 methods will help you get fruitful results.
Part 1: Change GPS Location on Nokia C12 Plus using a Professional PC Program
The PC Programs are entirely Software based and do a tremendous job to spoof Nokia C12 Plus iOS 16 Location . You don’t have to buy any new equipment and you will be operating using your computer.
You can get this done within minutes if you have the right program with you. One of the best options in the market is Wondershare’s Dr.Fone. This is how you use Dr. Fone Virtual Location spoofer for GPS Spoofing iPhone.
Dr.Fone - Virtual Location
1-Click Location Changer for both iOS and Android
- Teleport from one location to another across the world from the comfort of your home.
- With just a few selections on your computer, you can make members of your circle believe you’re anywhere you want.
- Stimulate and imitate movement and set the speed and stops you take along the way.
- Compatible with both iOS and Android systems.
- Work with location-based apps, like Pokemon Go , Snapchat , Instagram , Facebook , etc.
3981454 people have downloaded it
Step 1: Go to the official website of Dr.Fone - Virtual Location (iOS) . This is easily available when you google it or you can also follow this link here. Then you can download the executive file, install and then launch the application. Once the home page opens, you will find several options - Opt for ‘Virtual Location’. It is usually at the bottom of the page.

Step 2: Now take your Nokia C12 Plus device and connect it to the computer that has Dr. Fone. Then click on ‘Get Started’.

Step 3: Now, the world map will display on the screen and you can clearly see the coordinates and directions as well. On the top right corner, the third icon is called the ‘Teleport Mode’. Click on that and enter the name of the place in the search box. You can even pinpoint it, if you are sure about the place.

Step 4: If you are completely sure that you got the address right, click on the ‘Move Here’ option. It moves your Pin from your present location to your new virtual location.

If you are looking for a way to change Nokia C12 Plus Location without Jailbreak, then this is one of the safest options for you. Also, you have other additional features like Phone Transfer, and Whatsapp Transfer along with Location spoofing. The application will never go to waste, won’t occupy much of your computer/PC/Laptop’s space and you can get the fake location iOS within minutes.
Part 2: Change GPS Location on Nokia C12 Plus using External Device
You can achieve the iOS Spoof Location using External devices as well. These devices do not cause any inconvenience to you. They are meant to be small, fit into the lightning port of your iPhone, and act as an external source that will spoof the Nokia C12 Plus location and the same will reflect in every app that uses or detects your iPhone’s geographic location.
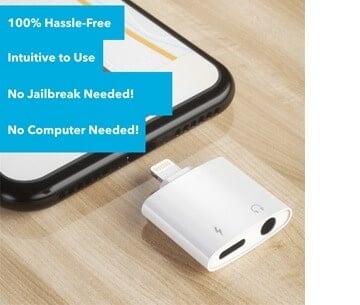
The best external device to change phone location Nokia C12 Plus is Double Location Dongle. This simple device can be utilized by following the steps below -
Step 1: The Double Location Dongle is a very small, white rectangle that connects to your iPhone’s port. But along with it, you also have to install the Companion app for location spoofing. Once you have both of them ready, connect the Nokia C12 Plus device to your iPhone.
Note: The Companion App is not available on the App store. You have to download it from Double Location’s official website.
Step 2: The next step is to open the Double Location iOS companion app and then settle on the Map Tab.
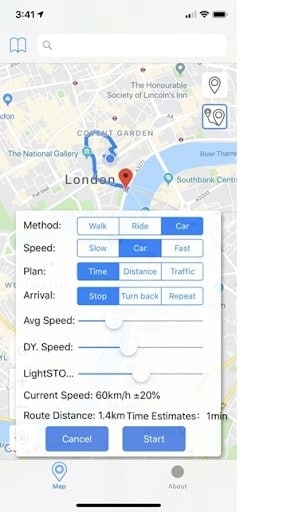
Step 3: Unlike what we had seen in the Dr. Fone step, we cannot enter the location into any search box. You should move the pin to the location that you want to virtually shift to. Double Location provides some very good options that will help you during gaming. You can change all the appropriate settings and proceed.
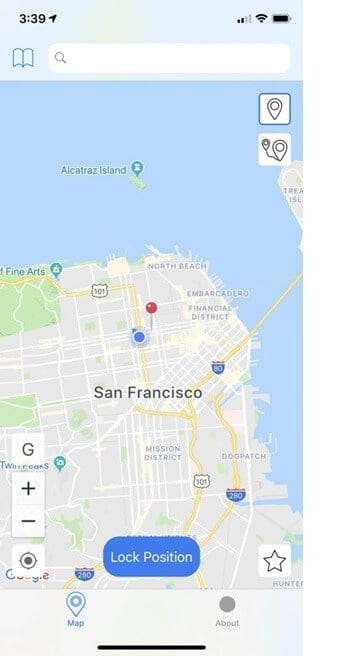
Step 4: On the bottom of the screen, Go for the lock position option. Once you do that, there will be a virtual shift in your geographic position and all your apps will register your new coordinates.
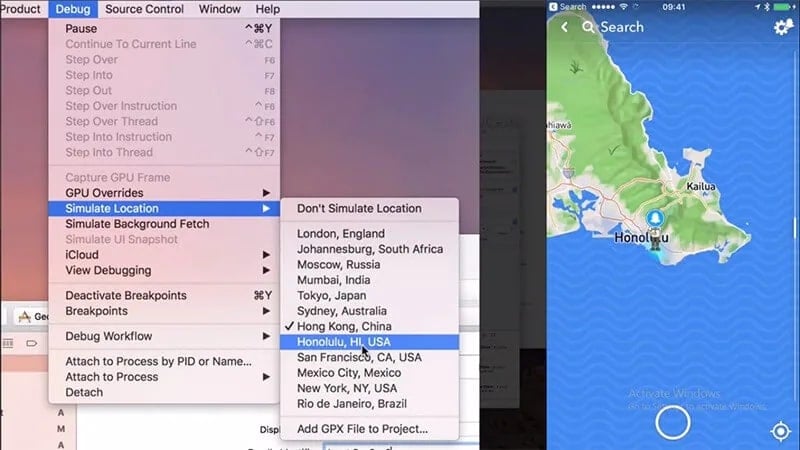
Part 3: Change GPS Location on Nokia C12 Plus using XCode
You can change the geolocation Nokia C12 Plus by using your coding expertise as well. That is why XCode exists. This Computer Program lets you change your Location in Nokia C12 Plus by giving some GIT Commands to the PC while your Nokia C12 Plus stays connected to it. By following these steps, you can understand how to do it. But if you’ve never had a liking for programming and coding languages, then you should probably skip this -
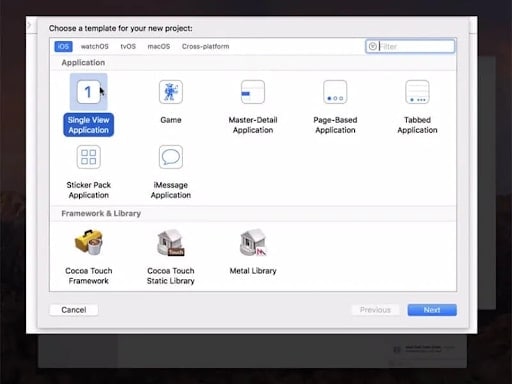
Step 1: Download and install XCode from the AppStore, directly to your Mac device. Launch the application.

Step 2: Once you see the XCode window open, Go for the ‘Single View Application’ to start a new Project and go on by clicking on ‘Next’. You can set up a name and details for this particular project.
Step 3: A screen display will appear asking you about your identity. This is where the minimal coding part starts. You need to enter some GIT Commands to continue with the project.
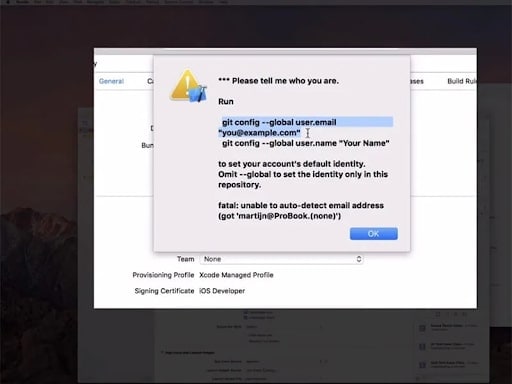
Step 4: Launch and run the terminal on your Mac device and enter these commands - git config –global user.email “[email protected]“ and git config –global user. name “your name”.You need to add your own details in the quoted space and continue to verify your identity.
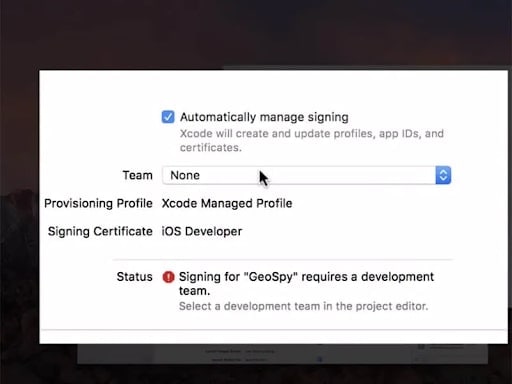
Step 5: Once you enter the commands, go to the next step and establish the Development Team. Then you can proceed to connect your Nokia C12 Plus device to your Mac device. Use the normal cable to do that.
Step 6: To allow the program to process the Symbol Files, you will have to choose the model of your device. Go to the ‘Build Device’ option and continue as per the prompts. However, make sure that you keep your Nokia C12 Plus unlocked for quick detection by the computer software.
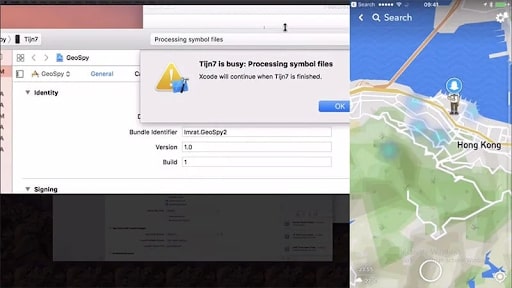
Step 7: Once that is done, you can come back to the actual location spoofing part. Go to the debug Menu > Simulation Location and specify the exact location that you want to virtually shift to. Once you are okay with it, the same will reflect on your Nokia C12 Plus as well.
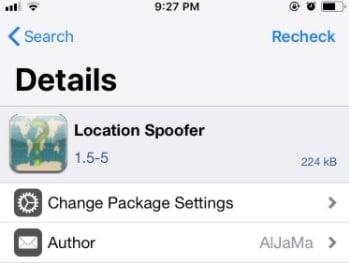
Part 4: Change GPS location on Nokia C12 Plus using Cydia Location Faker App
Cydia is also based on software applications and changes location in seconds, However, you need to note that you have to jailbreak your phone. If you don’t know how to do it or do not want to take the risk, Cydia’s LocationFaker app may not be the right fit for you. But if you are a jailbreak expert, this is a very comfortable GPS Changer for iPhone.
Step 1: Download the Cyndia LocationFaker app from the official website. LocationFaker8 is available for the iOS 8.0 model.
Step 2: After launching the app, enter the virtual location into the search box.
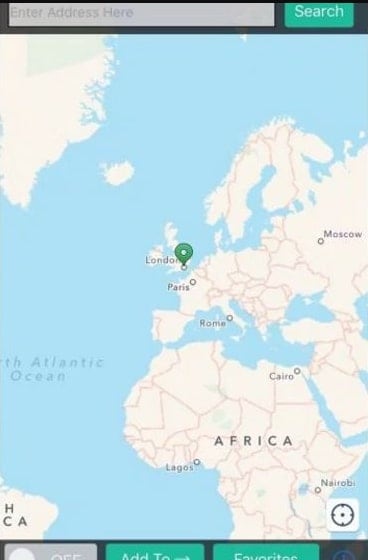
Step 3: If you are done with choosing the new location, shift the toggle from ‘OFF’ to ‘ON’ at the bottom of the page.
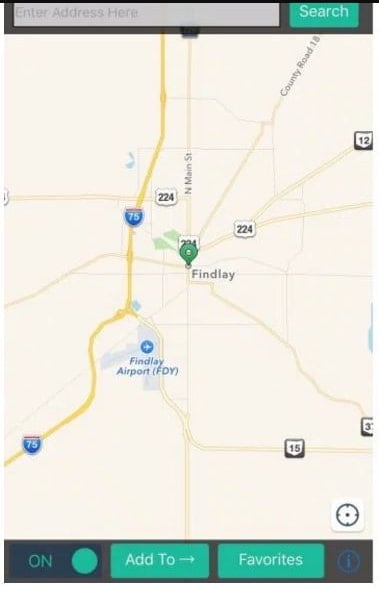
Step 4: Now we can decide which apps can access our new virtual location. At the bottom of the page, you will find an ‘i’ icon. Go click on it and choose the ‘White List’ option. This one will then take you to the app list and you can decide which of them will have access to the phone’s location.
Part 5: Change GPS Location on Nokia C12 Plus using Location Handle
Location Handle is another useful application that you can use to change your location by a few meters or simply go with an automated movement system that changes your location gradually as if you are moving from one place to another. This is how you use it -
Step 1: Download the Location Handle app from the website or App store
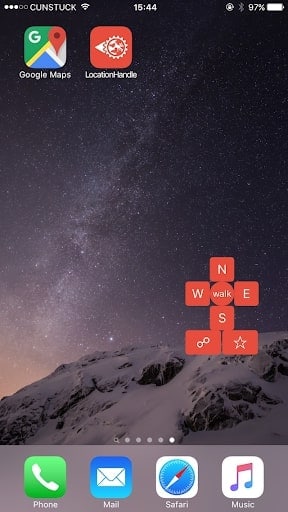
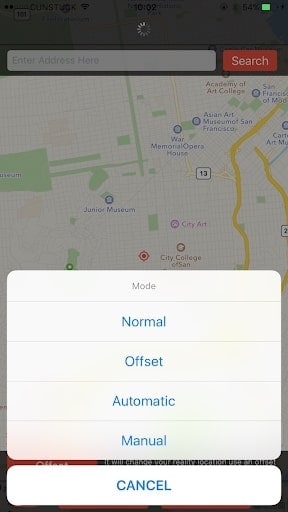
Step 2: There are four different types - Normal Mode - teleport to a new location; Offset Mode - Move a few feet away from the present location ; Automatic Mode - Slowly change your location from one point to another, as if walking ; Manual Mode - Change your location using a joystick.
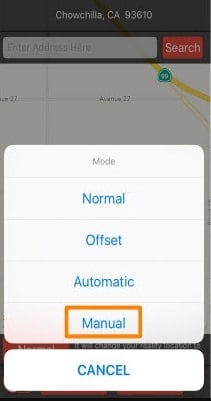
Step 3: Consider the Manual mode, because we want to change location to a far-off place and not necessarily for gaming.
Step 4: Once the Manual mode is activated, the map will be displayed and you can change the pin location. You can enter the location name in the search box.
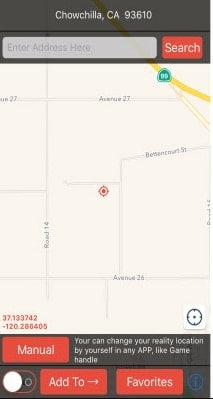
Step 5: The Joystick will appear on the page and you can use it to shift your location to wherever you want. Once you fix on the location, proceed and the new location will be updated.
Conclusion
We hope you are no longer wondering How to change Location services on Nokia C12 Plus. These 6 methods are very effective and you can always opt for the one that is most comfortable for you. If you want a hassle-free PC program, we have that narrowed down for you. If you are a coding enthusiast, then we’ve listed a method that best fits you. Whatever the reason, with an iOS Fake GPS, life becomes much easier and sometimes even safe on the internet. You can explore beyond the boundaries without moving from your couch!
Can Life360 Track You When Your Nokia C12 Plus is off?

Did you know that your Nokia C12 Plus tracks your location even when turned off? And if you’re a member of any social media network, it means you could be tracked. Do you like to have your privacy? Do you want to protect your kids from being tracked by strangers?
Of course Yes! Well, then you should know that Your Nokia C12 Plus can track your movements even when switched off. But is that true?
In the event that you switch off your Nokia C12 Plus, the GPS function will also be disabled. As a result, it will not be able to determine your position when your Nokia C12 Plus is turned off. However, Life360 will continue to provide the most recent location data that was uploaded to your account.
Should we trust Life360, the social media company that recently merged with Google, to protect our privacy? Let’s take a look at the facts.
- Part 1: What Is Life360 And How Does It Work?
- Part 2: Does life360 work if the phone is off?
- Part 3: 3 Ways to Stop Life360 from Tracking You


Part 1: What Is Life360 And How Does It Work?
The one app that kids hate and parents adore is called Life360. Life360 is monitoring software that can be downloaded into your Nokia C12 Plus and used by the individuals who are part of your Family Circle to monitor your location and the location of anybody else who is part of your Family Circle.
The app works by sending a request to your cellular carrier to get your location and then sending that information to the Life360 servers. In addition, life360 will store your location and send it to your social networks automatically.
Life360 is not required to track your location, but it is required to send your location to your social networks.
If you want to know more about Life360, check out our Life360 Review.
When it comes to privacy, many people are becoming more aware of how it is being violated. As a result, there’s no need to worry about whether or not the monitoring app in concern is as trustworthy as Life360.
Disconnecting from Life360 is as simple as turning off your Nokia C12 Plus and preventing the app from following and reporting your every step. Unfortunately, it also means that no one can see where they are about one another or how long it has been since they last updated their position.
If the necessity ever arose, such an undertaking may be useful for maintaining one’s privacy. However, customers have no idea that Life 360 may still be used to monitor them by other people.
Premium users will still have access to the last 30 days’ worth of location data, so the other person will be able to see where you were last seen.
Part 3: 3 Ways to Stop Life360 from Tracking You
1. Low Data Consumption
Disabling Life360’s Wi-Fi and Data may result in a warning to parents that their children are offline so that they can keep an eye on their kids. Does life 360 drain the battery? Low data mode is a better option for turning off life360 without alerting your parents. Go to the Settings and locate Life360; however, do not deactivate the exact location.

Alternatively, you should disable background app refresh, mobile network, physical activity, and WIFI to save battery life. An issue with your Internet connection will come up instead of location stopped in this situation. So don’t connect to any Wi-Fi at all.
2. Fake Locations
Using location spoofing applications on an Android smartphone, your kids can fool you into thinking they’re somewhere else. Dr.Fone - Virtual Location is a location spoofing application that will trick you into thinking that you are in a different location than you really are. The GPS position of the Nokia C12 Plus device will be updated to reflect the new place that you have chosen thanks to the software. It is worth noting that Dr. Fone - Virtual Location for iOS may also enable you to imitate GPS movement.
It has several other noticeable features that can help you in your daily life.
3. Setting Wi-Fi and Data Services to “Off.”
Another typical method kids use to prevent their parents from monitoring their position is to disable Life360’s Wi-Fi and Data. It works like this. If you don’t want applications updating in the background, enable power-saving mode.
Use a wired connection. Adolescents can turn off Wi-Fi and data when using the Life360 app on an iPhone. Go to Settings, look for Life360, and disable Cellular Data, Background Refresh, and Motion & Fitness. You’ll be able to keep track of where you are on Life360.
All these methods can be used to Stop Life360 from Tracking You. However, the best all-in-one solution is a third-party application called Dr.Fone. This Virtual Location Software helps you keep your tracking off, but you can also fake your location very easily in minutes.
Conclusion
Can you track a phone if the location is off? Life360 has become a standard feature of many smartphones. Parents often use it to monitor their children’s location. The fact that Life360 can be used to track users is quite disturbing. The good news is that there are ways to stop Life360 from tracking you. The best and all-in-one solution is a third-party application called Dr.Fone - Virtual Location .
Prank Your Friends! Easy Ways to Fake and Share Google Maps Location On Nokia C12 Plus
Google Maps is a virtual map for mobile and PC use. With it, you can check routes and street maps with unreal aerial imagery. However, sometimes you might want to fake Google Maps location. Google maps location. For example, you might want to tag your friends or followers with a new fake location. Or, you might want to prevent apps like Google Chrome from accessing your actual location. Whichever the case, this article teaches you how to fake GPS on Google maps without breaking a sweat. Let’s learn!
Part 1: How to Fake or Spoof Your Location in Google Maps?
You may think I should be turning off the location setting and wifi services to show fake locations on google maps. Well, I tried this, but it did not work, unfortunately. Google Maps can still track me. This is because Google Maps can use the signal strength of cell towers around me to guess my location, and believe me, this guess is usually very accurate. Also, the IP of the phone can be used. Here, we provide two effective methods for you to fake and change location in Google Maps at ease.
Method 1: Spoof location in Google Maps with a tool for both iOS and Android
If you want to fake Google maps location on iPhone, then you’ll have to put more effort than an Android device. Just installing an app might not work out to spoof Google Maps location on an iPhone. Nowadays, region-based games and apps are boring, and people need more options to explore. It is possible to share fake Google map locations by using different regions through a few clicks. Dr.Fone - Virtual Location has much more innovative ways to do that.
You need to download this app to use its incredible features. It’s a 1- click location-changing software that can outdo any other software in the market. This is the safest way to change Android and iPhone Locations without Jailbreak. Also, you get to enjoy other useful features of this software such as Phone Transfer, WhatsApp Transfer with the location changing.
Features:
- Allows users to simulate GPS movement along a route as they draw.
- One-click teleportation of GPS location to anywhere system available.
- There is a joystick available to spoof GPS movement comfortably.
- You can use this software with various location-based apps, like Pokemon Go, Snapchat, Instagram, etc.
- It’s compatible with both iOS and Android operating systems.
Here is a video tutorial for you to have a quick view on Google maps location changing.
 safe & secure
Step-by-step Guide to Fake Google Maps Location with Dr. Fone Virtual Location:
Step 1: First, you need to download, install and launch the Dr. Fone Virtual Location software on your computer. From the software’s home page, you need to select the “Virtual Location” option from a bunch of other options.
Step 2: Next, you need to connect your Nokia C12 Plus to the computer by using a cable.

Step 3: On the next window, you’ll find the world map on your screen, and the coordinates and directions are clear on the map. You need to click on the third icon called the “Teleport Mode” from the top right corner of your screen. Then type in the place’s name in the search box where you want to change your location. There is also a way to pinpoint the area if you know it properly.
Step 4: After becoming sure of your new location, click on the “Move Here” button to change your location from the real one to the virtual one you selected.

Method 2: Change location in Google Maps with a VPN
An array of VPN apps come with built-in location spoofing features on top of the usual IP address masking. For example,
1. Nord VPN
NordVPN includes additional features to stay ahead of Hulu’s VPN blocks. It has a Smart DNS tool, to unblock streaming apps on games consoles and Smart TVs, and a functional app for Amazon Fire TV, too, though, it isn’t quite as fast as ExpressVPN, but it’s more than fast enough for HD streaming.
Pros
- Affordable price tag
- Useful Smart DNS feature
- IP and DNS leak protection
Cons
- Speed Slower than ExpressVPN
- Only one Japan server location
- Unable to pay by PayPal
2. ExpressVPN
ExpressVPN can bypasses many streaming blocks, like Hulu’s, and it delivers a fast long-distance speeds connecting to America from overseas compared to other vpns. Also, it provides many Japanese server locations, including the main big cities in Japan, Tokyo and Osaka.
Pros
- Fast speed
- In-built DNS and IPv6 leak protection
- Smart DNS tool
- 14 US cities and 3 Janpanese location severs
Cons
- More expensive than other VPN providers
3. Surfshark
Surfshark is relatively new to the market and only emerged some time back in 2018. It’s available now at a great price compared to current top dogs in the market.
Pros
- Affordable price tag
- Safe & private connection
- Smooth user experience
Cons
- Weak social media connection
- New to industry, unstable for sometime
VPNs change your perceived location by swapping out your real IP address with that of the VPN server. IP addresses are unique sequences of numbers and decimals that identify every device on the internet. An IP address can be used to approximate a device’s location.
Step-by-step guide for faking location in Google Maps with a VPN
No matter what VPNs you are using, the steps are basically as same as the following:
- Open a VPN app on your phone.
- Choose a country IP address that you hope to change to.
- Switch the button to make a connection on VPN.
- Refresh or reopen your Google Map, and then input your desired location on its search section.
- It’s complished when the desired location is found.
Part 2: How to Share Your Location in Google Maps?
For iPhone users, you can share your Google map location through the following steps:
- Start Google Maps on your Nokia C12 Plus.

- Click on your profile avatar, and in the menu, click Location sharing. If you are already sharing your location, you will tap New share.
![]()
- Now select the contact you want to share your location with and also how long you will share.

- Click Share.
Or you can directly mark a location you wanna go to first, and tap the “Share” button, then choose the channels you want to share. You can share through WhatsApp, Telegram, Instagram, etc.

Also, follow the steps below if you are using an Android phone:
- On your Nokia C12 Plus or tablet, open the Google Maps app Google Maps.
- Search for a place. Or, find a place on the map, then touch and hold to drop a pin.
- At the bottom, tap the place’s name or address.
- Tap the Share icon. If you don’t see this icon, tap More and then Share.
- Choose the app where you want to share the link to the map.
Part 3: FAQ: All You Wanna Know about Location Changing on Your Nokia C12 Plus
1. How can I add my favorite route as favorite?
In the reallocation screen, you’ll be able to find the five-star icon on the proper sidebar and, therefore, the new window after you use the three provided modes. A simple click to feature the route to your favorites. After you boost features, it’ll show you “collection successfully,” and also the five stars icon will display a red icon, and you’ll also enter to test what percentage you have ever strengthened.
2. How to turn off your location on an iPhone device?
You can do that by changing the settings on your device. Settings >> privacy options>> location services, then turn the icon to the left, which will indicate that your location is off.
3. How to turn off your history on an iPhone device?
To turn off the History, stick to the same icon of settings, and from the system services, check your significant locations, and you can delete them as well.
4. How does one give someone your location from your Nokia C12 Plus?
Start with opening the “Find My” app on your Nokia C12 Plus and choose the “People” tab. Select share my location and enter the name or number of the person you wish to share your location with. In the end, tap send and share your site with someone you want to share.
Final Words
We’ve discussed the fake Google maps location through different methods in this detailed guide. Android and iOS users can use various apps to fake their location. For iOS users, Dr.Fone - Virtual Location is a perfect choice to spoof Google maps location without doing much work. Sharing fake locations in Google maps is a straightforward thing to do. Whether you want to use it to prank your friends, otherwise, you may have a more serious reason. By following the above steps outlined in this article, you will convince Google that you are anywhere within the world.
Also read:
- [New] 2024 Approved The Essential Guide to Intellectual Property Rights on YouTube
- [Updated] In 2024, Ignite Social Success Discover the 10 Most Powerful IGTV Video Ideas for Brands
- [Updated] In 2024, Why Are Recommended YouTube Movies Elusive on Facebook?
- [Updated] In 2024, Windows 11 Audio Recording Techniques
- [Updated] Melodious Memes Crafting Choreographed Reels with Sound
- 3 Best Tools to Hard Reset Tecno Camon 20 | Dr.fone
- 5 Ways to Restart Lava Blaze 2 5G Without Power Button | Dr.fone
- 最適なフリーソフトでMP4/SRTのマージ方法を学ぶ:オプショントップ6選び - MP4とSRT
- Best Android Data Recovery - Retrieve Lost Photos from ZTE .
- Can I recover my data if my iPhone 15 screen turns black? | Stellar
- Complete guide for recovering contacts files on Oppo K11 5G.
- How do i sign a .wpt file document electronically
- How do you play HEVC/H.265 files on Sony ?
- In 2024, Best Ways on How to Unlock/Bypass/Swipe/Remove ZTE Axon 40 Lite Fingerprint Lock
- In 2024, How to Watch Hulu Outside US On Samsung Galaxy A54 5G | Dr.fone
- In 2024, Official 4 Best Ways to Get Filmora Discount Codes
- Kauf-FAQs: Erkenntnisse Zum Kauf Von WinX DVD Video-Software
- Title: In 2024, Methods to Change GPS Location On Nokia C12 Plus | Dr.fone
- Author: Nova
- Created at : 2025-01-06 18:50:13
- Updated at : 2025-01-12 00:13:24
- Link: https://phone-solutions.techidaily.com/in-2024-methods-to-change-gps-location-on-nokia-c12-plus-drfone-by-drfone-virtual-android/
- License: This work is licensed under CC BY-NC-SA 4.0.